Middle Earth SBG – Ancient Ruins Painting Guide

This guide is ideally suited for painting the bases I showed you how to make in this tutorial.

I’ve used the same basing technique for both my Azog’s Legion and my White Council, but with a few subtle changes to the painting in order to give them a different character. I’ll be going through the stages for both in full but there are only a few differences between them, but you’ll notice from the picture they end up looking fairly different.

Eerie Ruins

What you will need:

  • Citadel Rhinox Hide
  • Citadel Eshin Grey
  • Citadel Dawnstone
  • Citadel Ionach Skin
  • Citadel Pallid Wych Flesh
  • Vallejo Chocolate Brown
  • Citadel Death World Forest
  • Citadel Karak Stone
  • Army Painter Steppe Grass
  • Army Painter Mountain Tufts
  • Dark Green Leaves

Begin by basecoating the base with Sotek Green, then apply a heavy drybrush of Eshin Grey

Apply a medium drybrush of Dawnstone

Apply a light drybrush of Ionach Skin

Apply an edge highlight to the tiles with Pallid Wych Flesh

Make a mix of 1 part Chocolate Brown and 5 parts water and apply over the sanded areas

Make a similar mix with Death World Forest and apply over select areas of the sand

Apply a light drybrush of Karak Stone I’ve the sand and edges of the cork

Apply a very light drybrush of Pallid Wych Flesh to the sand

Apply some of the mountain tufts to the base

Use PVA to apply the grass around the tufts and across the sandy areas

Finally use PVA glue to affix some leaves to the base. This can be a little fiddly so I would recommend some tweazers

Dark Ruins

What you will need:

  • Citadel Rhinox Hide
  • Citadel Eshin Grey
  • Citadel Dawnstone
  • Citadel Ionach Skin
  • Citadel Pallid Wych Flesh
  • Vallejo Chocolate Brown
  • Citadel Karak Stone
  • Army Painter Steppe Grass
  • Army Painter Mountain Tufts
  • Autumn Leaves
  • Alclad II ‘mud’ weathering pigment

Apply a basecoat of Rhinox Hide to the base and once dry apply a medium drybrush of Eshin Grey across the base

Apply a light drybrush of Dawnstone, focussing on the edges of the tiles

Apply a very light drybrush of Ionach Skin to the edges of the tiles

Apply an edge highlight of Pallid Wych Flesh to the tiles

Use the same Chocolate Brown mix found in the Eerie Ruins guide and apply to the sand areas and exposed cork

Apply a light drybrush of Karak Stone to the sand and exposed cork

Apply a very light Pallid Wych Flesh drybrush to the sand and exposed cork

Apply the mountain tufts to the base

Apply a light dusting of weathering powder to the top and edges

Use PVA to affix some autumn leaves to the base to finish


All of my guides and articles will continue to be free and open for use by anyone, but if you did find this guide helpful why not buy me a coffee?

SUPPORT ME!

Middle Earth SBG – Playing Azog’s Legion!

I’ve got my first 800pts finished and painted up and I’ve really been enjoying the games I’ve been having with them, especially the variety of units I can get on the table. I wanted to offer a look at what I’ve discovered about them.

Overall I’ve found the army very good but also fairly well balanced. So far nothing seems overcosted nor undercosted, although I know there is a debate about whether the ‘Master of Battle’ bonus should be on a 4+.

I also found that they never really felt outclassed, well except by Sauron, always able to meet challenges with at least one part of the force. This flexibility is what I love most about the force. Azog’s Legion is really a jack of all trades, but master of none.

Army 800pts.jpg

Gundabad Orcs

Gundabad Orc Warband

The Gundabad orcs offer a solid backbone to your army. An average statline but a good defence brings them in line with most other armies ‘better than usual’ troops.

They won’t wow you on the table top but they’ll certainly do their part.

Pros

  • Solid defence of 6 when equipped with shields. Great against elf bows and the like
  • Ancient Enemies: Rerolling 1s to wound against dwarves and elves is amazing
  • Cheap, reliable captains
  • Strength 4

Cons

  • Average fight value of 3
  • Only source of banners for the army
  • Low courage

Gundabad Beserkers

Beserkers Complete.jpg

Solid linebreakers, but I think they really excel at flanking and outmaneuvering. Some middling stats stop them from being outstanding but this is reflected well in their cost and rules.

Pros

  • 8″ move allows for flexibility and an increased threat range
  • Ancient Enemies
  • 6+ save against wounds
  • High courage

Cons

  • More reliable with support, which can lessen the movement advantages
  • Fairly average stats

Goblin Mercenaries

Goblins Complete.jpg

Offering a nice tactical choice with their ‘Mercenary Ambush’ special rule, which allows them to show up within a terrain peice from turn 2 onwards they do however feel a little expensive. The captain racks up at the same points as the Gundabad orcs equivalent meaning paying for the ability even if you don’t use it. Still a nice cheap addition to an army and you do get a lot of joy when they manage to kill things.

Pros

  • ‘Mercenary Ambush’ ability
  • Very cheap
  • ‘Chittering Horde’ allows them to support one another

Cons

  • ‘Mercenary Ambush’ comes at a cost
  • Mediocre stats, it is still a goblin after all

Troll Brute

Troll Brute Side 1.jpg

I love this guy. The brute causes a s10 hit on every model it touches during movement. If the model dies he can keep moving. And squashing. That is until he fails to wound and charges the survivor.

The first few games I failed miserably, forever rolling 1s and 2s and squishing nothing, but once he gets rolling he can make a mess of enemy lines. Just watch out for wizards. Compel and Command cast on him at the wrong time can have him walking over your own force!

Pros

  • Excellent squashing abilities
  • Terror and Fearless
  • Access to Brutal Power Attacks, especially Barge
  • 4 wounds

Cons

  • Relatively low defence
  • Susceptible to spellcasters
  • Low Fight

Gundabad Ogres

IMG_20181104_103712_203.jpg

The ogres are a weird addition to the force, offering a brutal but easily overwhelmed linebreaker. Much like the Beserkers they have an 8″ move, making them unusually speedy. The ‘Relentless Advance’ rule adds even more flexability. They can charge through thier own troops, orcs, goblins and warbats. Theres a good chance it will kill them, but getting the ogre into a key combat can be worth it.

Backed up by some solid stats and a relatively cheap cost I would highly recommend adding them into your force.

Pros

  • 8″ movement
  • Solid stat line. 3 wounds, 3 attacks, fight 5.
  • Brutal Power Attacks
  • ‘Relentless Advance’

Cons

  • Low defence
  • Easily swarmed

Azog the Despoiler

Azog Final Complete.jpg

Azog is a beast, an absolute beast! He has an outstanding stat line, alongside some brutal special rules meaning he is quite easily one of the best combat based characters in the game. On the White Warg he is a force to be reckoned with. Being able to share their store of Might, Will and Fate they have access to an impressive 6, 4 and 2. This combined with the army special rule, giving Azog ‘Master of Battle’, tools him up to deal with a good amount of the major threats coming your way.

Whilst he’s impressive wielded as a hammer, smashing aside rank and file, I reckon he should be your scalpel. Direct him towards any mid level character and he will end them in short order. Even some of the more prominent characters will fear Azog charging down on them if he has a good amount of Might left.

I should also point out I haven’t used the flail yet so haven’t factored that in.

Pros

  • Wounds heroes on a 3+
  • Might out the wazoo
  • Movement and charge bonus of the warg
  • 12″ Standfast that affects other orc heroes. With the right positioning you can cause a ripple through your force once broken that keeps everbody in the fight. Considering the low average courage across the army this is a huge boon.
  • Master of Battle. I can do what you can do better.

Cons

  • Aim for the warg
  • Susceptible to magic
  • Low Fate
  • Struggles against well armoured infantry

Bolg, War bats, Troll Catapults and Gundabad Trolls

The only ones that I haven’t played with as yet. The war bats and the catapult because there are no models yet and I’d rather wait for official ones. The trolls and Bolg because I haven’t picked them up…..yet.

And that’s my thoughts so far on Azog’s Legion, but I will be looking to get reinforcements as well as some allies in the very near future. More on that soon. In the meantime let me know what you think and if I missed anything.

All of my guides and articles will continue to be free and open for use by anyone, but if you did find this guide helpful please support me with a donation, so I can continue to make great tutorials like this one!

SUPPORT ME!

Middle Earth SBG – Ancient Ruins Basing Tutorial

20181108_141438.jpg

I absolutely love going to town on the basing of my miniatures. It’s just another excuse to add some character, variety and unification to your armies. It’s all about adding that story that really brings your miniatures to life.

The most recent basing I have been doing is for my Azog’s Legion force and today I’m going to show you what you need and how to go about making them.

I’ll be doing a series of tutorials on basing, both the modelling and the painting, so look out for future articles.

What you will need:

  • Cork Roll. I use a 2.5mm thickness, like this. This is readily available from most hobby stores, so if you do have a model train store nearby pop in and take a look. Just one of these rolls will easily last you the whole army.
  • Plasticard. I have so far been using a fairly thin, 1mm, variety. This does make it a bit easier to cut and model, but doesn’t look quite as good as a thocker variety.
  • Sand. I used Fine Sand from Basecrafts.
  • Mixed cork. Used for detailing. Can be found here, or like the cork roll can be found in hhobby stores.
  • PVA
  • Super Glue
  • Clippers
  • Modelling Knife

Building the Bases

20181108_130951

Begin by breaking the cork roll down into smaller, circular sections. I used the base as a template and broke the cork off around the edge. Always make more than required as these can be used for extra levels and details.

20181108_131031

Glue one of the circles to the top of the base with superglue.


20181108_131113

Once dry this will give you your first layer.

20181108_131155

Due to some of the drying times involved I’ll always build a few bases at a time, usually enough for a warband.


20181108_131228

Cut the plasticard down into small rectangular and square shapes. They don’t need to be uniform as the ruins are quite, well…ruined.

20181108_131304

Using super glue attach each segment at a time to build up the paving on top of the cork.


20181108_131344

Clip off the excess plasticard around the edge of the base. The aim is to keep to the circle but still retain an angular look.

20181108_131428

That’s the second layer done. Normally I would attach figures at this point. It can limit your ability to paint the base but does ensure the mini will be a good fit.


20181108_131507

Next up is weathering the plasticard. Using the modelling knife make scratches across the surface. The more you add the more beaten up the ruins will look.

20181108_131538

Also use the knife to shave down the edges and add some bigger cuts.


20181108_131634

Use super glue to add a few peices of the mixed cork across the bases.

20181108_132121

Use PVA to add some of the fine sand onto small areas of the bases. I focussed on any cork visible on the top, around the mixed corks and in the cracks.


20181108_132153

Once the pva was dry I added a layer to seal in the sand. This was acheived with a mix of 1 part PVA to 6 parts water. I add this to all my bases that include sand as it really secures everything and cuts down on wear and tear.


20181108_131706

The beauty of the cork is it’s quite an easy material to cut and craft into unique features.

20181108_131738

A simple slice like this and both parts can be used to make a staircase.


20181108_131842

Glued one on top of the other they add that extra dimension and retain the circle shape.

20181108_131919

You can utilise this to make some pretty funky and diverse ruins. Just remember to test fit your miniatures so you know they will fit and loook good.


20181108_132000

you will need to cut the plasticard to fit the middle step, but the bottom and top can overhang to be cut down.

20181108_132044

From there it’s just finishing them up just like the others by adding mixed cork, sand and a seal.


And there you have it. This is how I built and will continue to build all the bases for my Azog’s Legion force. I hope you all find it usual and I would love to see some of the bases you make using it, pop me an email at deathwatchstudios@gmail.com, find me on Facebook or Instagram.

Join me soon to find out just how I painted them as well.

All of my guides will continue to be free and open for use by anyone, but if you did find this guide helpful please support me with a donation, so I can continue to make great tutorials like this one!

SUPPORT ME!

Middle Earth SBG – Choosing My Army!

Jumping back into Lord of the Rings meant once again picking an army to collect. I should point out before I continue that evil is my bag. It didnt even cross my mind that my main force would be a good one. I like my monsters and gribblies too much.

Back in the day I had a fairly sizable Dol Guldur army with a Necromancer led contingent and a Spider Queen force and before that a large Mordor force. I wasn’t looking to revisit any of these and wanted to try something new. I painted a lot for those armies and wanted to get a completely fresh start, although I may revisit these forces in a few months.

All this meant looking away from the Lord of the Rings forces and adventuring into the fairly unfamiliar territory of The Hobbit. I had not kept up with model or rules releases for this, so really had no idea what was out there for it. I had seen the films when they were released, but needed a refresher alongside a read of the Hobbit armies PDF. So got the extended editions out and got my geek on.

Following this epic viewing (I really enjoyed the trilogy. Flawed films but still an awesome adventure)and reading session, I knew exactly what I wanted to collect, both good and evil forces.

99jSZEw.jpg

Gundabad.jpg

I knew I wanted a hoard of orcs, gribblies and massive trolls, led by the big bad himself, Azog. Even though he doesn’t really stick to the Tolkein lore I loved this character. Just a good and proper villain. It really helped that he also came with a great selection of gribblies of all shapes and sizes. As I said earlier this is is right up my street.

Galadrielguldur.jpg

I also loved the Dol Guldur fight between the White Council and the Necromancer and fell in love with the White Council. I love this whole story line and the characters involved. It also meant a small collection of key characters, so not much to collect and a great opportunity to really give them some painting love.

whiteCouncil3.png

Not to mention a mate has a 1000pt army consisting of the Necromancer, the Nine and the Dungeon Master. It’s going to be an epic and beautifully themed game when we get a chance to play it.

I did expect it to take longer for me to get stuck into both forces, but I’ve already painted 800pts of Azog’s Legion alongside 2 members of the White Council. Check them out below…

A Month in Pictures – October

This month saw a huge boost to my numbers, mainly because I got stuck into my own Middle Earth SBG force, Azog’s Legion. It’s been a while since I’ve had that level of enthusiasm for a project of my own and it’s a joy to have it back. So much so that I have managed to paint up a full 800pt force! Just a unit of Gundabad Orcs and I’ll have 1000pts. Next up will be some allies and the start of my good force.

I also painted up a few of the Nighthaunt models from Soul Wars for a guide in this months issue of Tabletop Gaming magazine. This gave me the oppertunity to try a few different schemes. Of all of them the monochrome was definately my favourite.

Models Painted: 46

Total painted in 2018: 151


A Month in Pictures – September

September had a couple of milestones to celebrate. The first of which is over 100 miniatures painted in 2018! If I’m honest I was hoping this would have been acheived a lot earlier in the year but my focus has been on other, more important, things. I’m still very happy with it and I know if my recent painting spurt is anything to go by,  that total will be shooting up! The second milestone is not really painting related, but it see’s my return to playing Middle Earth Strategy Battle game from Games Workshop. Me and Lord of the Rings have a history in the hobby, which I’ll be writing about soon. Anyway onto the models from this month…

Models Painted: 12

Total painted in 2018: 105

A Month in Pictures – February 2018

The second month roles by and it seems to be the month of franchises, with Star Wars, Dr. Who and Batman all being represented.

I’m happy with the progress I made this month. Nothing to really challenge myself, or an attempt at a new technique though, so I need to ensure I pursue this in March.

Let’s take a look at all of the models I painted this month…

Painted in February: 22

Total painted in 2018: 39


A Month in Pictures – January 2018

So the new year has arrived and I wanted to add a wee progress marker to the blog each month, so I can take stock of how much mini’s I actually get through in a year. It’s also so I can track my progress, particularly in regards to the hobby goals I’m giving myself(more on that another time), and see how far I can push myself.

Let’s take a look at all of the models I painted this month…

Painted Model Count: 17

Total to Date: 17

Imperial Assault – Scum Reinforcements!

ig-88

I’ve been painting up even more Imperial Assault miniature’s in an attempt to let my players have at least one mission in our next session were everything we use is fully painted. This time I’ve been focussing on getting some mercenaries ready in the form of infamous bounty hunter IG-88 and a couple of Trandoshan hunters…

trandoshans

Whilst not much work was required on IG, I am really pleased how he turned out, especially since I didn’t want him to just be base metal. I wanted him to be a bit more dirtied up and well worn looking. I’m very pleased with how the Trandoshans turned out, particularly the flesh. I knew straight off the bat I wanted the flesh to be different colours and the pairing to be unified by the colour of the overalls. The only thing I’m not sure I like is the fact that when looking at the overalls combined with the white collar, all I can think of is this…

rbptn001lg

Maybe the Zorn have joined Star Fleet?

Knight Models – Suicide Squad Game Unboxing!

suicide-squad-box-game-title

Boom! Just like that I’m pulled back into Gotham and the world of the Batman. It’s been over a year since I’ve touched any Batman related models, mostly down to not enough opponents in the area, but I’ve been keeping up with the releases and keeping an eye on what Knight Models are up to with the property. I was pleasantly surprised when they announced a two player starter box, based off of the Suicide Squad movie, but knew I needed to get ahold of one and see if I thought it was any good.

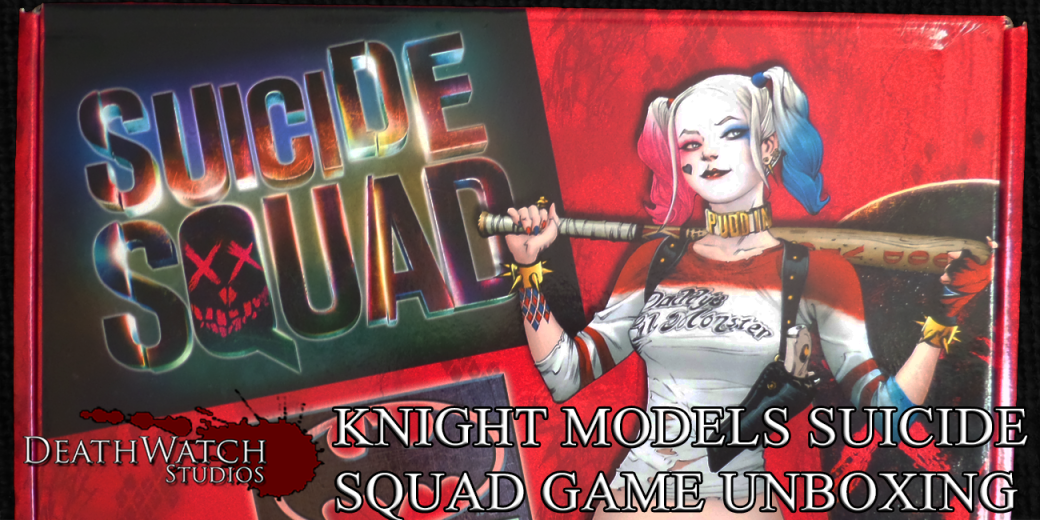
I’ve been keeping up with Knight Models since fairly early days. The days when all they had available for learning the rules was a badly translated PDF rulebook and the one main thing you notice with a product like the Suicide Squad Box Game is how far they have come in such a short amount of time. The shiny, sumptuous box this game comes wrapped up in is a beauty. Never before have I been this impressed by the box of a game. The artwork is on point perfectly blending the movie characters into a comic book variation of themselves and the logos and text are all presented in that slightly cooky Suicide Squad way. Everything is bright and bold, but more importantly strong. This box is a solid beast. Take a look for yourself…

Even the interior carries this asthetic making for an awesome whole. Inside is all the gibbons needed to play. The poppet card buildings, tokens, rulebook and character cards are all stored above a strip of foam and a pink plastic tray for all the miniatures…

This box looks amazing and you can really see it standing out on your games shops shelves.

So let’s take a look at some of the exciting things that come in the box. The first of those that I couldn’t wait to get stuck into was the buildings. Printed onto nice thick card these come in their frames alongside the tokens…

I eagerly popped out the buildings and after a relatively stress free 15-20 mins I had some wonderful buildings ready to go…

Honestly I like some MDF, more realistic looking, buildings myself but these are a stellar addition to the game for an easy to build and cheap way of gaining a great looking table. They are absolutely chock full of Batman character. Little details like riddle markers, Harvey Dents campaign office and Batman and Wonder Woman posters to name a few, litter the buildings. Each section is double sided meaning you create a completely different building just by swapping them, but in another stroke of genius, you can also stack them to create larger buildings. Once built they were also surprisingly strong. These will definitely hold your model or a whole gang with no issues.

Overall I’m really impressed with these buildings and am hopeful that Knight Models will embrace them and hopefully release bigger and bette variations.suicide-squad-rulebook

The next item on the list is probably the most vital for beginners, the rulebook. This is a soft back version that is slightly smaller than it’s hardback counterpart. Like the rest of the set it’s heavily Suicide Squad themed, although the cover is the only part that is lifted directly from he movie the rest is the same comic art style as the cover of the box.

It contains an overview of the rules needed to play the game, but does not go quite as in depth as the main rulebook nor does it include any of the information included in the Flash and Arrow book other than how to build a Suicide Squad team. This is not a bad thing and fairly par for the course when it comes to a starter box. This will keep you going for a fair wee while but once you start getting into other gangs or characters you will need to pick up the full rulebook.

One of the things it does contain that the main rulebook does not is a themed mini campaign to play with the included miniatures. It’s nice to see new scenarios to play the game being featured in all the books coming out.

Finally let’s take a look at the other gubbons and tokens that are included in the box.

The box game give’s you a set of take the lead counters for each faction, objective counters for each player, 4 dice, a set of 4 sewers and 4 lampposts and a mysterious reputation points chit. All of these are made from the same card as the buildings so are the same great quality and definitely a fantastic starting point for the plethora of tokens you need for the game. The lamppost markers are a bit of a nuisance. They won’t stand if just stuck into the card base that comes with them, but will stand when you add a 30mm base underneath them, but if this was the intention it would have been good to include enough bases in the box. Still better to have them than not though.

The dice are very nice, but when you’re playing can take a wee while to get used to and decipher. It’s amazing how used you are to seeing the dots presented in a specific way and how easily a little difference can throw you off.

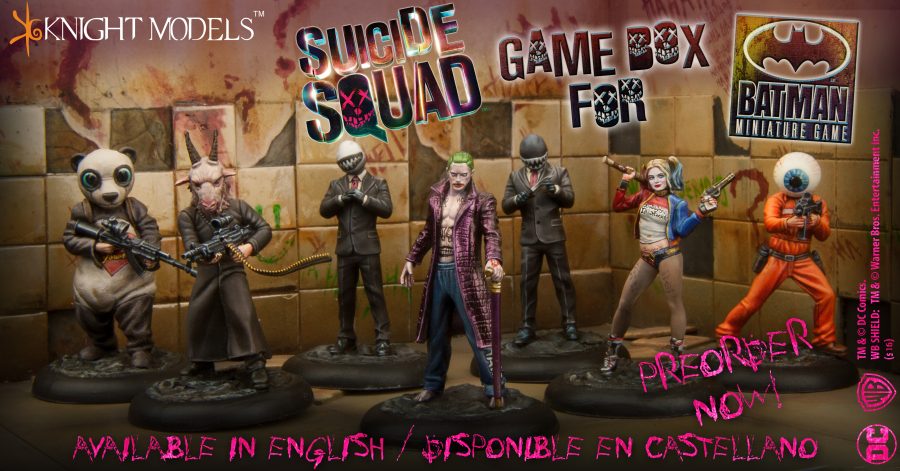
Last bu not least is the miniatures and their character cards…

As you can see the back of the cards omit the usual image of the model and have instead gone for something a bit different. Each of the Suicide Squad members has symbol based on the look of that character and the Joker gang just has the same symbols the Joker himself. Harley has her own symbol and since she can be in both gangs her colour is a mix. The stats side of the card is the same as any other BMG character card, filled with the same artwork and awesome rules.

facebook-publicidad0_01-e1474607044814

The miniatures themselves are nice but I will start off by saying I’ve never been a fan of the movie models in the range anyway. Each one does a fantastic job of capturing the essence of the movie character and they really do look like them, especially the Joker. There is the usual light amount of flash and the biggest problem that I’ve had with Knight models mini’s, really small joins. I really don’t like the insanely thin join point on the miniatures that is impossible to pin, but it is something I’ve come to expect. I’ll have a bit more of an in depth look at the miniatures once I have a go at building and painting them, hence just the Knight Models pictures for now.

facebook-publicidad0_02-e1474606795757

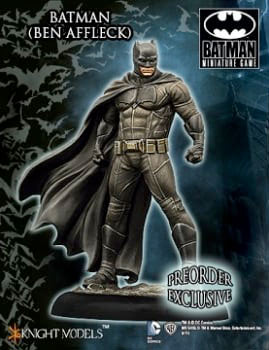
I also managed to get one of the pre-order Batfleck miniatures, yay! This is one of the movie miniatures I can get behind as I really like what they’ve done with Batman in the DC movie universe and this miniature perfectly embodies that version of the character.

batman-miniature-game-suicide-squad-game-box-includes-free-batman-ben-affleck-miniature-pre-order-late-october-p5520-9404_medium

Overall I’m really impressed with this box. The production values are at the top end of the scale across the board meaning you get exactly what you pay for if not more. I hope it sells well considering that the movie it ties into didn’t do very well for itself (I loved it), and draws in a whole new bunch of people into this fantastic game!