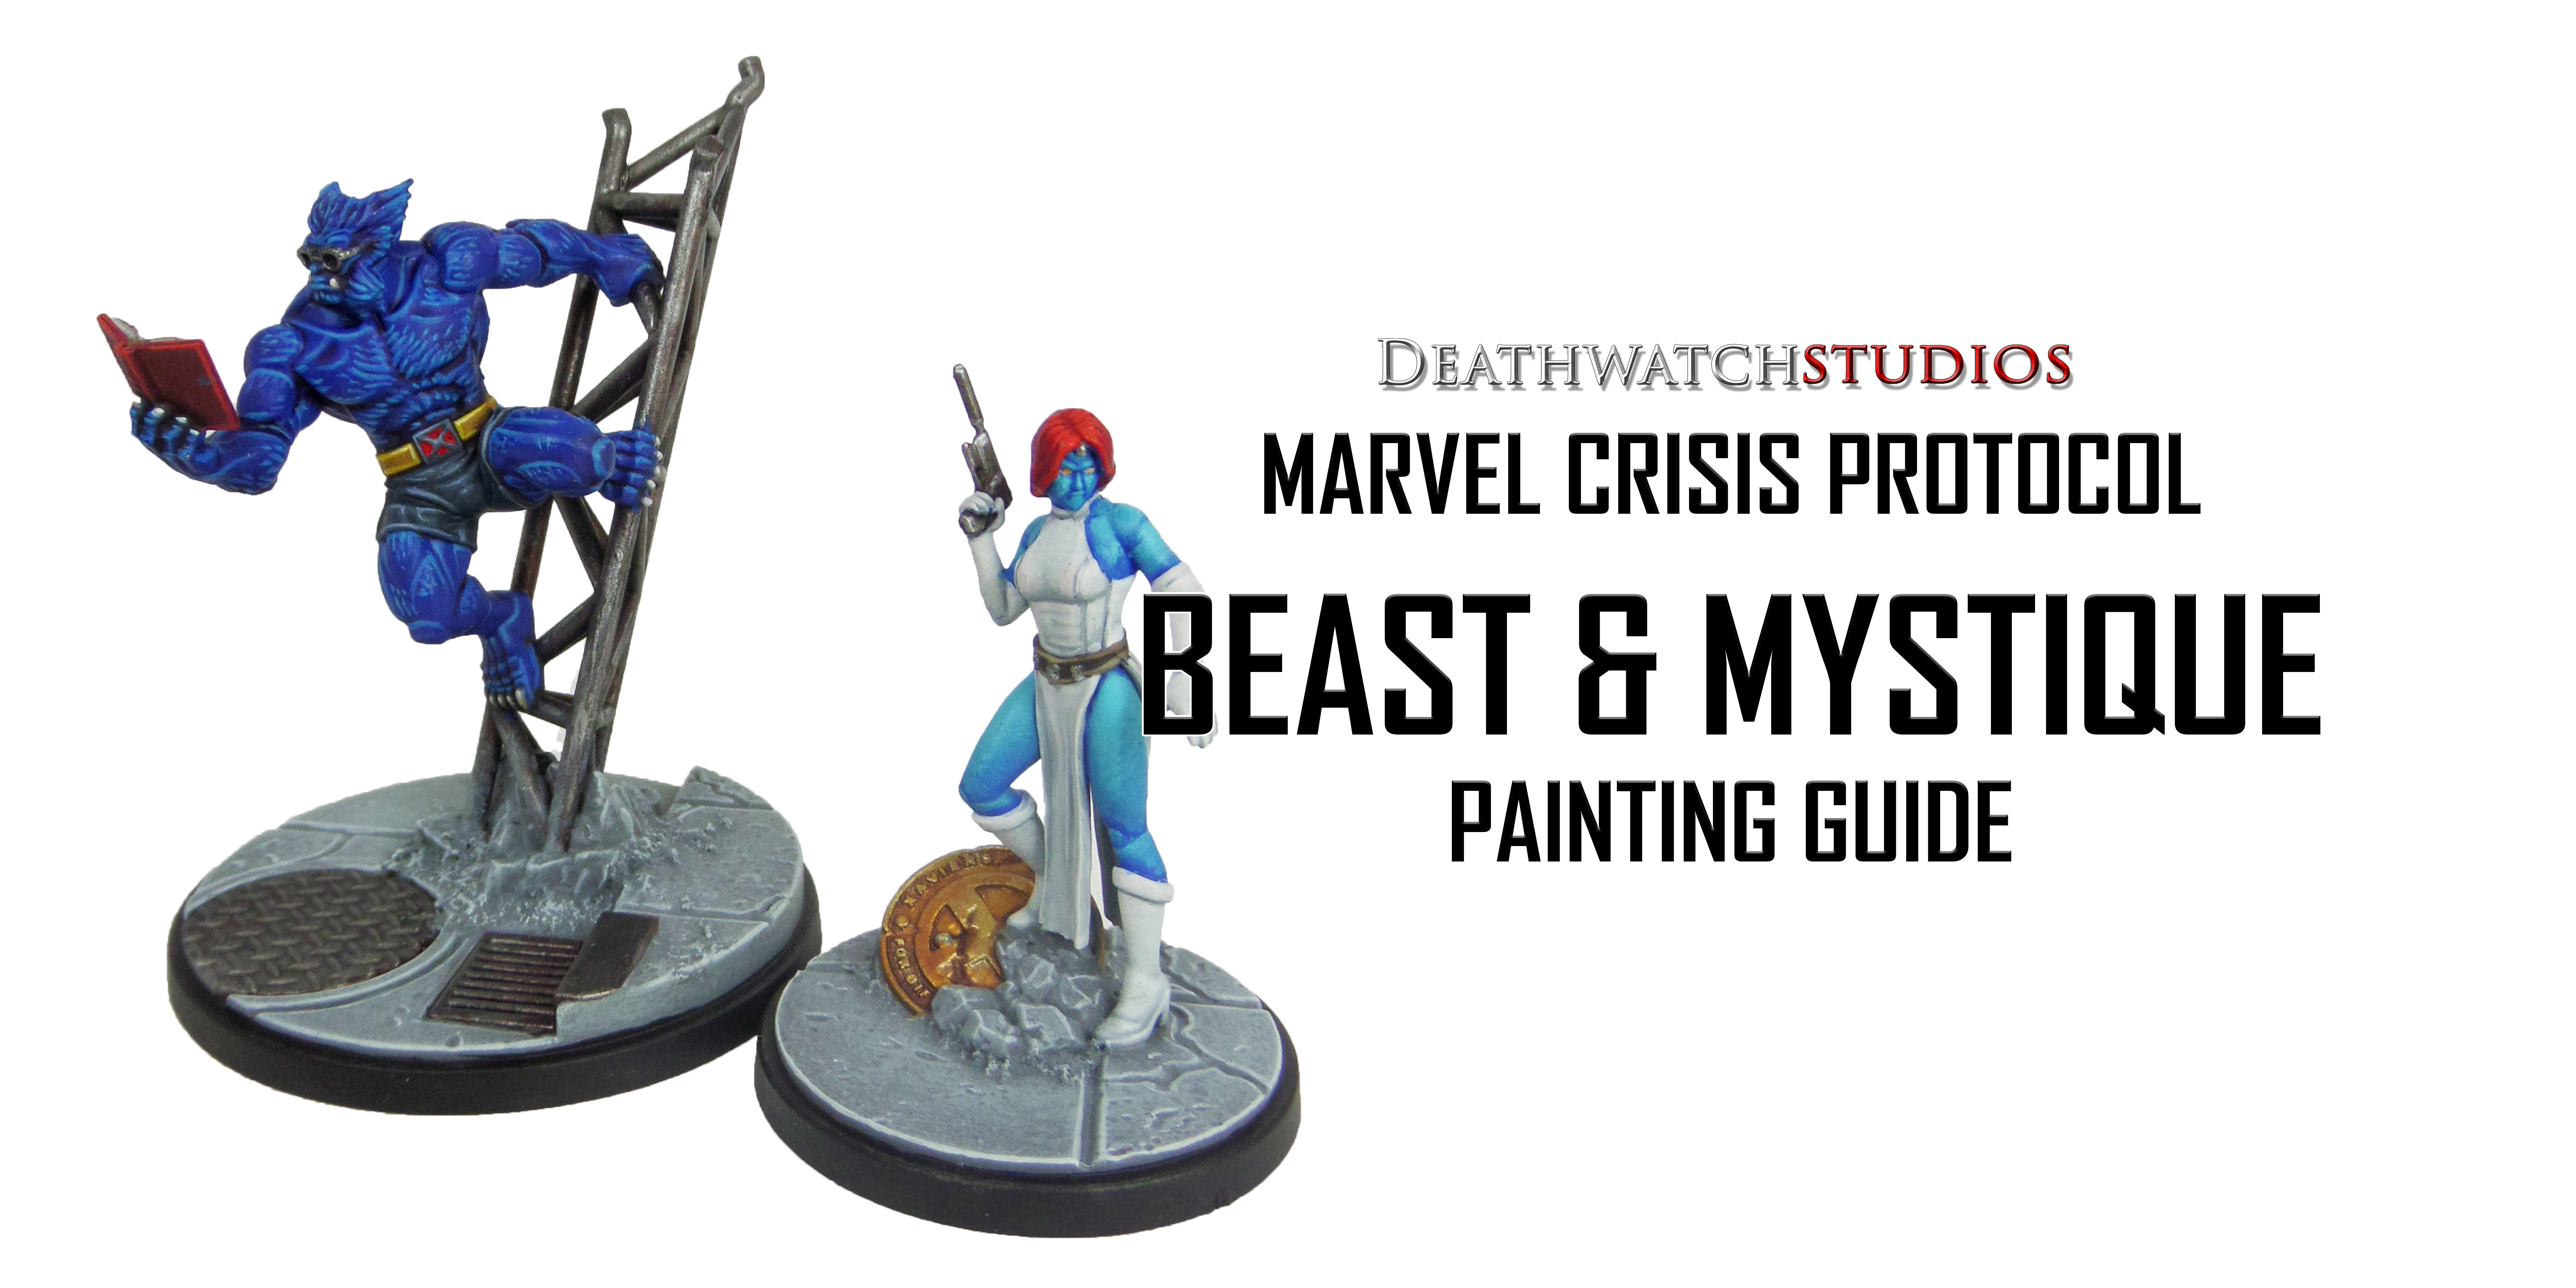
Welcome to my latest painting guide!
I need your support. Because my guides takes time and supplies to do, any support you can offer would mean the world to me. A supportive message in the comments is enough, but if you have the means why not send me a gift on Ko-Fi or PayPal. Thank you!
Prep: Fully build both models and undercoat black.
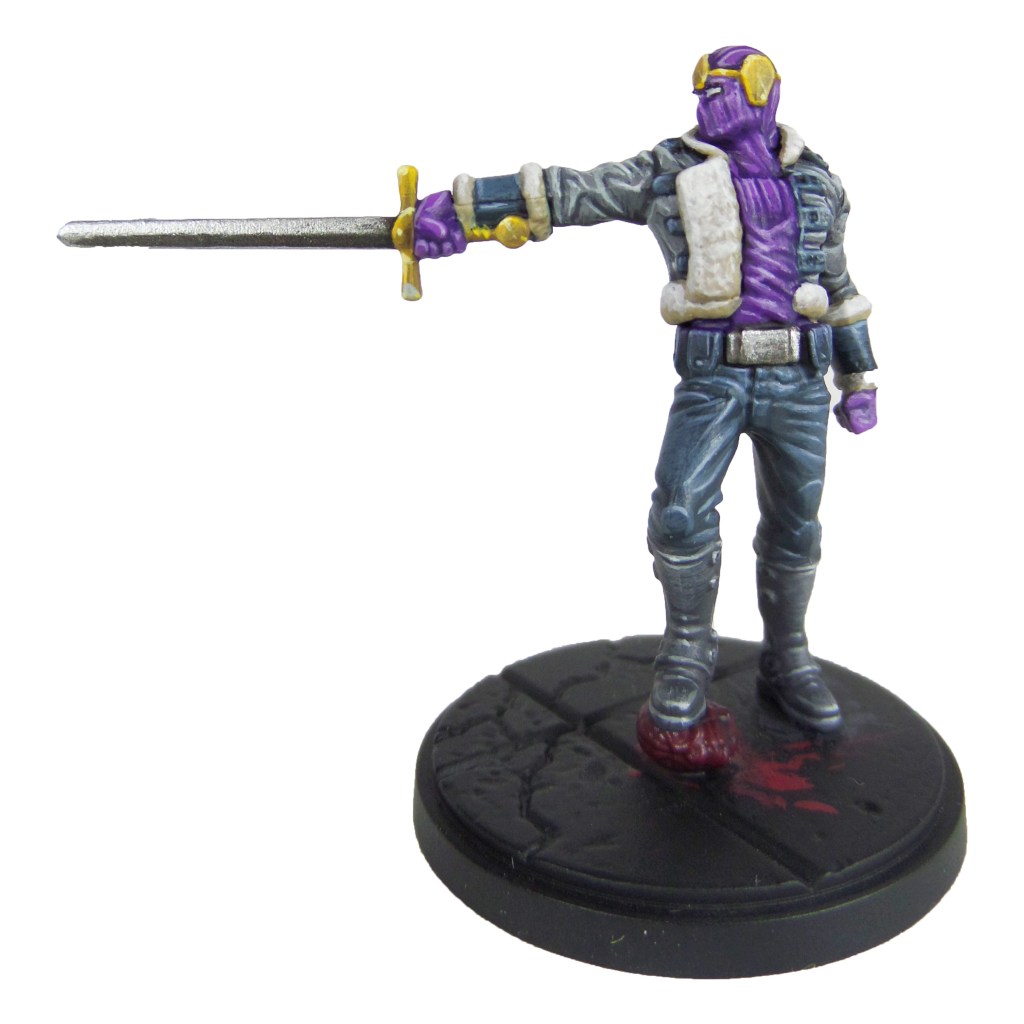
Baron Zemo

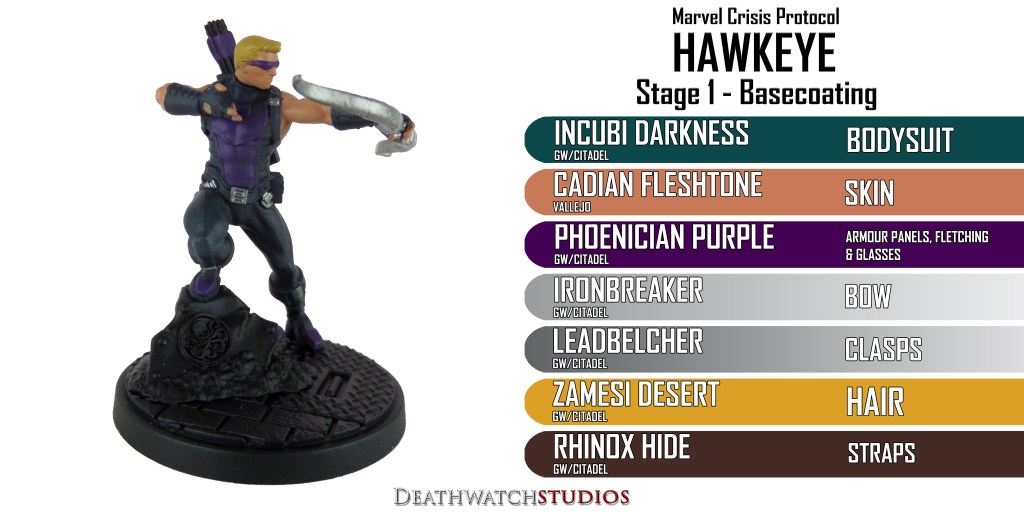
Stage 1
Phoenician Purple: Apply a basecoat to the bodysuit.
Incubi Darkness: Apply a basecoat to the trousers, cuffs and jacket straps.
XV-88: Apply a basecoat to the hilt and crown.
Leadbelcher: Apply a basecoat to the sword and buckle.
Karak Stone: Apply a basecoat to the fur trim.
Eshin Grey: Apply a basecoat to the jacket and boots.

Stage 2
Xereus Purple: Apply a layer to the bodysuit.
Thunderhawk Blue: Apply a layer to the trousers, cuffs and jacket straps.
Averland Sunset: Apply a layer to the hilt and crown.
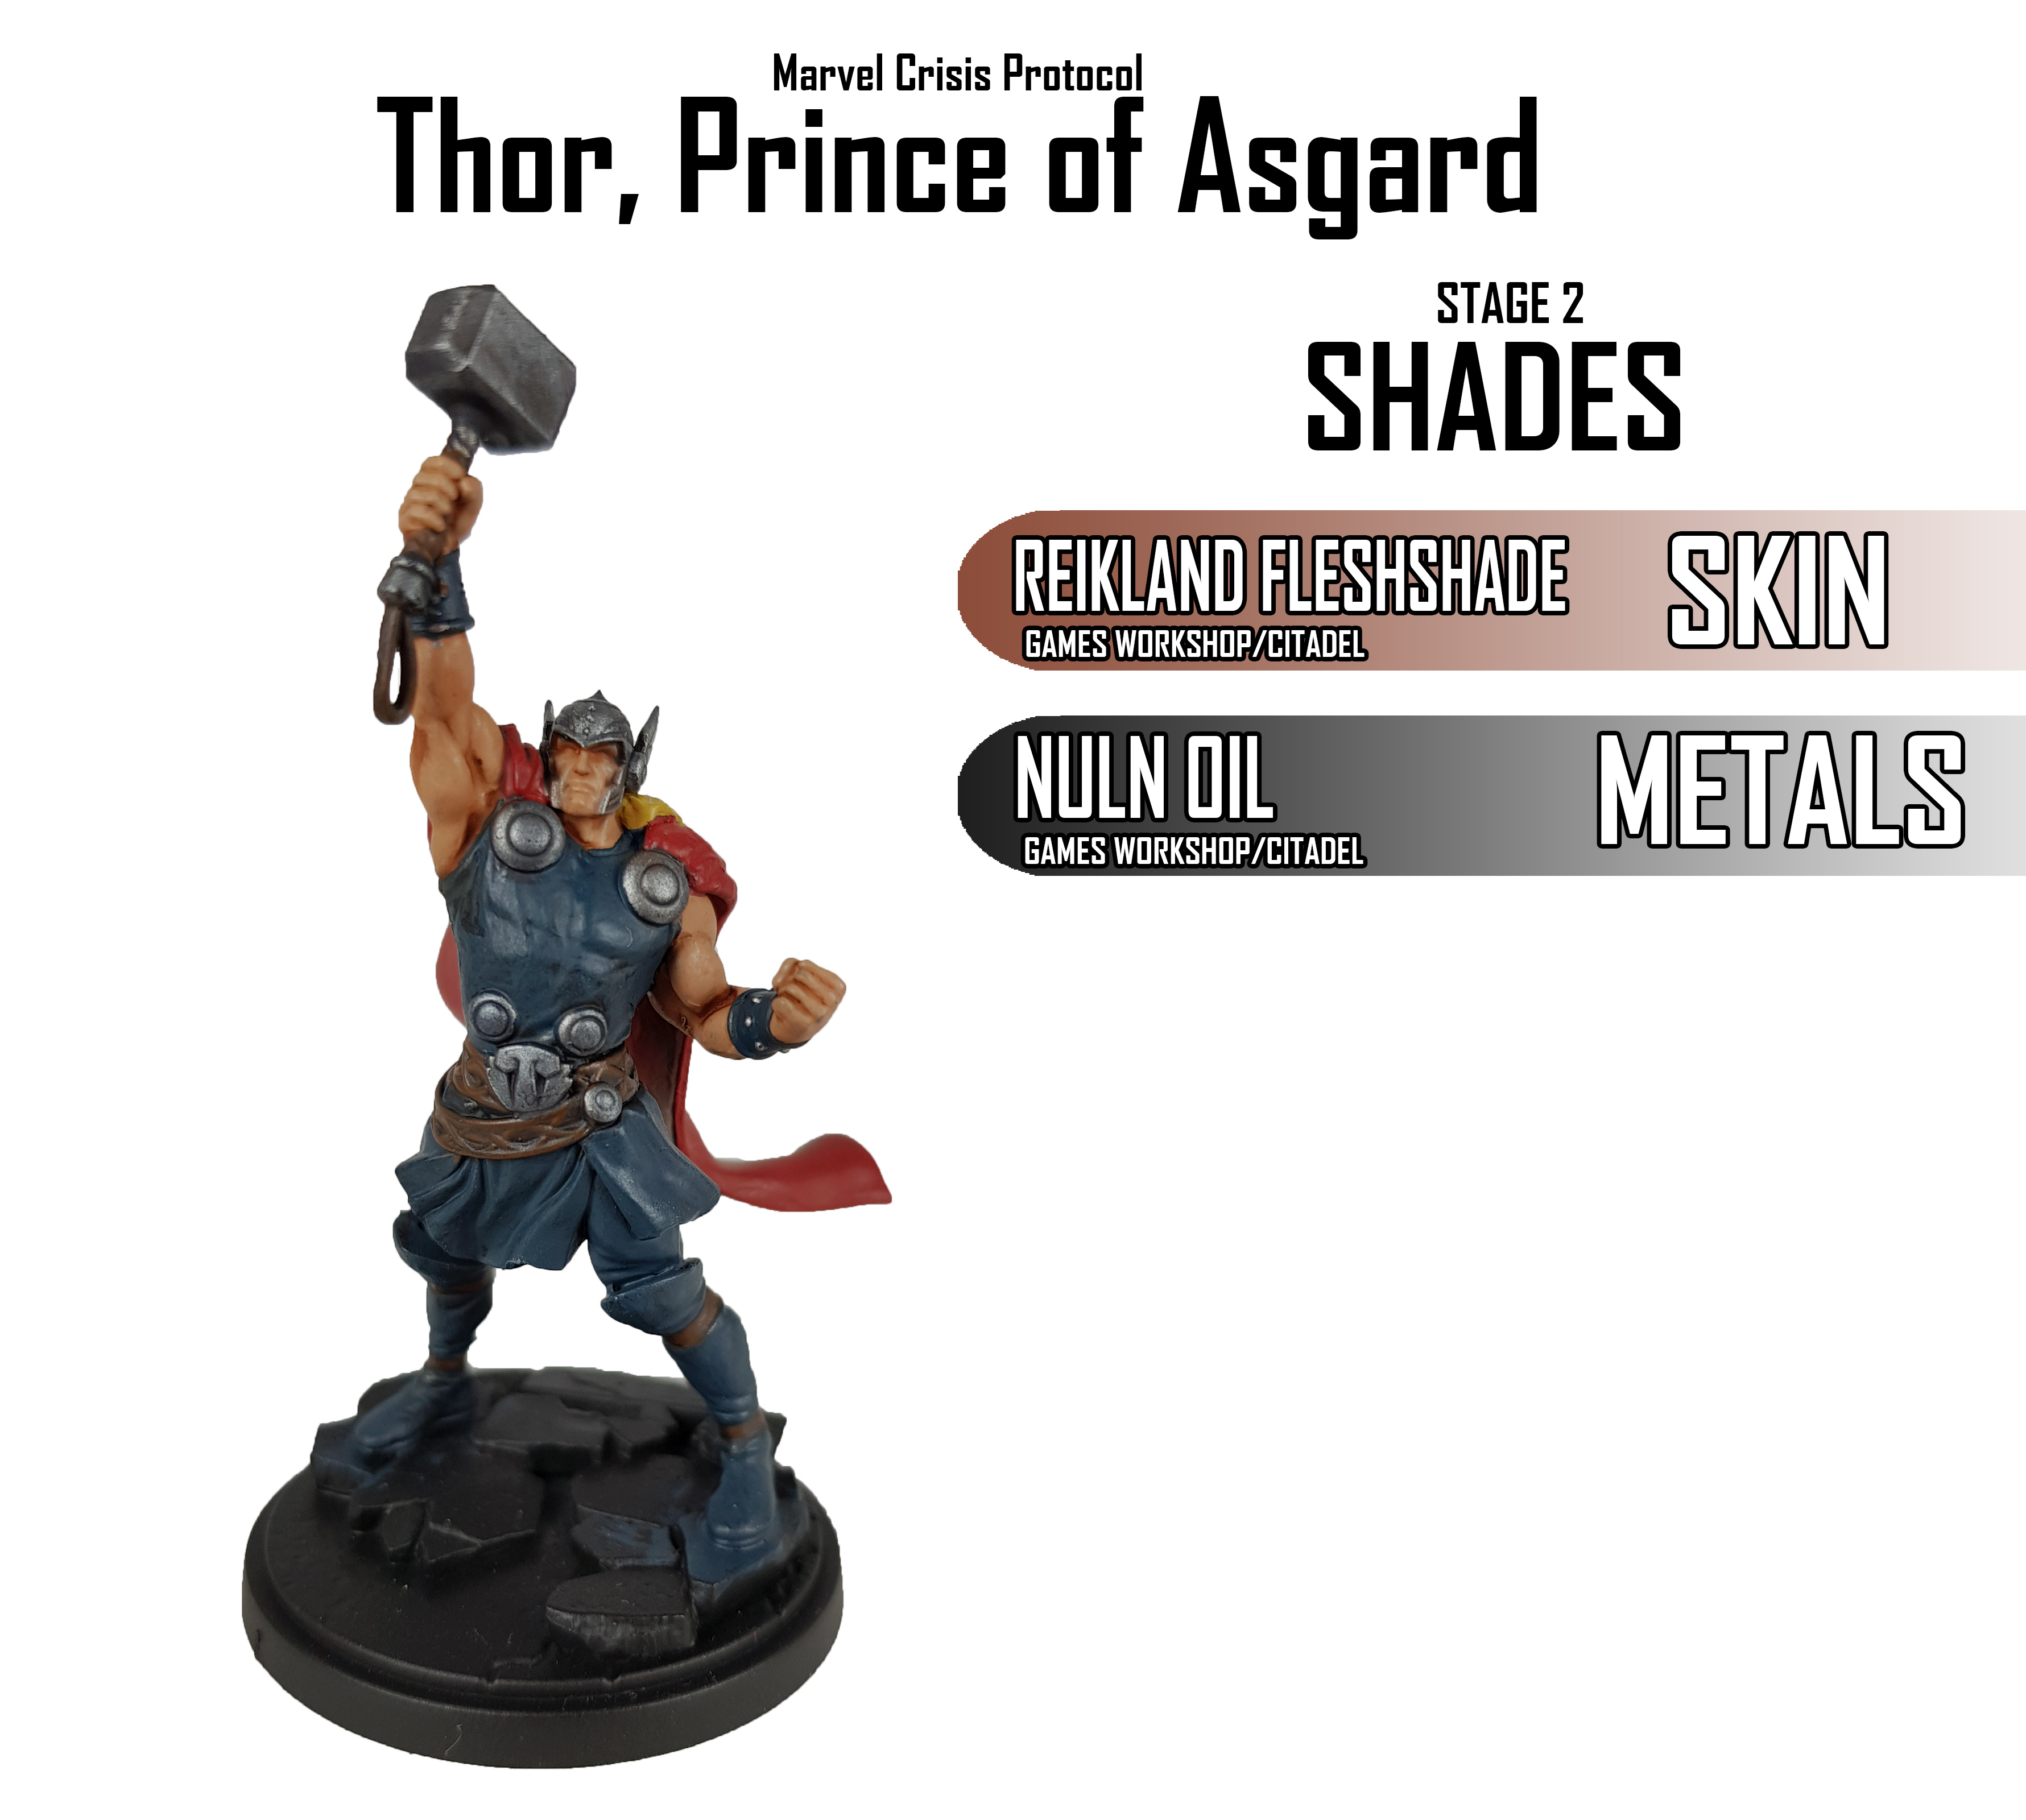
Nuln Oil: Apply a shade to the blade and buckle.
Rakarth Flesh: Apply a layer to the fur trim.
Dawnstone: Apply a layer to the jacket and boots.

Stage 3
Genestealer Purple: Apply a line highlight to the bodysuit.
Russ Grey: Apply a line highlight to the trousers, cuffs and jacket straps.
Yriel Yellow: Apply an edge highlight to the hilt and crown.
Ironbreaker: Apply a layer to the blade and buckle.
Pallid Wych Flesh: Apply a layer to the fur trim.
Celestra Grey: Apply a line highlight to the jacket and boots.
Stage 4
Dechala Lilac: Apply a spot highlight to the bodysuit.
Fenrisian Grey: Apply a spot highlight to the trousers, cuffs and jacket straps.
Dorn Yellow: Apply a spot highlight to the hilt and crown.
Stormhost Silver: Apply a spot highlight to the sword and buckle.
White Scar: Apply a layer to the eyes and a spot highlight to the fur trim.
Krieg Khaki: Apply a spot highlight to the jacket and boots.
Finish by painting the base with the Base Painting guide.
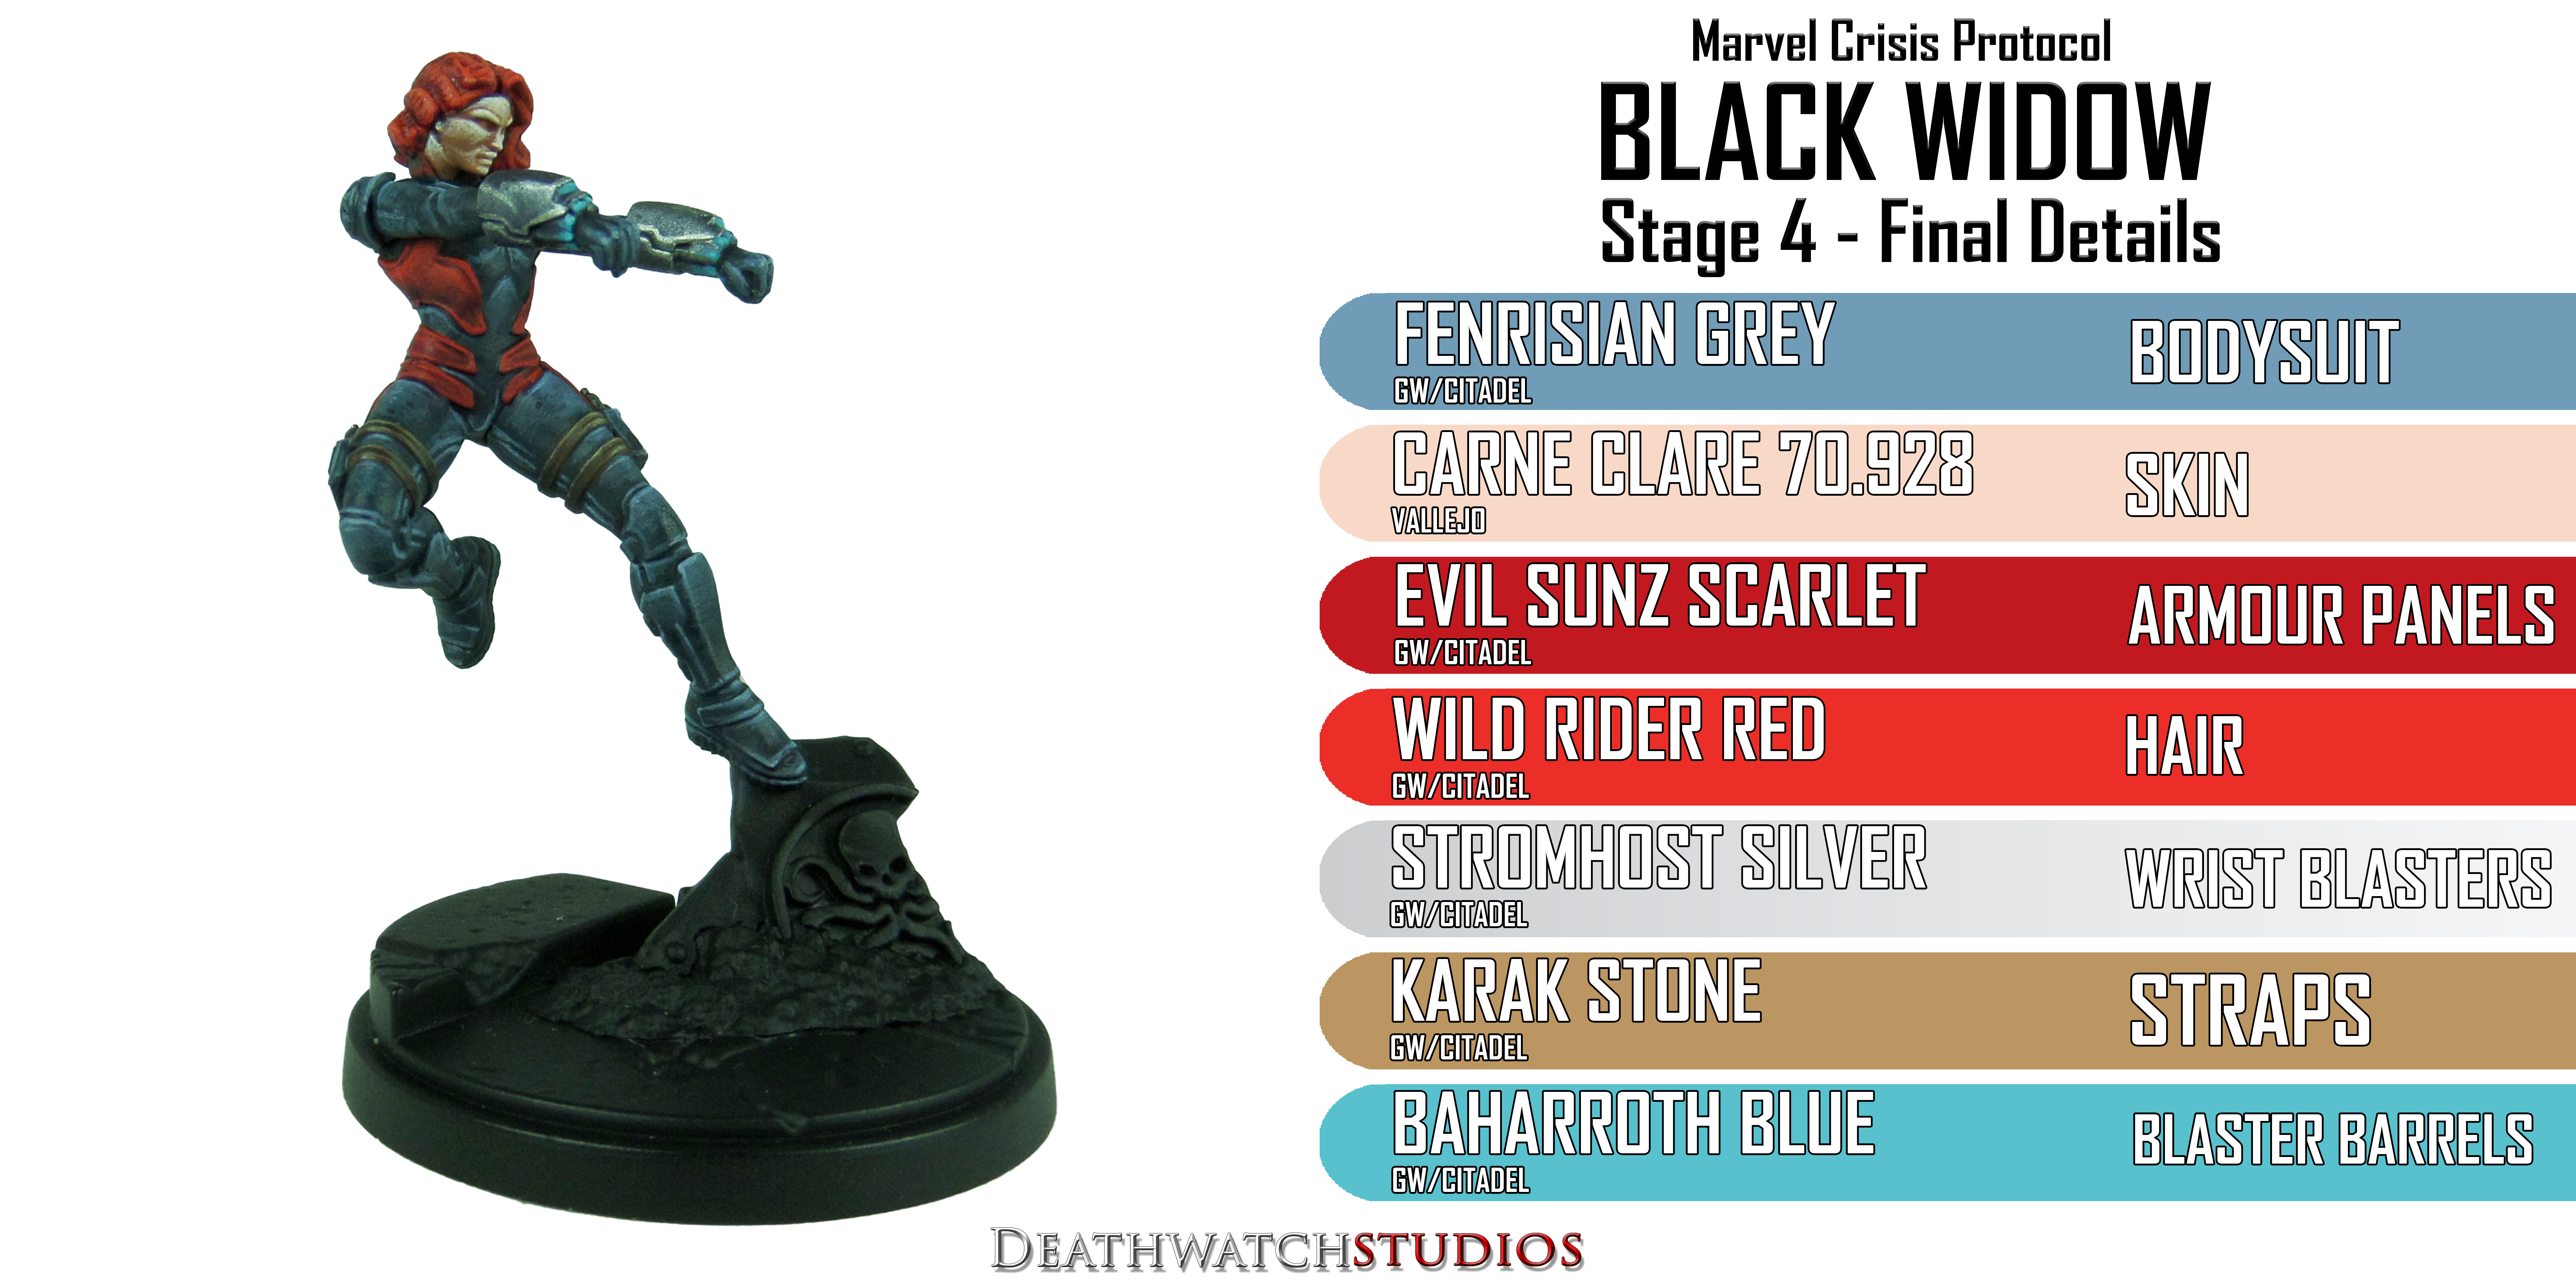
Black Widow
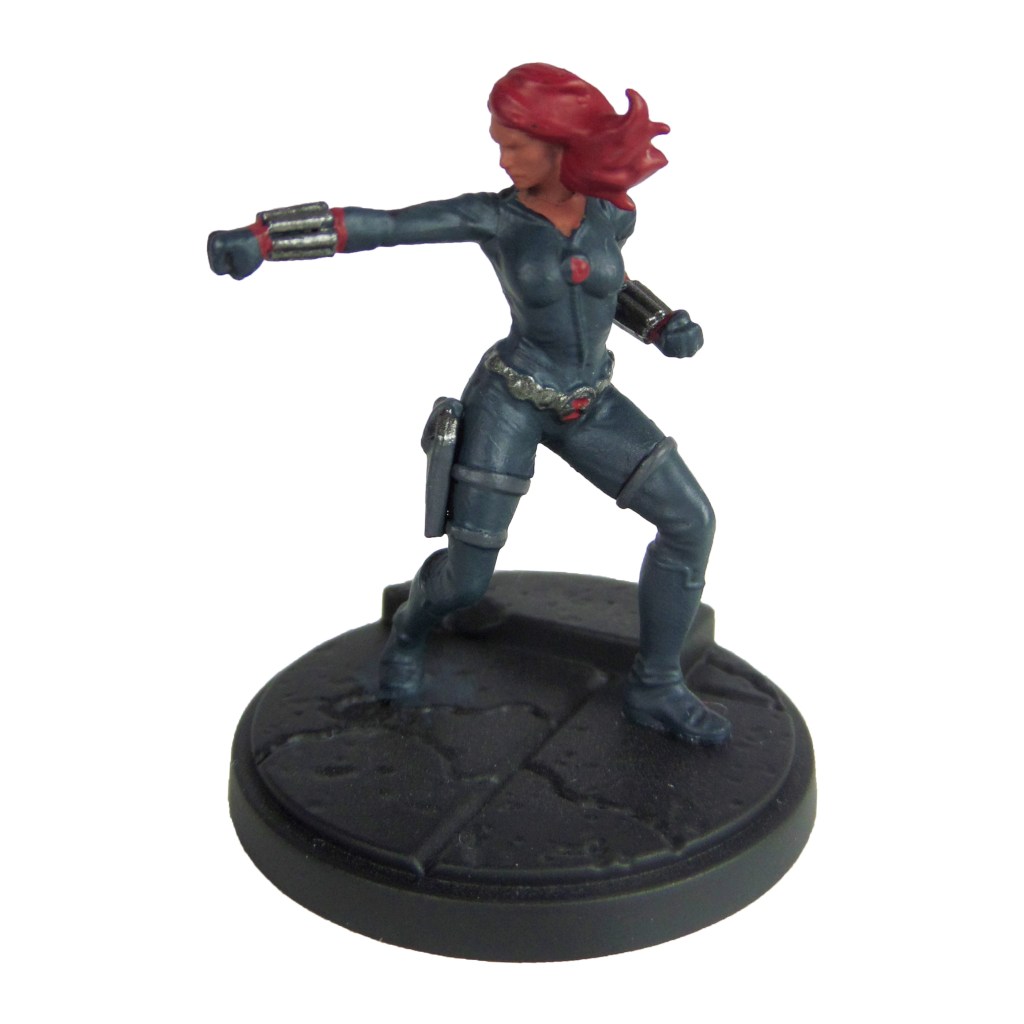
Stage 1
Incubi Darkness: Apply a basecoat to the bodysuit.
Iron Warriors: Apply a basecoat to the belt, gun and bracelets.
Khorne Red: Apply a basecoat to the hair, symbols and wrists.
Bugman’s Glow: Apply a basecoat to the skin.
Eshin Grey: Apply a basecoat to the straps and holster.

Stage 2
Thunderhawk Blue: Apply a layer to the bodysuit.
Nuln Oil: Apply a shade to the metals.
Mephiston Red: Apply a layer to the hair, symbols and wrists.
Cadian Fleshtone: Apply a layer to the skin.
Dawnstone: Apply a line highlight to the straps and holster.

Stage 3
Russ Grey: Apply a line highlight to the bodysuit.
Drakenhof Nightshade: Apply a shade to the metals.
Evil Sunz Scarlet: Apply a line highlight to the hair and wrists.
Basic Skintone 70.815(Vallejo): Apply a highlight to the skin.
Celestra Grey: Apply a line highlight to the straps and holster.

Stage 4
Fenrisian Grey: Apply a spot highlight to the bodysuit.
Ironbreaker: Apply a spot highlight to the metals.
Wild Rider Red: Apply a spot highlight to the hair and wrists.
Light Flesh 70.928 (Vallejo): Apply a spot highlight to the skin.
Krieg Khaki: Apply a spot highlight to the straps and holster.
Finish by painting the base with the Base Painting guide.