Knight Models – Black Canary & Green Arrow

Black-Canary-&-Green-Arrow

Some heroes head over from Star City to help out the Batman!

These two I picked up on a whim just because I really liked the models, and I was very glad that they looked just as good in the flesh. Green Arrow I found was a fairly easy one to paint because the majority of him is green, go figure eh :), and the details are so crisp the highlighting was really easy to get on with.

Black Canary was a bit different. Everything was just as crisp as Arrow except for the tights, the crosshatch pattern was fairly flat in a few areas so it took a good amount of time and a steady hand to get them looking how I wanted. The only other thing I struggled with was the face. Due to the sculpt it is quite difficult to not make her look like a certain type of inflatable ;).

Not being that familiar with the character I painted her up as Knight Models have and I wish I’d researched it a bit more before hand. The models based off the New 52 look, which would mean I would rather have had the main body and arms a lot closer to black as she is in the comics.

Here’s some more pics of them both…

Black-Canary-1 Black-Canary-2 Green-Arrow-1 Green-Arrow-2

Knight Models – Red Hood & Batwoman!

Red-Hood-&-Batwoman

My god I love these two! Red Hood for his sheer bad-ass-ness. The mini just oozes cool intimidation and matches the comic so well. Batwoman on the other hand has such a simplicity to her. No clutter, no ostentation, just simple. This really works for the mini especially combined with the nonchalant but confidant pose. Love it!

These two have probably been the best models I’ve had from Knight so far in regards to mold lines, with only a minor area on Batwoman and one down the inside of Red Hoods legs. Construction is pretty easy on Red Hood with only the arms needing pinned on and a wee bit of filler put in. Batwoman was a bit trickier, but only because of the left leg. This leg joins at the knee but because its a v shaped join it was tricky to pin, so needed to be roughed a bit with a file to get a good stick with the glue.

Onto some more pictures…

Red-Hood-1 Red-Hood-2 Batwoman-1 Batwoman-2 Batwoman-3

As you can probably guess, and I know I say it nearly every time, but these where a joy to paint. I loved every minute. Not just two of my favourite models from Knight Models, but two of my favourite models ever!

Knight Models – Gotham City Police!

Cops

That’s four of Gotham’s finest ready to back up my heroes in a fight 😀

I wanted to do something a little bit different with them than to the ‘official’ scheme, but nothing too drastic. So I threw in a little bit of gold to add some colour and let the minis stand out a bit more, and I think it works quite well 🙂

Cop1 Cop2 Cop3 Cop4 Cop5 Cop6 Cop7 Cop8

Another lot of minis that were a joy to paint especially the two unnamed officers(the chubby chap with the flashlight and the lady officer), who are now two of my favorite models from the range 🙂

Next up some more of the Bat Family…

Knight Models – Batgirl & Nightwing

I’ve been getting a little painting in where I can on my collection of Batman miniatures and have changed my plans as to what I’ll be painting slightly. The place I go to get my Batman Miniatures Game fix on Facebook; Arkham City Limits, which has just become the official group for the game (meaning it is supported by Knight Models and has regular input from the folks behind the game), is running a painting competition :). The rules are simple; Paint up a new 350 rep force that has not been shown on the web before now. Perfect for me just starting out.

So along with the Bat Family I will be painting up a realised I would need some cops & swat to back em up, which have been ordered and should be with me soon 😀

In regards to the Bat Family I’ve now finished up Batgirl and Nightwing…

Batgirl-&-Nightwing Batgirl-1 Batgirl-2 Batgirl-3

Nightwing-1 Nightwing-2 Nightwing-3

There is a couple of things I want ot fix with these; Batgirl’s base needs a black rim and I would like to add the red down Nightwing’s back but other than that they are done :). I had more trouble with Batgirl than I thought I would and am not completely happy, but she’ll have to do. Nightwing on the other hand, I enjoyed a lot more than I thought I would, even though it’s quite a simple scheme.

Next up will be some cops to back these folks up 😀

Knight Models – Batman & Robin!

My plan for the Knight Models range was to get and paint up the Bat family and what better place to start than the dynamic duo themselves; Batman & Robin…

Batman-&-Robin

Batman-1 Batman-2 Robin-1 Robin-2

I loved painting these up, absolutely loved it 😀

The detail on the models is clean and crisp, something I’ve always loved about metal models. As I’ve said before the scale is glorious, especially considering the little detail of Batman being taller than Robin, something you often don’t see with model ranges. My only complaint was Batmans ears, which seemed a little shorter than they should be, and one looking a little malformed. Only a small problem though 🙂

Next up, Batgirl or Nightwing?

I’m Back Baby!

54725831

After a long hiatus from this blog and any hobby activity in general, I’m getting back to it now! Yay 🙂

Many factors contributed to my absence; Preparing for my first-born, moving house, getting an Xbox One and a few other things, but all in all it came down to needing a break from toy soldiers for a wee while.

Luckily in the last few weeks that monkey has climbed back onto my back, and the brushes and tools have been unpacked ready to go and I can attribute my new found enthusiasm to one man; Batman!

I recently discovered a miniatures range from Knight Models featuring the Dark Knight and a whole host of his allies and rogues gallery and was so impressed with the minis I got ordering right away :), and here’s what I’ve got to work on…

Batgirl, Batman, Robin & Nightwing

Batgirl, Batman, Robin & Nightwing

Deathstroke, Green Arrow & Black Canary

Deathstroke, Green Arrow & Black Canary

I’m suitably impressed with the quality of these folks, with good, clean and exceptionally detailed molds, but also the scale is amazing. Being 35mm rather than the usual 28mm I’m used to working with they really do stand apart and look really special. This also helped alleviate a problem I had with the price, and realise that they are worth the £12 a peice they come in at.

So I have these chaps to work on, and I’ll have an update on them later today once a few more licks of paint have been added, but I also have another bucket load of models to work on in the form of…

dbx-box

The box set for Xtreme arrived just before Christmas and whilst I haven’t had a chance to do much with it yet, this new boost of hobby enthusiasm has got me starting to prepare the models for painting and playing, and I’m hoping to get a review of the box set done soon. The second wave has just started shipping as well, which means I’ll soon be buried under a pile of minis, and I’d like to get ahead of it while I can 🙂

Finally I’d like to say it feels good to get back to this and share my progress with all you lovely people 😀

Deadzone – Plague Painting Guide!

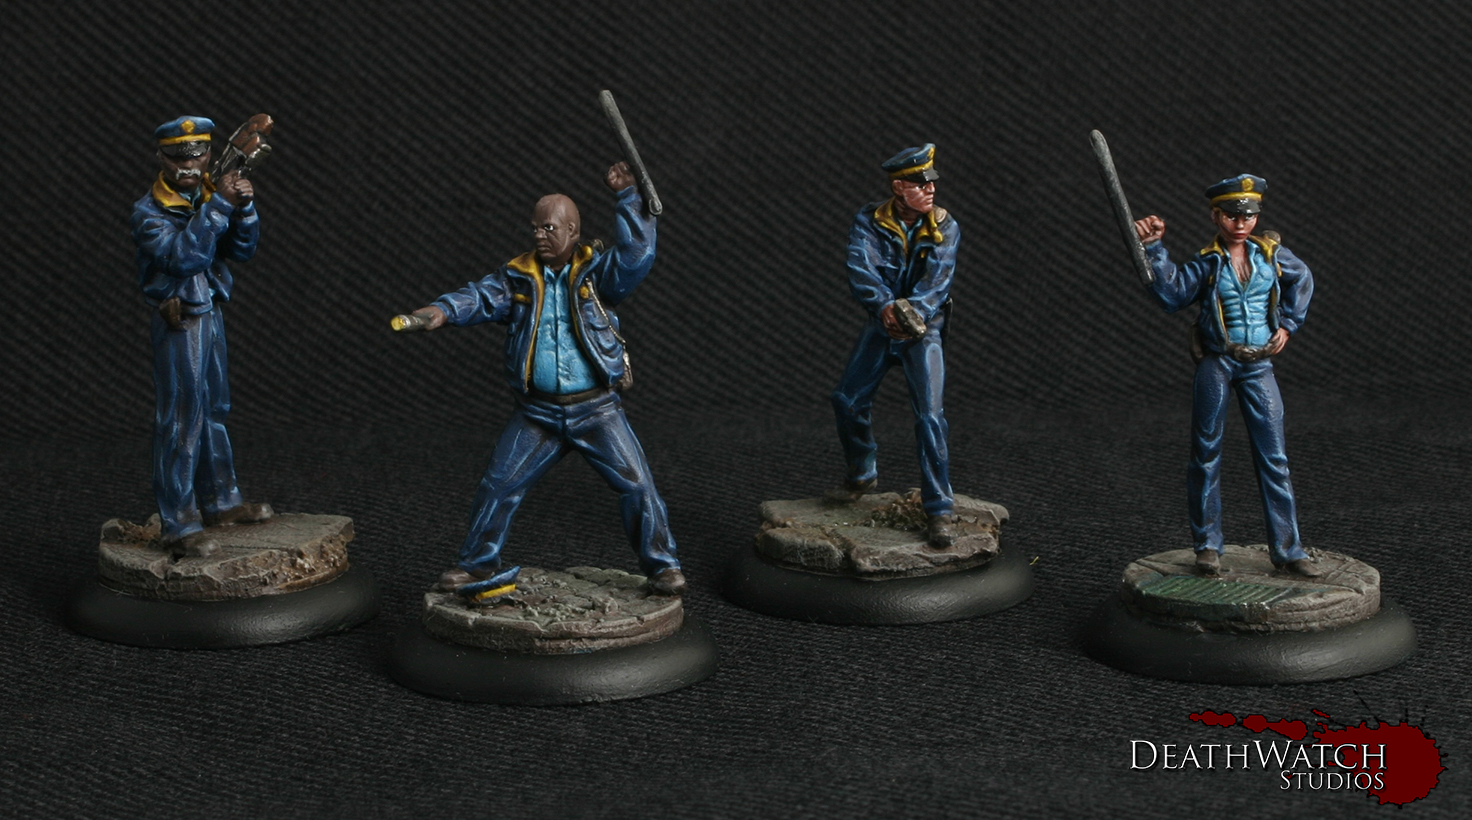
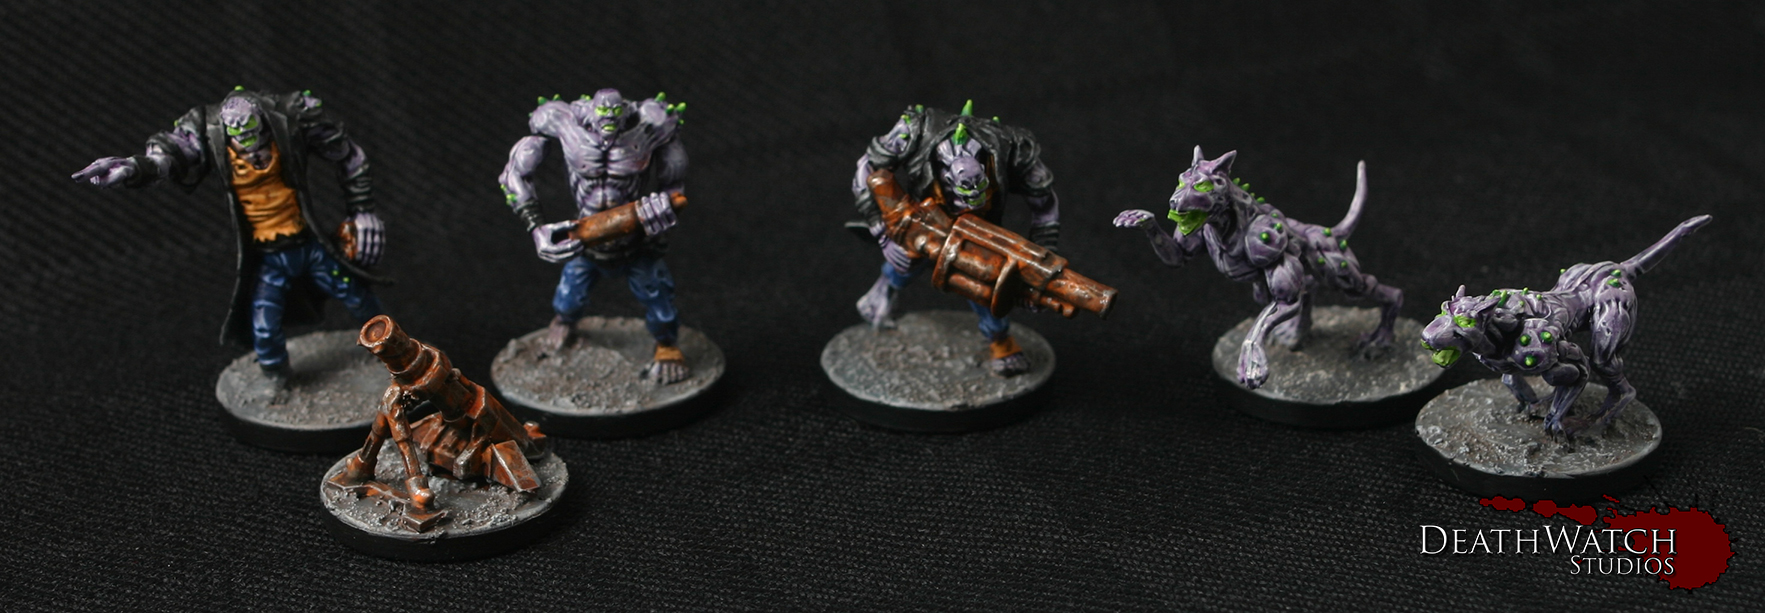
With the main bulk of my Plague force fully painted and ready to rip some faces off, I thought I would share the methods I used to get them looking how I did these guys…

Plague-Group

Plague-Flesh

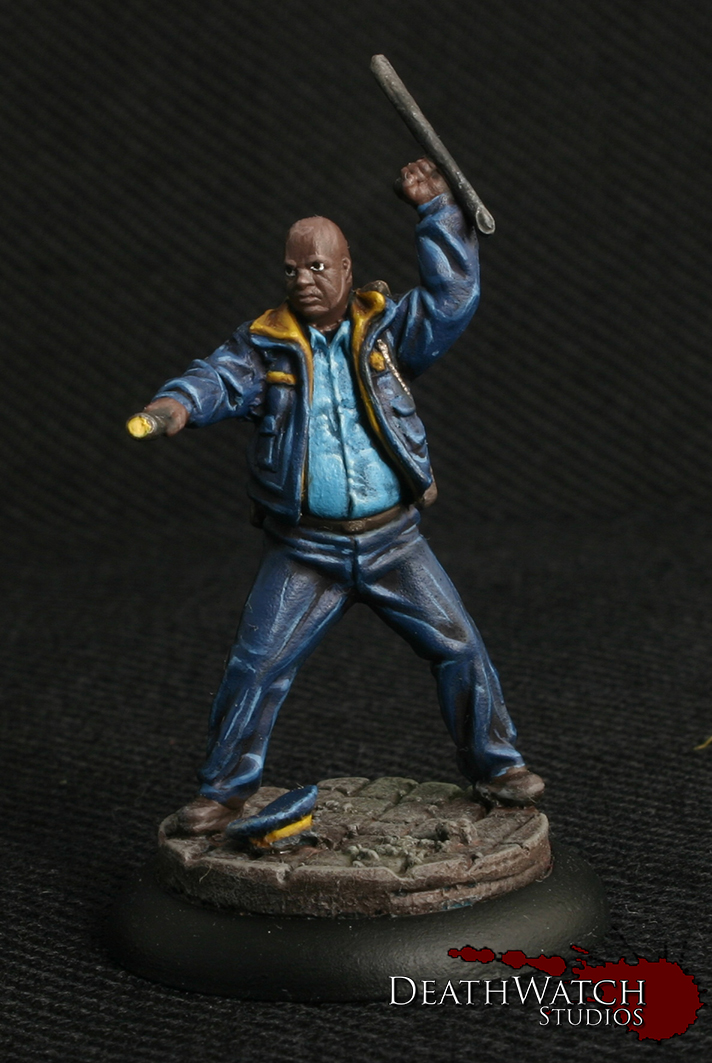
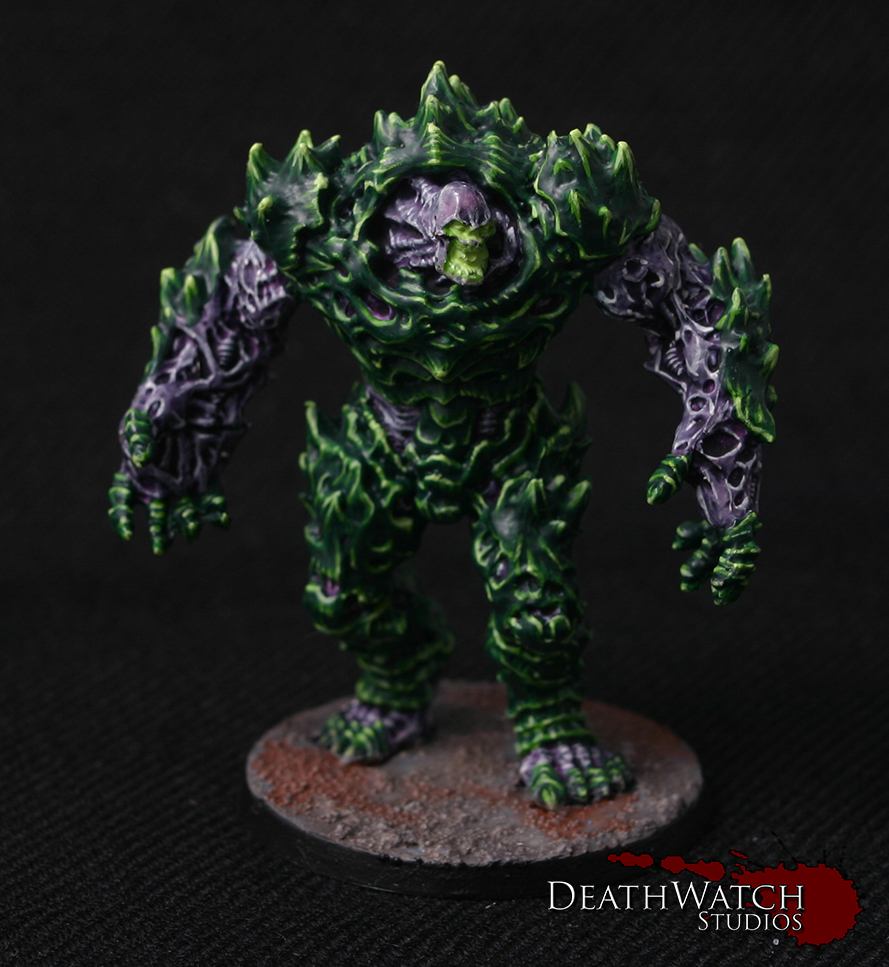
Flesh: Basecoat of Pallid Wych Flesh

Wash of 3:1 Druchii Violet and Lahmian Medium

Wait for the previous wash to dry and add a light wash of 3:1 Drakenhof Nightshade and Lahmian Medium

Once dry add a fine highlight of Pallid Wych Flesh

Plague-Trousers

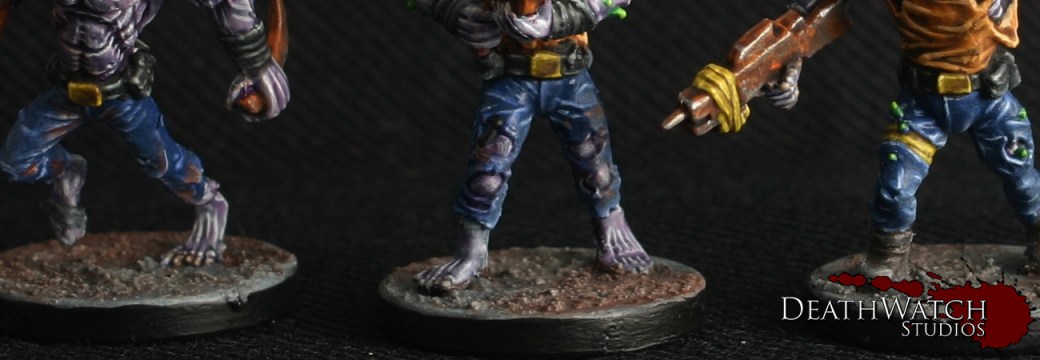
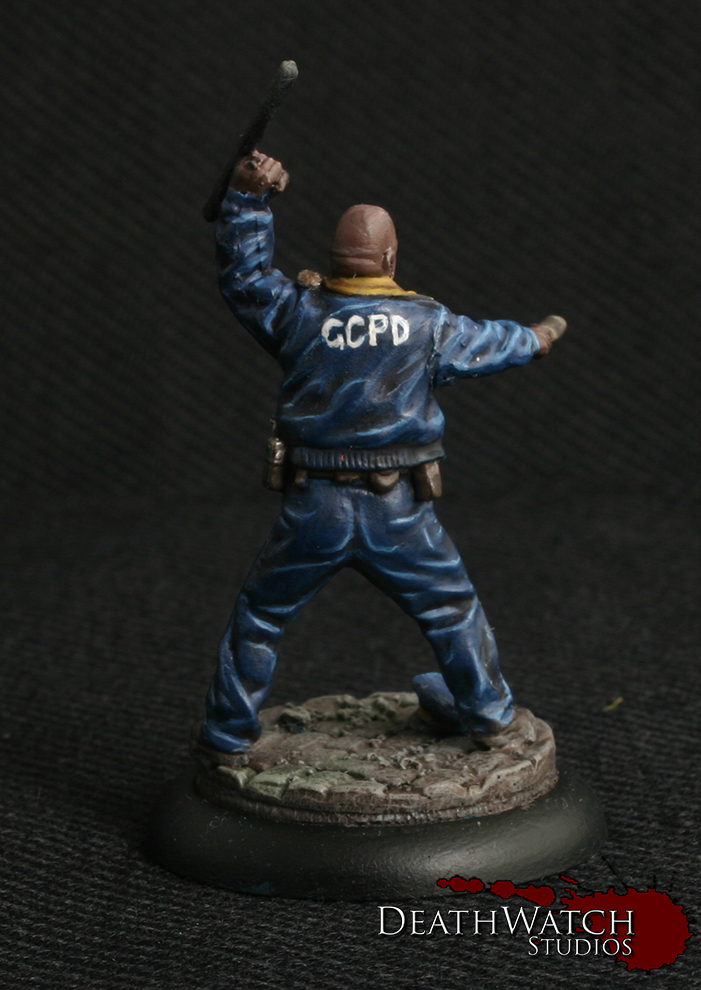
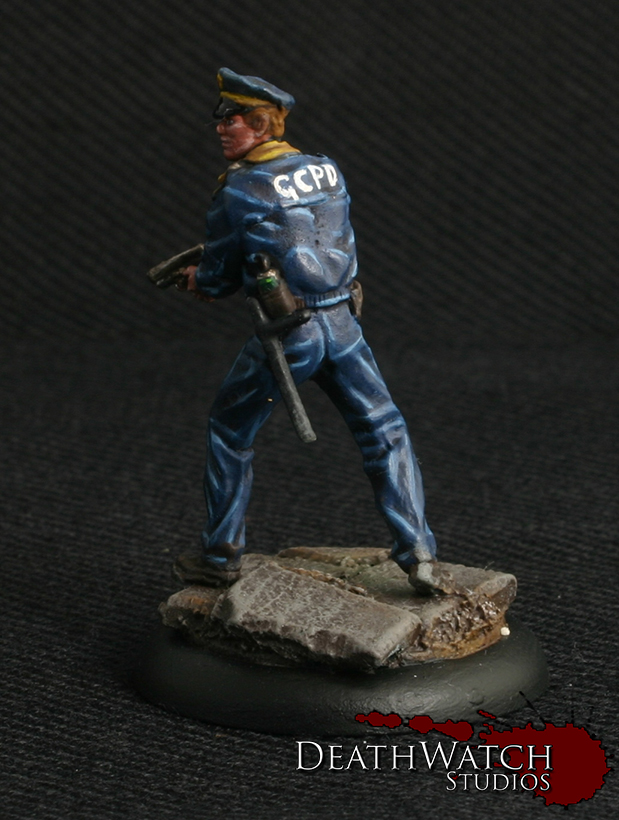
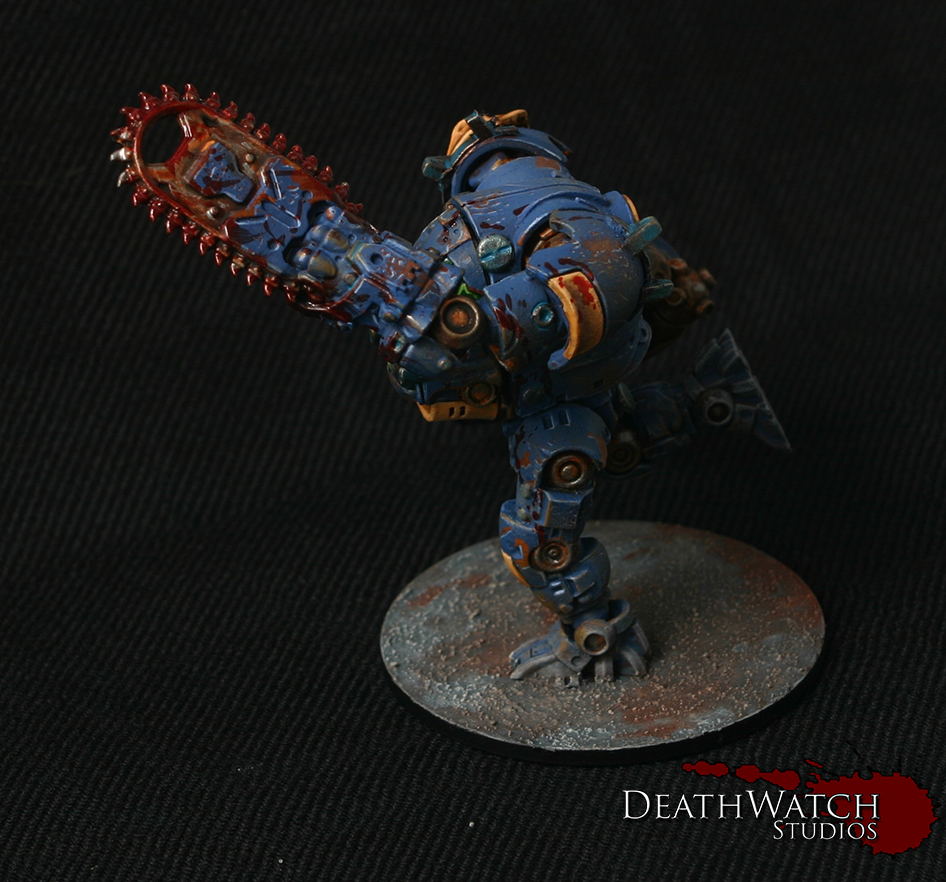
Blue trousers: Basecoat Kantor Blue

Highlight of Altdorf Guard Blue

Highlight 1:1 Altdorf Guard Blue and White

Fine Highlight of 2:1 White and Altdorf Guard Blue

Plague-Cloth

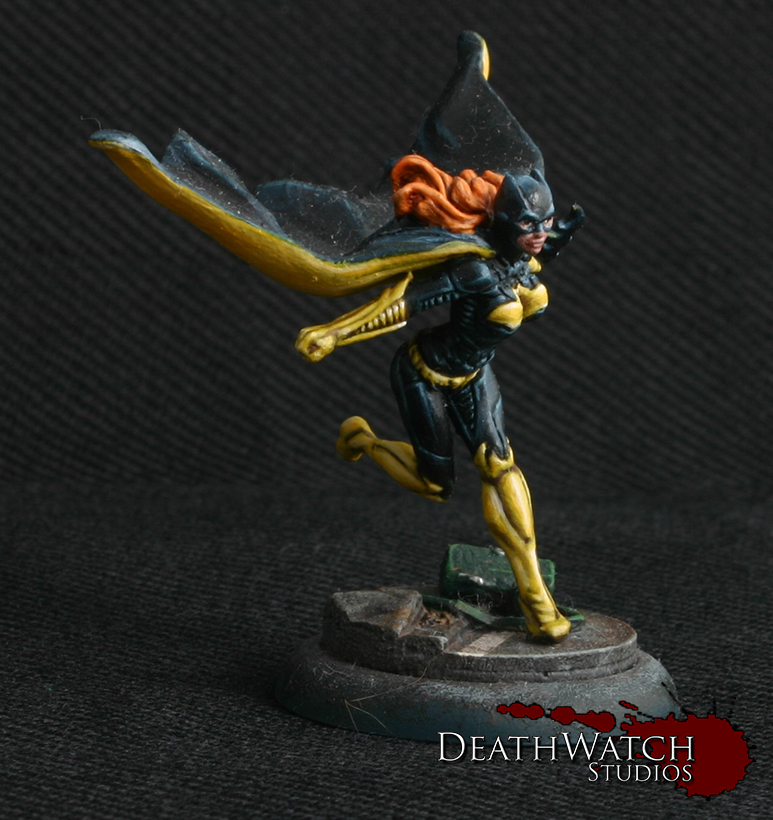
Orangey Brown Sectons: Basecoat Tau Light Ochre

Wash of Agrax Earthshade

Highlight of Tau Light Ochre

Fine highlight of 1:1 Tau Light Ochre and Pallid Wych Flesh

Plague-Metals

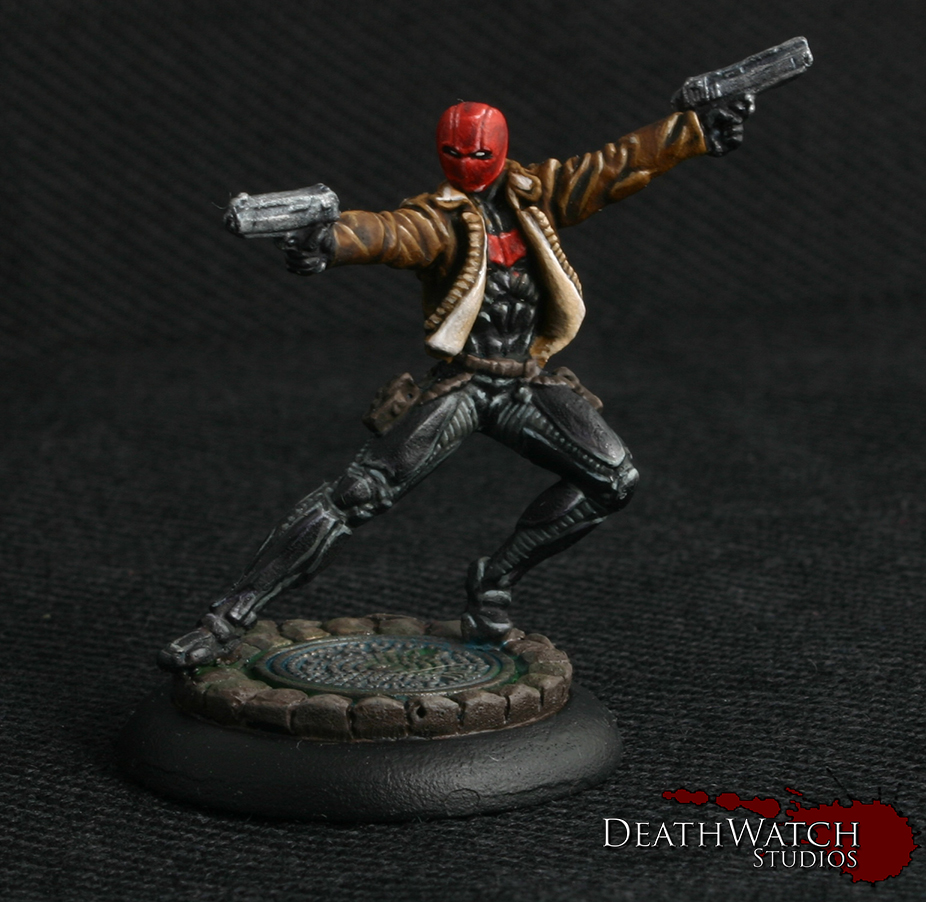
Guns, Blades & Metals: Basecoat of Doombull Brown

Stipple on Trollslayer Orange then Fire Dragon Bright

Lightly drybrush Leadbelcher to the edges

Wash of Agrax Earthshade

Fine highlight of Leadbelcher to some of the edges and stippled onto larger areas

Plague-Greens

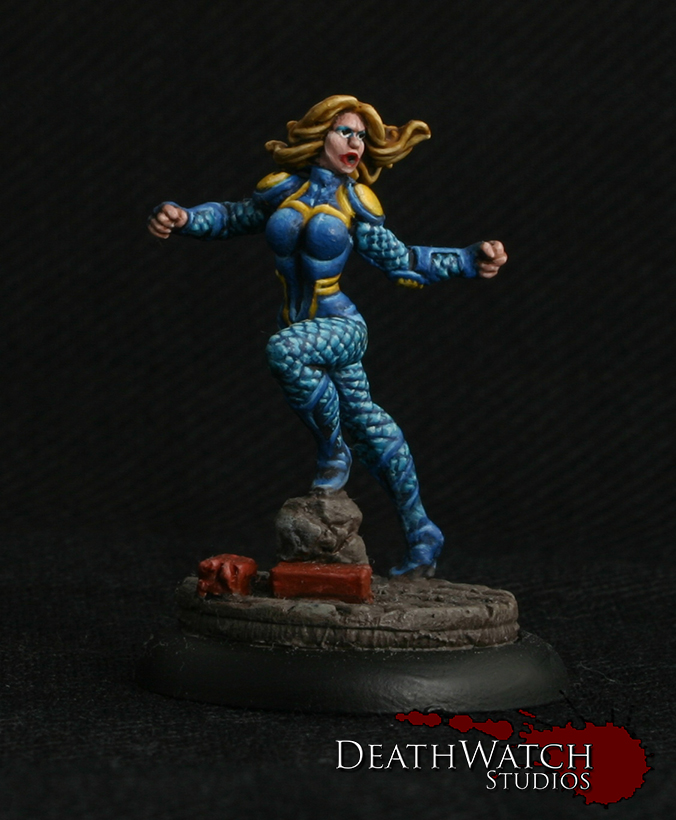
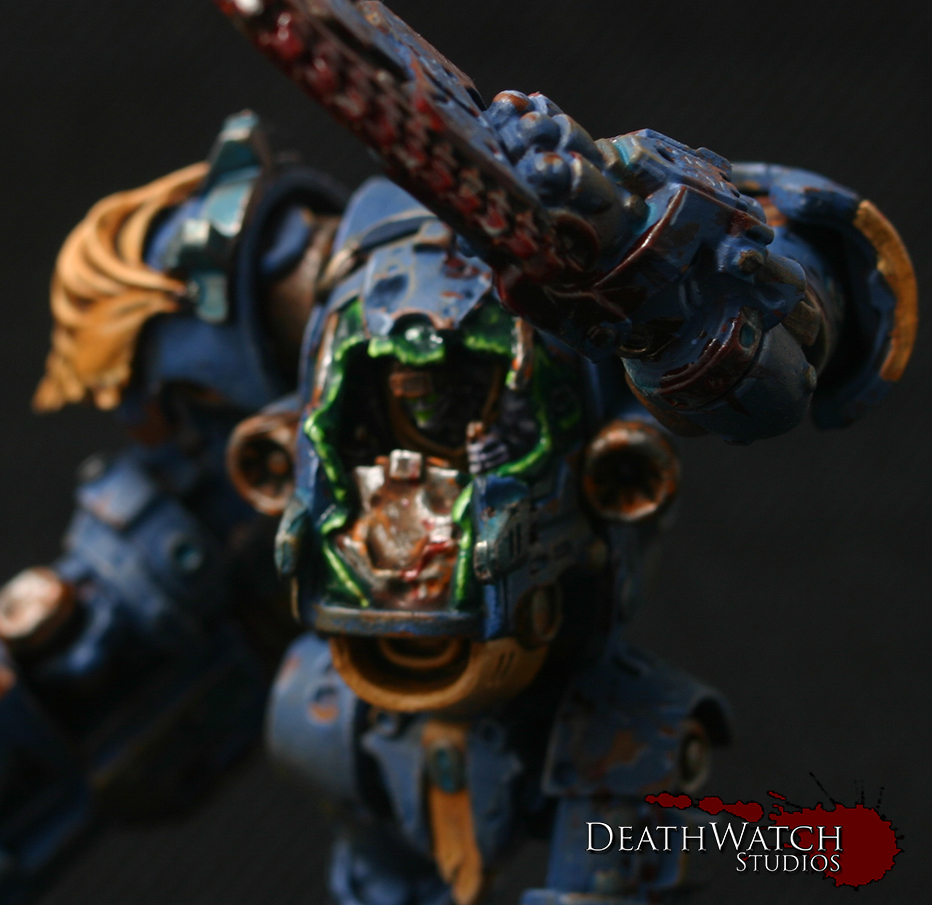
Green Spines & Armour Plates: Basecoat of Caliban Green

Highlight of Snot Green

Highlight of Moot Green

Fine Highlight of 2:1 White and Moot Green

Plague-Faces

Glowy Green Faces: Add a coat of watered down Moot Green on and around the eyes and mouth. This should be about 5 parts water to 1 part paint.

Allow to dry and then add a coat of 3:1:1 Water, Moot Green and White, leaving the outer most parts the original colour

To finish off add a dab of 3:1 White and Moot Green to the centre

Plague-Blacks

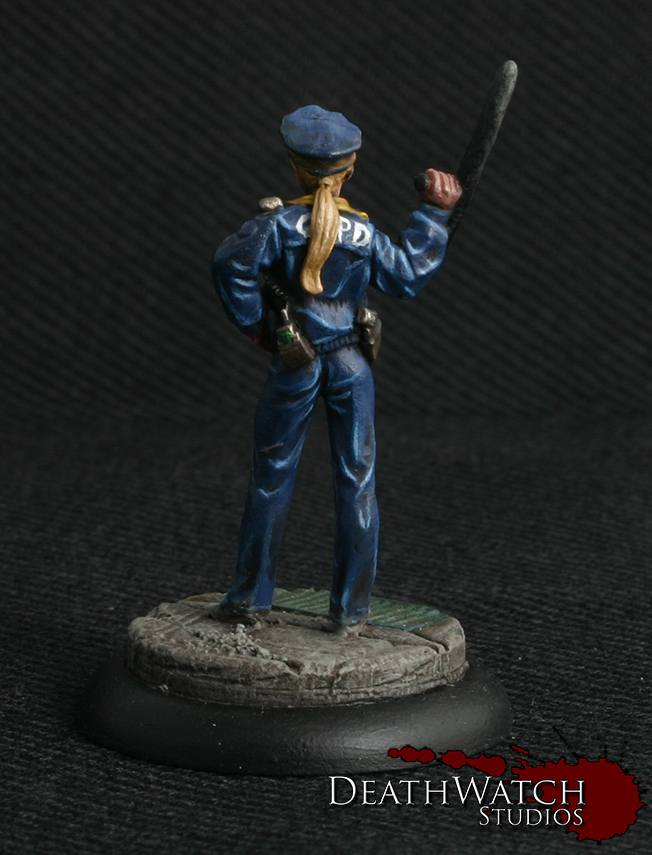
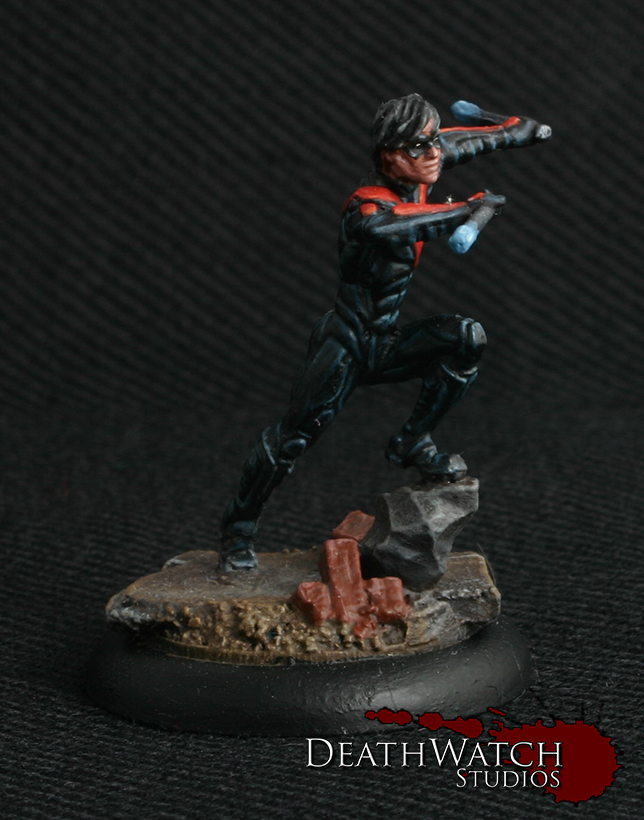
Jackets, Straps and Pouches: Basecoat in Black

Add a highlight of Mechanicus Standard Grey

Highlight with Codex Grey

Fine Highlight of Celestra Grey

Wash with Badab Black

Plague-Trousers

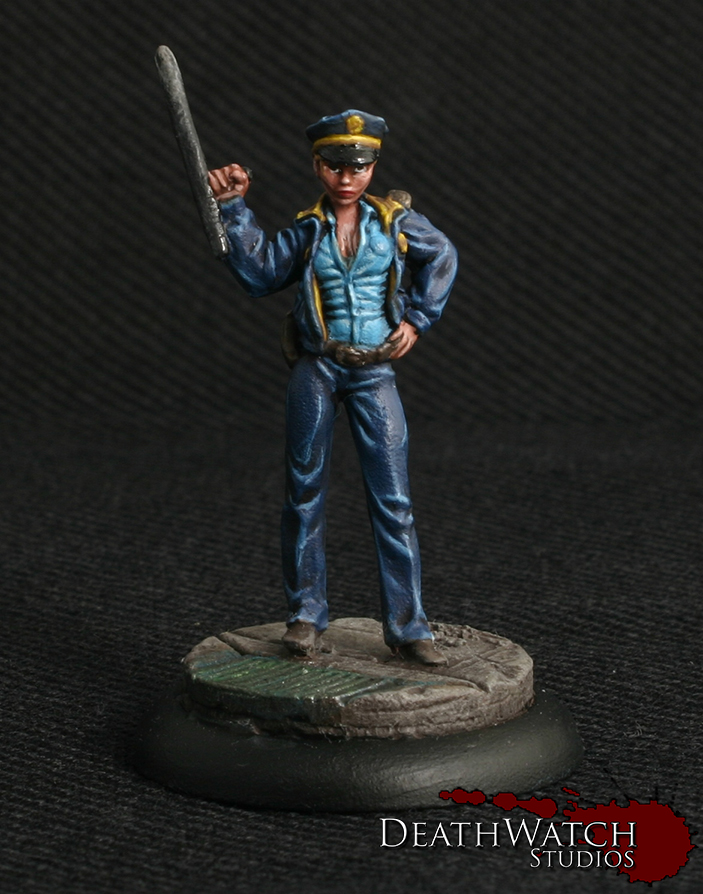
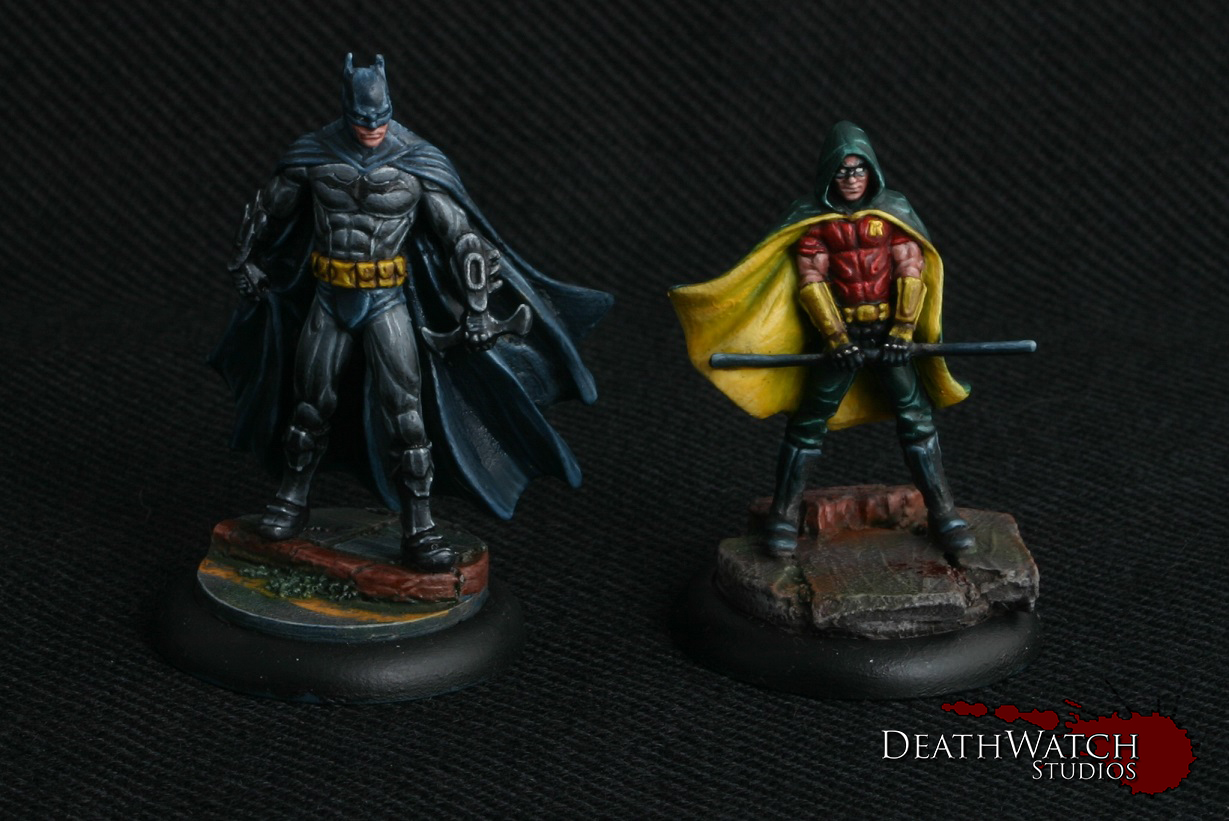
Belt Buckles: Basecoat XV88

Highlight with 2:1 XV88 and Yriel Yellow

Highlight Yriel Yellow

Fine Highlight 1:1 Yriel Yellow and White

Plague-bases

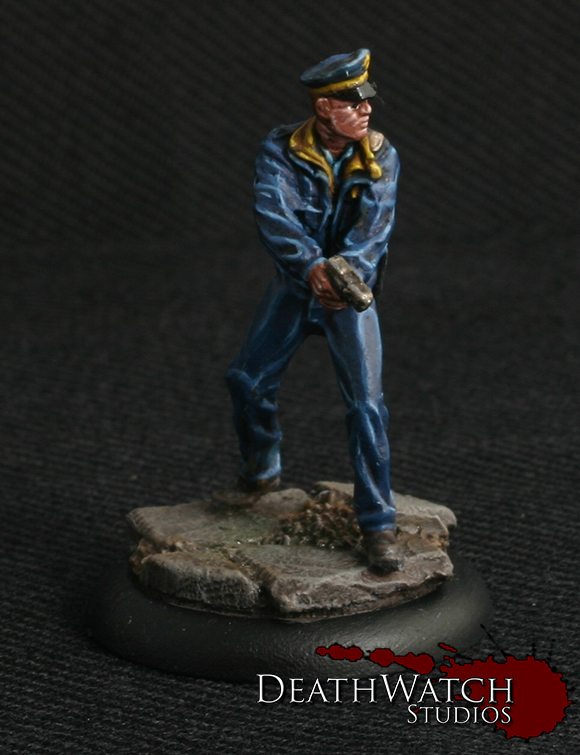
Bases: The first step for my bases was done before any undercoating and was as simple as adding a coat of the GW texture paint Astrogranite. This gives it the texture, but with enough spacing between them to feel like a concrete surface. It also has the added bonus of filling and hiding the seam around the circular section around the feet and the slot in the base.

Once the rest of the figure was painted I then moved onto the base as the last step.

First was a basecoat of Mechanicus Standard Grey

Then a drybrush of Codex Grey

Another drybrush this time with Clestial Grey

And a final drybrush of Terminatus Stone

To make it feel a bit more natural I then added a coat of watered down Dryad Bark to most of the base. I reccomend a very thin coat, at least 5:1 Water and Dryad Bark

I then added small patches of a 5:1 mix of Water and Doombull brown to add further variation.

Finally I painted the rims of the bases black to tidy them up a bit.

And there you have it, nice and simple but good looking none the less, even if I do say so myself 😀

If I happened to miss anything that you want to know about, just leave me a comment 🙂

Deadzone – Plague Booster!

So I have added a booster to my Plague force…IMG_9484

This will give them a wee bit extra oomphf, especially with a couple of Frag weapons in there:). I’ve painted them up to match the rest of the force, with the only real difference being the coats worn by one of the Mortar crew and the grenade launcher bloke. These I went with black on to stick with the theme and give them a trenchcoat feel. Here’s how they look now…

Reinforcements-1 Reinforcements-2

The only one of them still not done is the swarm. I don’t see myself using it anytime soon so I wasn’t in a rush to get it done, but I will eventually get it panted :). But for now that’s the Plague force complete. When it comes to models anyway. I’ve been getting quite into writing the fluff for these guys which I’ll show off soon, along with some pics of the whole force together 😀

Deadzone – Plague Strider Finished!

This model is a beauty! I found it really easy to put together, especially as the components allow a great degree of flexibility to the pose, giving you an awesome looking model no matter what 🙂

I’ve chosen to paint it in the same fashion as the clothing for the Stage 3s to give it, and them, a uniform feel. Although I knew I would also need to make it look a bit more worn and worse for wear. Here’s how it turned out…

Strider-5

Strider-4

Strider-8

Strider-7

Strider-6

Strider-9

I painted this before fully constructing, as it would be a lot trickier to get right otherwise. I left the arms, the cockpit front and the pilot off to paint separately.

This gave me the inspiration for some back story to the Plague force I’ve put together, as well as some scenery once the force is ready.

The idea centers around a corporation, Feist Security Technology, that operates in a similar manner to a police force, with the notable exception they only serve and protect those that pay for the privilege. Whilst escorting a shipment from a client corporation all hell brakes loose leaving a few Plague infected Feist security troopers . These troopers keep spreading the Plague, instinct taking them back to the central Feist buildings and spreading the sickness throughout, garnering a good mix of well trained grunts, specialists, equipment and a Gr77 ‘Riot’ mech.

Even made up a logo to go with the corporation…

Feist-Logo

It’s only the start of an idea, but I’m gonna run with it and see where ti takes me 😀

Deadzone – Plague Stage 1 Finished!

The final model from the Plague starter, the Stage 1, is finished. Now I’ve got one hell of a beast to lead the swarm, pack, herd?

Stage-1-1 Stage-1-2

I’ve painted him pretty much the same way as the Stage 2s, as there’s not much different other than the size. I did find it hard to decide which bits should be armour plates or flesh as the definition between the two seems blurred at best ob the model, although I’m still pleased with how he turned out 🙂

Next up will be the Strider 😀