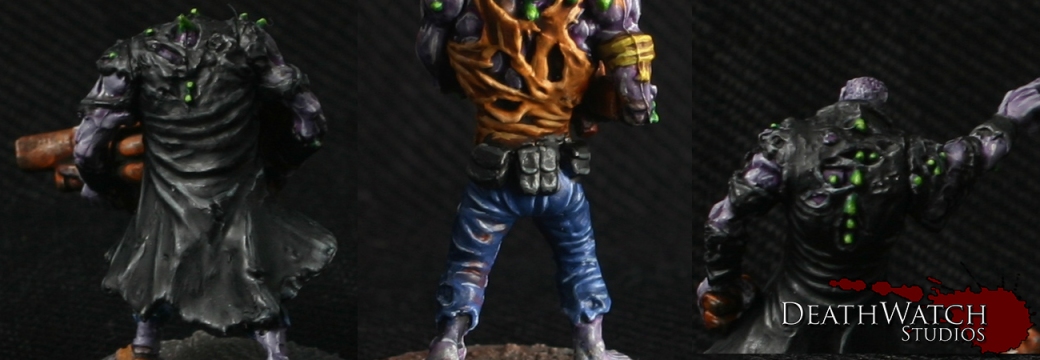
With the main bulk of my Plague force fully painted and ready to rip some faces off, I thought I would share the methods I used to get them looking how I did these guys…
Flesh: Basecoat of Pallid Wych Flesh
Wash of 3:1 Druchii Violet and Lahmian Medium
Wait for the previous wash to dry and add a light wash of 3:1 Drakenhof Nightshade and Lahmian Medium
Once dry add a fine highlight of Pallid Wych Flesh
Blue trousers: Basecoat Kantor Blue
Highlight of Altdorf Guard Blue
Highlight 1:1 Altdorf Guard Blue and White
Fine Highlight of 2:1 White and Altdorf Guard Blue
Orangey Brown Sectons: Basecoat Tau Light Ochre
Wash of Agrax Earthshade
Highlight of Tau Light Ochre
Fine highlight of 1:1 Tau Light Ochre and Pallid Wych Flesh
Guns, Blades & Metals: Basecoat of Doombull Brown
Stipple on Trollslayer Orange then Fire Dragon Bright
Lightly drybrush Leadbelcher to the edges
Wash of Agrax Earthshade
Fine highlight of Leadbelcher to some of the edges and stippled onto larger areas
Green Spines & Armour Plates: Basecoat of Caliban Green
Highlight of Snot Green
Highlight of Moot Green
Fine Highlight of 2:1 White and Moot Green
Glowy Green Faces: Add a coat of watered down Moot Green on and around the eyes and mouth. This should be about 5 parts water to 1 part paint.
Allow to dry and then add a coat of 3:1:1 Water, Moot Green and White, leaving the outer most parts the original colour
To finish off add a dab of 3:1 White and Moot Green to the centre
Jackets, Straps and Pouches: Basecoat in Black
Add a highlight of Mechanicus Standard Grey
Highlight with Codex Grey
Fine Highlight of Celestra Grey
Wash with Badab Black
Belt Buckles: Basecoat XV88
Highlight with 2:1 XV88 and Yriel Yellow
Highlight Yriel Yellow
Fine Highlight 1:1 Yriel Yellow and White
Bases: The first step for my bases was done before any undercoating and was as simple as adding a coat of the GW texture paint Astrogranite. This gives it the texture, but with enough spacing between them to feel like a concrete surface. It also has the added bonus of filling and hiding the seam around the circular section around the feet and the slot in the base.
Once the rest of the figure was painted I then moved onto the base as the last step.
First was a basecoat of Mechanicus Standard Grey
Then a drybrush of Codex Grey
Another drybrush this time with Clestial Grey
And a final drybrush of Terminatus Stone
To make it feel a bit more natural I then added a coat of watered down Dryad Bark to most of the base. I reccomend a very thin coat, at least 5:1 Water and Dryad Bark
I then added small patches of a 5:1 mix of Water and Doombull brown to add further variation.
Finally I painted the rims of the bases black to tidy them up a bit.
And there you have it, nice and simple but good looking none the less, even if I do say so myself 😀
If I happened to miss anything that you want to know about, just leave me a comment 🙂


Those are beautiful models. 🙂 I love seeing your painting.
How did you do your bases? Colour scheme? Thanks.
I’ve edited the guide to add in the bases, thanks for reminding me it wasn’t there 🙂
Nice guide – thanks for sharing. Looking forward to what you will do with the Dungeon Sagas figs 🙂
Absolutely awesome…thanks for this great painting guide!
These are great minis! I’ve linked your work in our article about the models: https://alkony.enerla.net/english/the-nexus/miniatures-nexus/miniature-related/miniature-set/plague-gen-3-mutants-ed1-for-deadzone-ed1-from-mantic-games-miniature-set-review