Welcome to my latest painting guide! Omega Red hits the painting table. A fairly chunky model with some cool but very flexible tentacles.
I need your support. Because my guides takes time and supplies to do, any support you can offer would mean the world to me. A supportive message in the comments is enough, but if you have the means why not send me a gift on Ko-Fi or PayPal. Thank you!
Prep: Fully build the model. Undercoat black.
Stage 1
Word Bearers Red: Apply a basecoat to the clothing and armour interiors on the shoulders and wrists.
Leadbelcher: Apply a basecoat to the armour and tentacles.
Karak Stone: Apply a basecoat to the skin.
Balor Brown: Apply a basecoat to the hair.
Stage 2
Druchii Violet: Apply a shade to the reds.
Drakenhof Nightshade: Apply a shade to the metals.
Agrax Earthshade: Apply a shade to o teh skin and hair.
Stage 3
Wazdakka Red: Apply a thinned layer to the reds.
Ironbreaker: Apply a line highlight to the metals.
Rakarth Flesh: Apply a layer to the skin.
Blonde Hair 09257: Apply a layer to the hair.
Stage 4
Evil Sunz Scarlet: Apply a line highlight to the reds.
Stormhost Silver: Apply a spot highlight to the metals.
Pallid Wych Flesh: Apply a line highlight to the skin.
Blonde Highlight 09258: Apply a spot highlight to the hair.
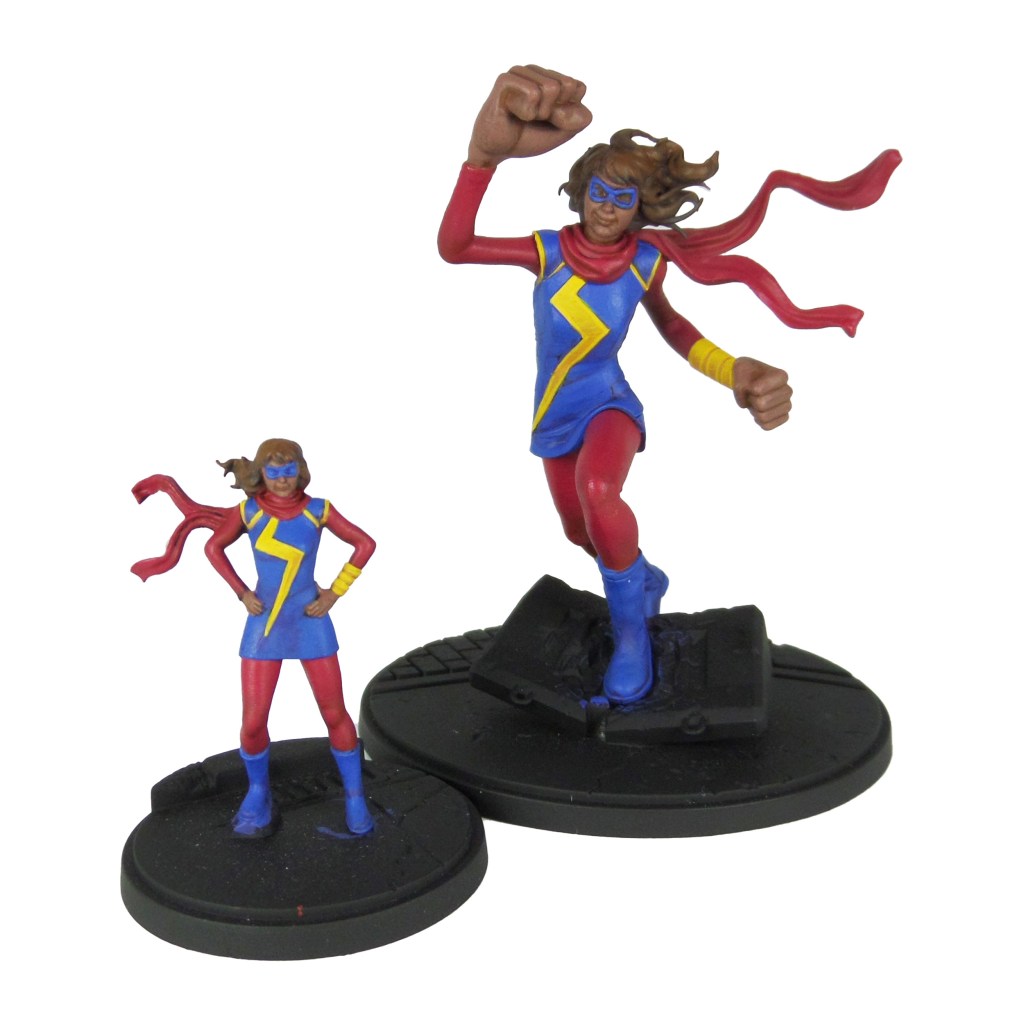
Welcome to my latest painting guide! Ms. Marvel in both her normal and embiggened form, a model that surprised me with its size, coming head to head in height with the Hulk!
I need your support. Because my guides takes time and supplies to do, any support you can offer would mean the world to me. A supportive message in the comments is enough, but if you have the means why not send me a gift on Ko-Fi or PayPal. Thank you!
Prep: Fully build both models. Undercoat black.
Stage 1
Word Bearers Red: Apply a basecoat to the legs, arms and scarf.
Mournfang Brown: Apply a basecoat to the skin.
Dryad Bark: Apply a basecoat to the hair.
Tau Light Ochre: Apply a basecoat to the bolt and lining.
Macragge Blue: Apply a basecoat to the top, boots and mask.
Stage 2
Mephiston Red: Apply a layer to the legs, arms and scarf.
Knight-questor Flesh: Apply a layer to the skin.
Mournfang Brown: Apply a layer to the hair.
Yriel Yellow: Apply a layer to the bolt and lining.
Caledor Sky: Apply a layer to the top, boots and mask.
Stage 3
Evil Sunz Scarlet: Apply a thinned layer to the legs, arms and scarf.
Cadian Fleshtone: Apply a thinned layer to the skin.
Steel Legion Drab: Apply a line highlight to the hair.
Phalanx Yellow: Apply a line highlight to the bolt and a spot highlight to the lining.
Teclis Blue: Apply a thinned layer to the top, boots and mask.
Stage 4
Wild Rider Red: Apply a line highlight to the legs, arms and scarf.
Kislev Flesh: Apply a line highlight to the skin.
Karak Stone: Apply a spot highlight to the hair.
Dorn Yellow: Apply a spot highlight to the bolt and lining.
Lothern Blue:Apply a line highlight to the top, boots and mask.
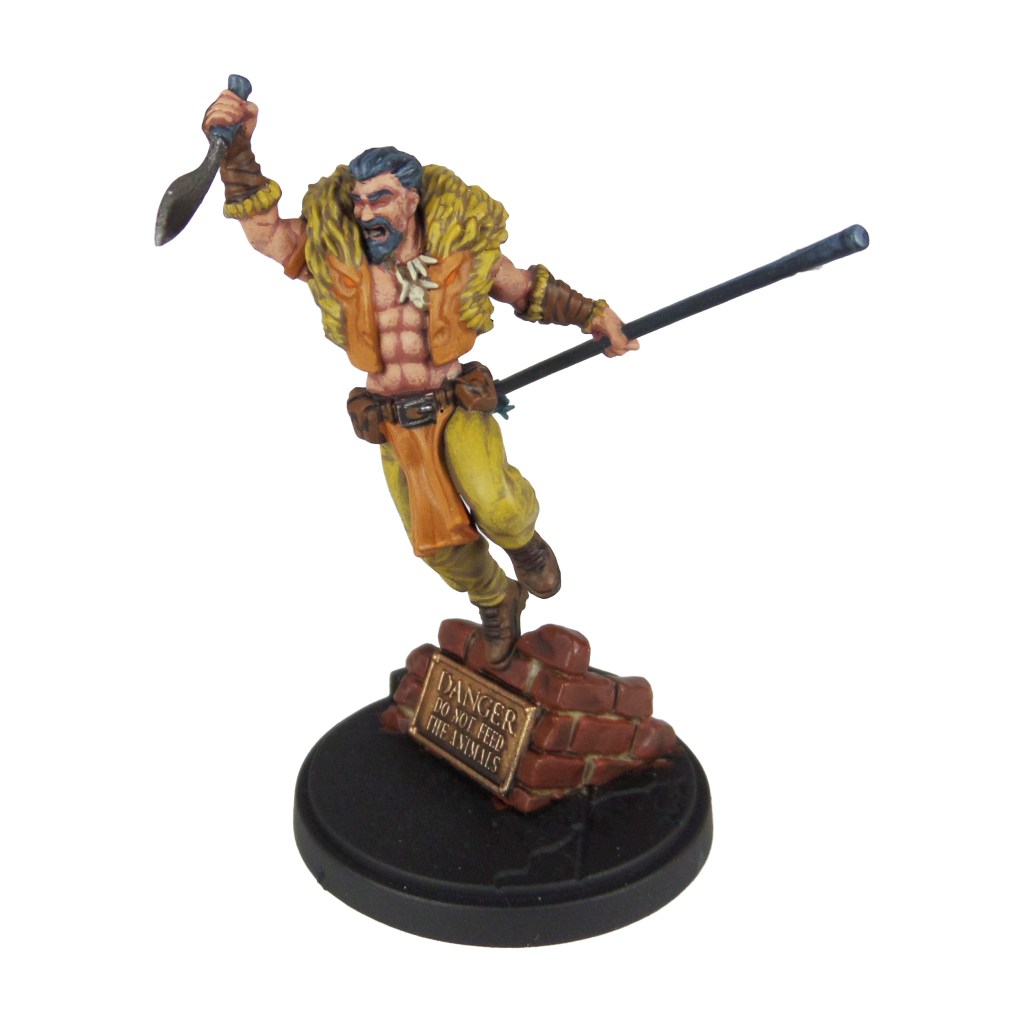
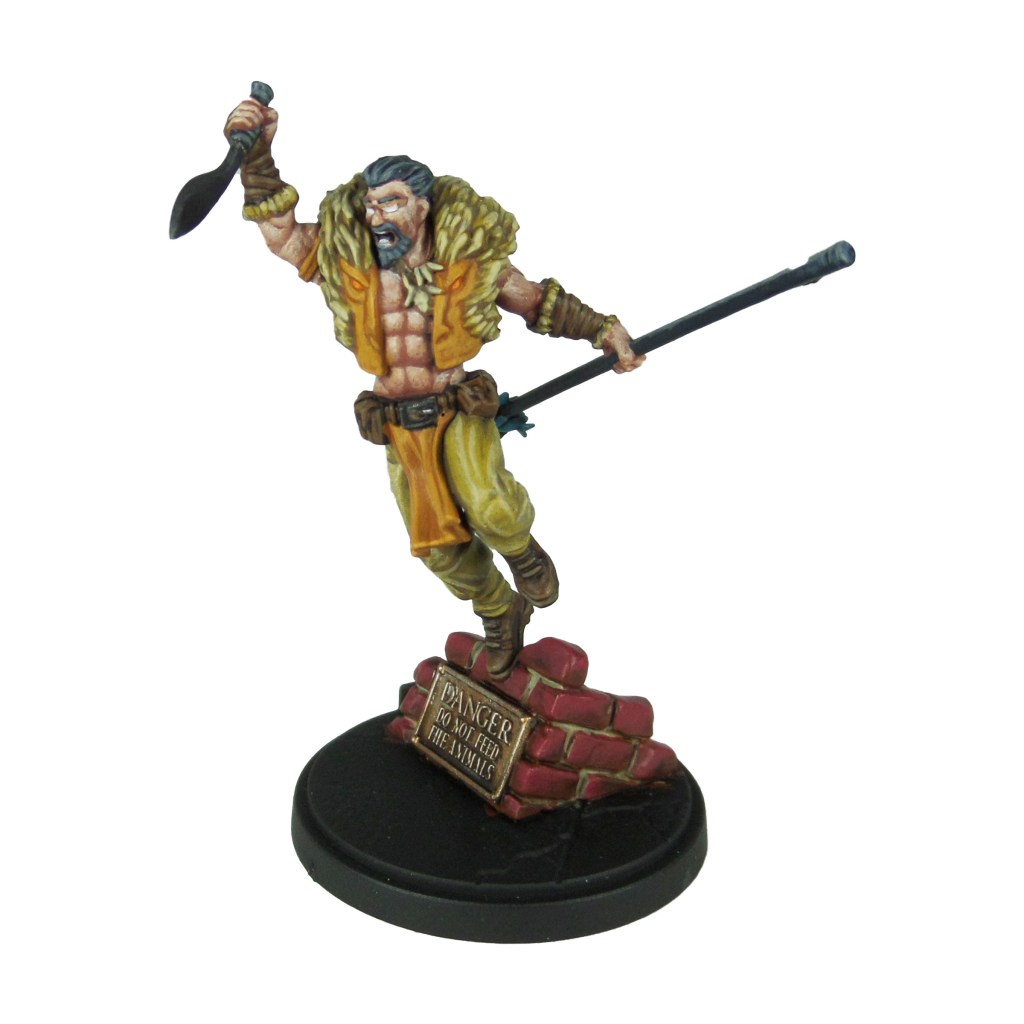
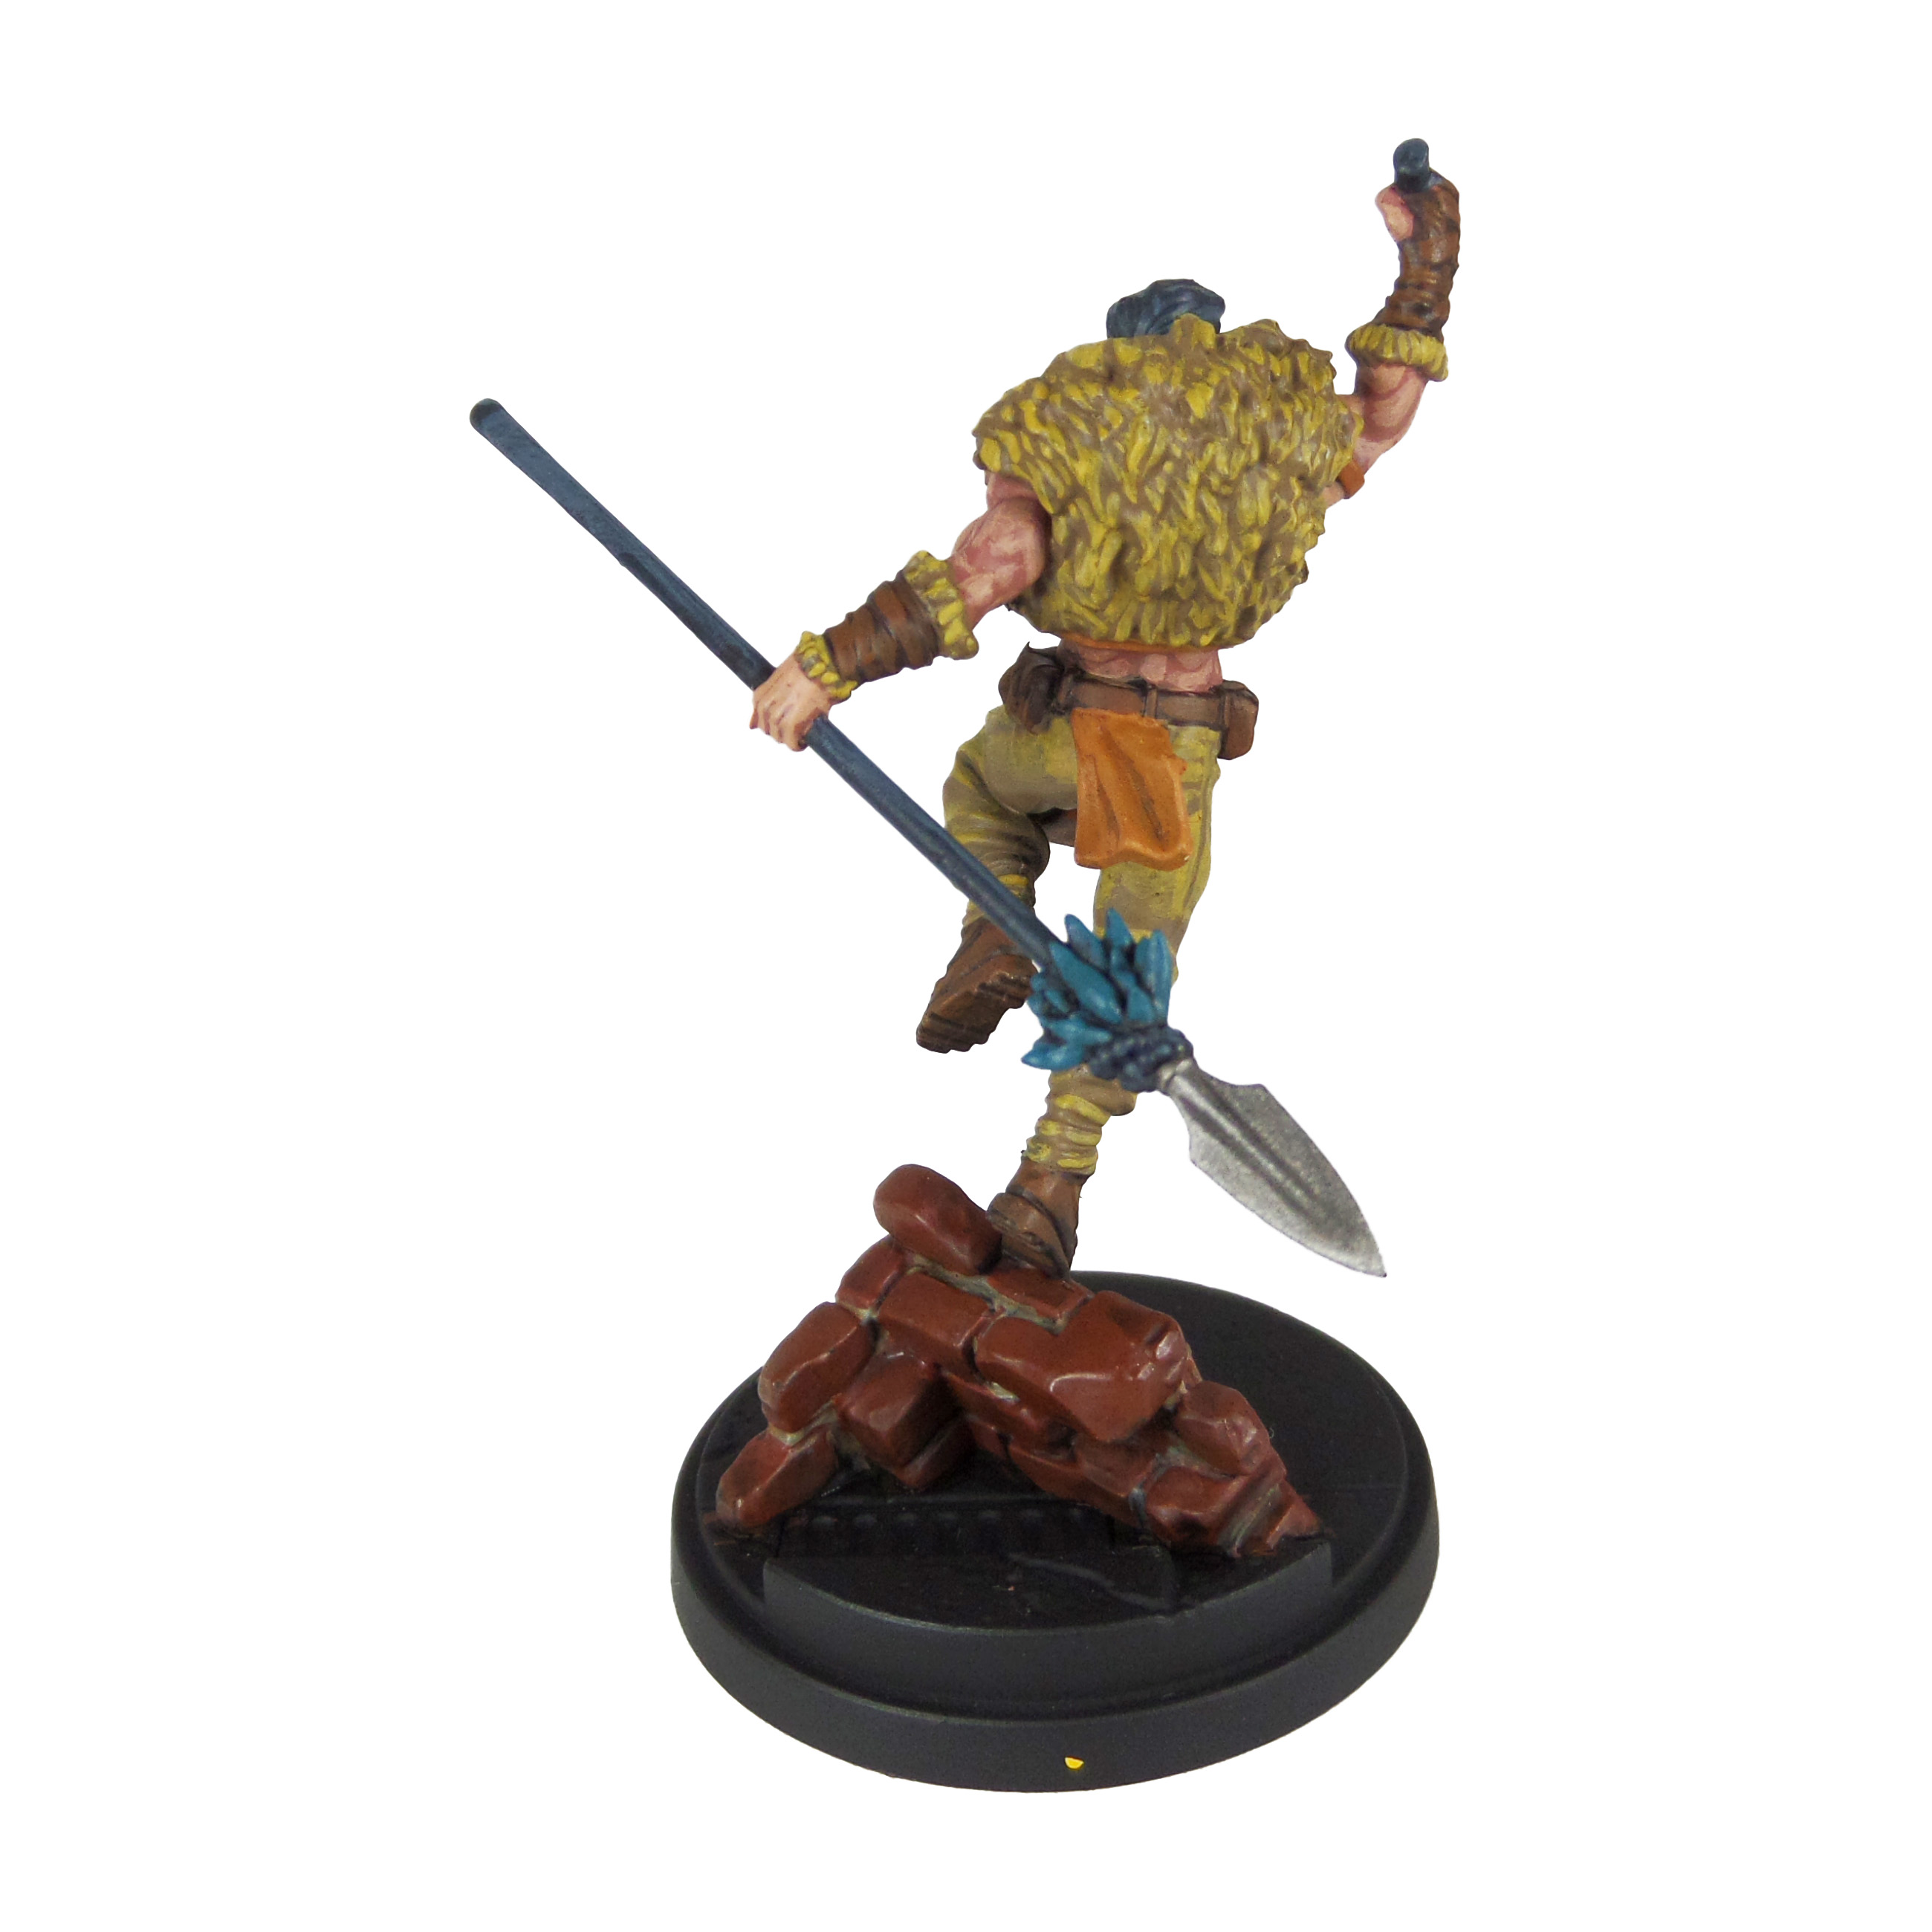
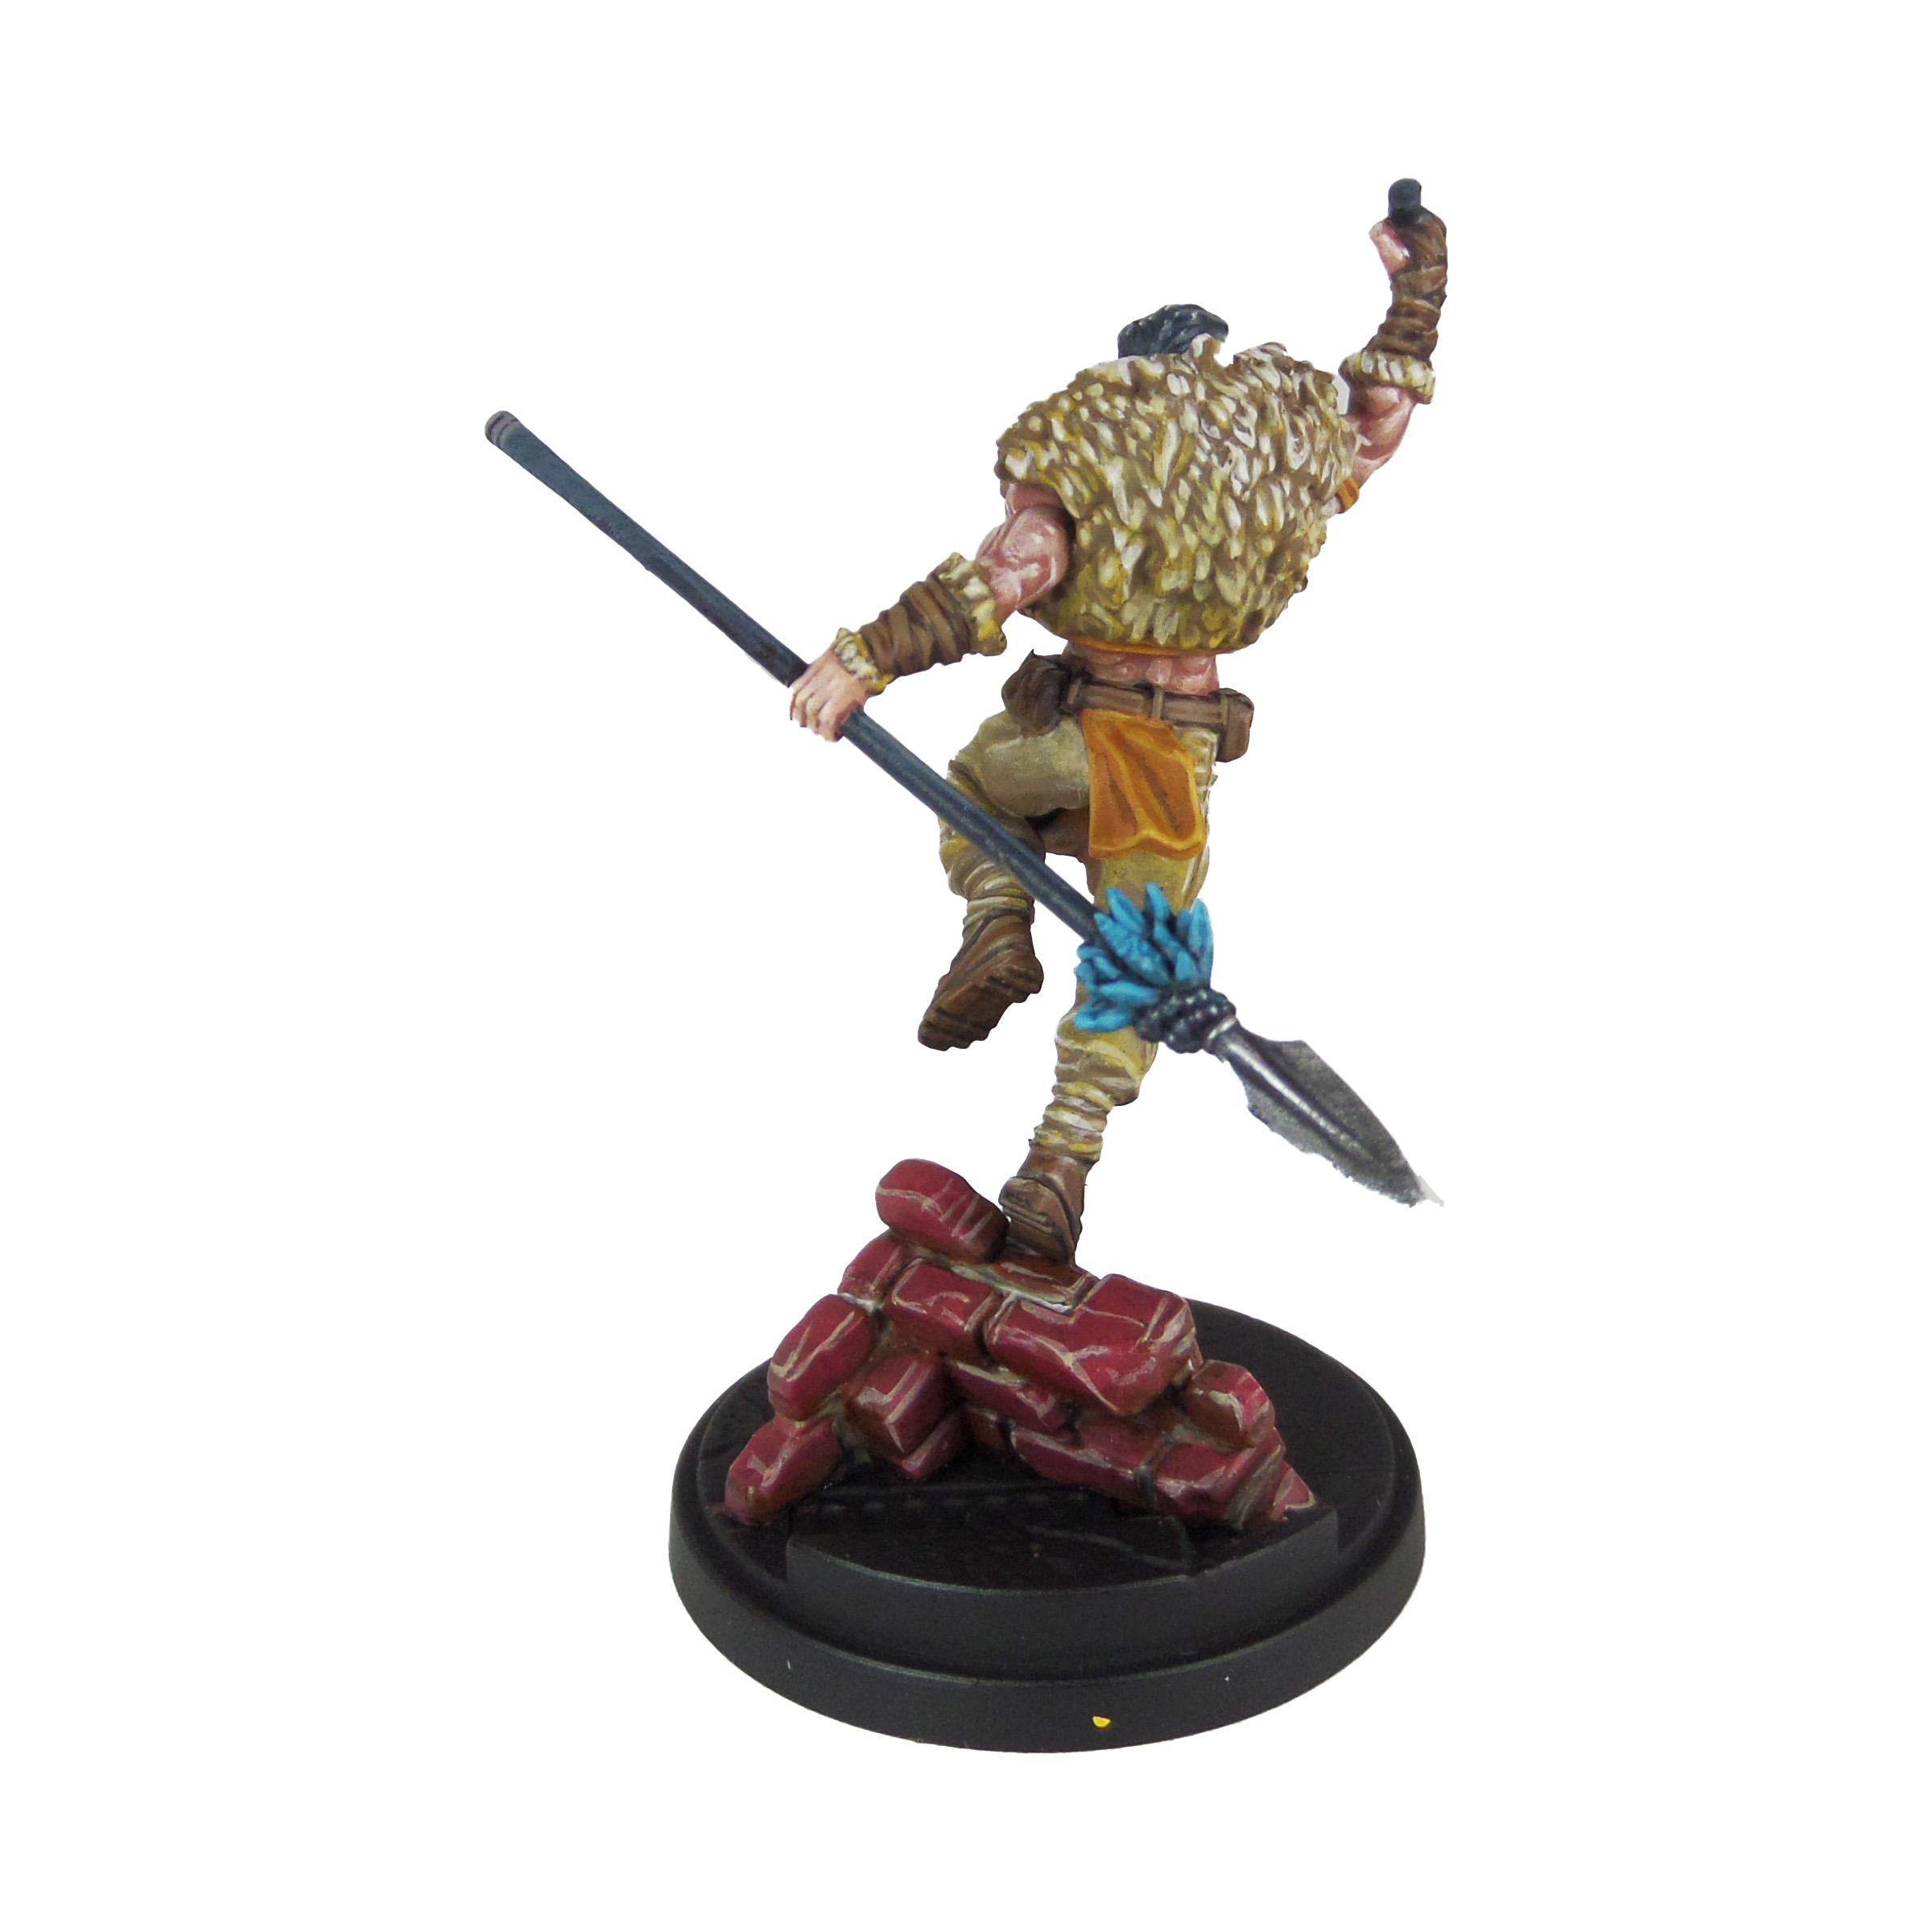
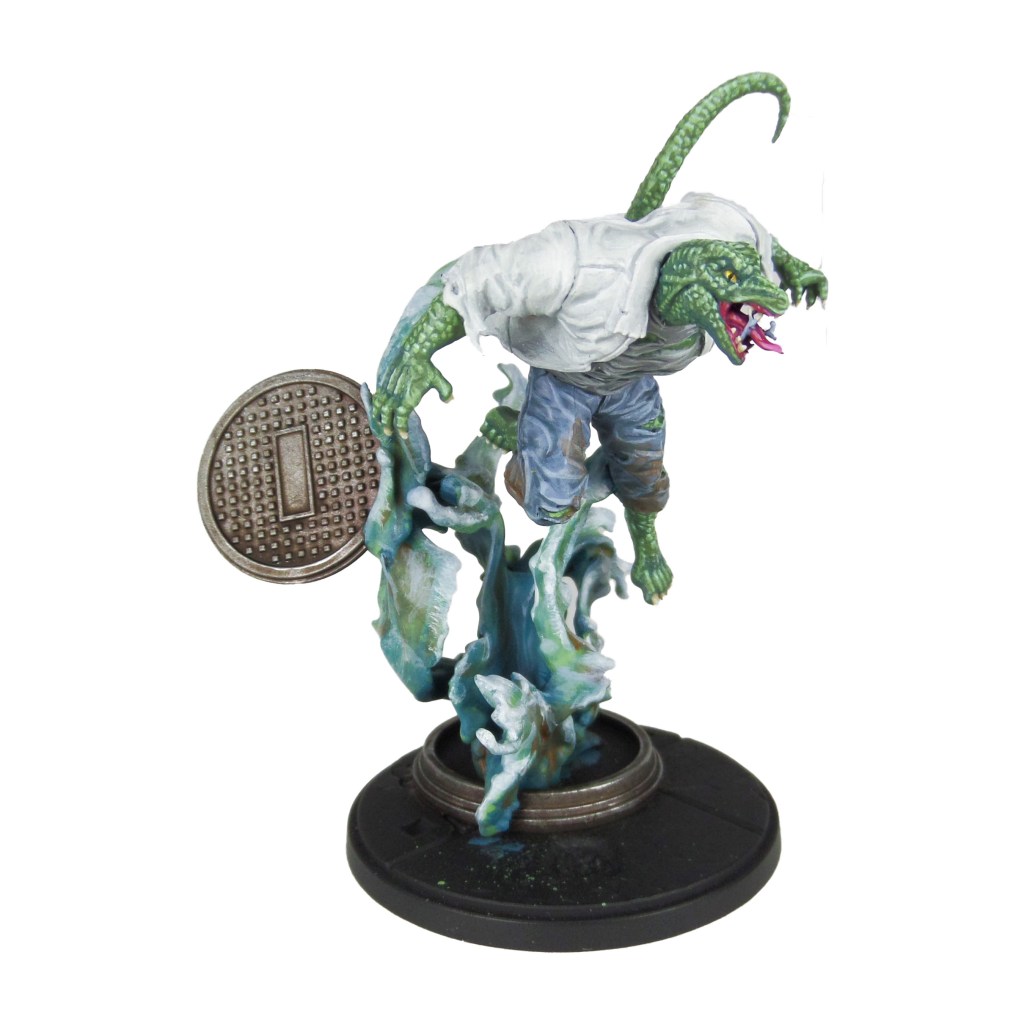
Welcome to my latest painting guide! Kraven the Hunter and Lizard are up this week, with another glorious set of models.
I need your support. Because my guides takes time and supplies to do, any support you can offer would mean the world to me. A supportive message in the comments is enough, but if you have the means why not send me a gift on Ko-Fi or PayPal. Thank you!
Prep: Fully build both models. Undercoat black.
Kraven
Stage 1
Bugman’s Glow: Apply a basecoat to the skin.
Skrag Brown: Apply a basecoat to the waistcoat and tabard.
Steel Legion Drab: Apply a basecoat to the mane and trousers.
Incubi Darkness: Apply a basecoat to the spear, weapon handle and hair.
Rhinox Hide: Apply a basecoat to the wrist wrappings, boots, pouches and belt.
Leadbelcher: Apply a basecoat to the weapon heads and belt buckle.
Sotek Green: Apply a basecoat to the feathers on the spear.
Doombull Brown: Apply a basecoat to the bricks.
Karak Stone: Apply a basecoat to the mortar between the bricks.
Sycorax Bronze: Apply a basecoat to the sign.
Stage 2
Cadian Fleshtone: Apply a layer to the skin.
Deathclaw Brown: Apply a layer to the waistcoat and tabard.
Zamesi Desert: Apply a layer to the mane and trousers.
Thunderhawk Blue: Apply a layer to the spear, weapon handle and hair.
Mournfang Brown: Apply a layer to the wrist wrappings, boots, pouches and belt.
Nuln Oil: Apply a shade to the metals and feathers on the spear.
Agrax Earthshade: Apply a shade to the brick wall and sign.
Trollslayer Orange: Apply a layer to the lion eyes.
Stage 3
Basic Skin Tone: Apply a thinned layer to the skin.
Tau Light Ochre: Apply an edge highlight to the waistcoat and tabard.
Ushabti Bone: Apply a thinned layer to the mane, trousers and pendant teeth.
Dawnstone: Apply a line highlight to the spear, weapon handle and hair.
Steel Legion Drab: Apply a line highlight to the wrist wrappings, boots, pouches and belt.
Drakenhof Nightshade: Apply a shade to the metals.
Sotek Green: Apply a line highlight to the feathers on the spear.
Wazdakka Red: Apply a thinned layer to the bricks.
Karak Stone: Apply a layer to the mortar.
Canoptek Alloy: Apply a layer to the sign.
White Scar: Apply a layer to the eyes.
Stage 4
Light Flesh 70.928: Apply a line highlight to the skin.
Zamesi Desert: Apply a line highlight to the waistcoat and tabard.
Pallid Wych Flesh: Apply a line highlight to the mane, trousers and pendant teeth. Apply a spot highlight to the mortar.
Celestra Grey: Apply a spot highlight to the spear, weapon handle and hair.
Karak Stone: Apply a spot highlight to the wrist wrappings, boots, pouches and belt. Apply a line highlight to the bricks.
Ironbreaker: Apply an edge highlight to the metals.
Temple Guard Blue: Apply a line highlight to the feathers.
Abaddon Black: Apply a pupil to each eye.
Leopard Print
Stage 1
Skrag Brown: Apply small spots to the tabards.
Stage 2
Abaddon Black: Carefully apply ‘c’s around the spots, add smaller ‘c’s to any gaps.
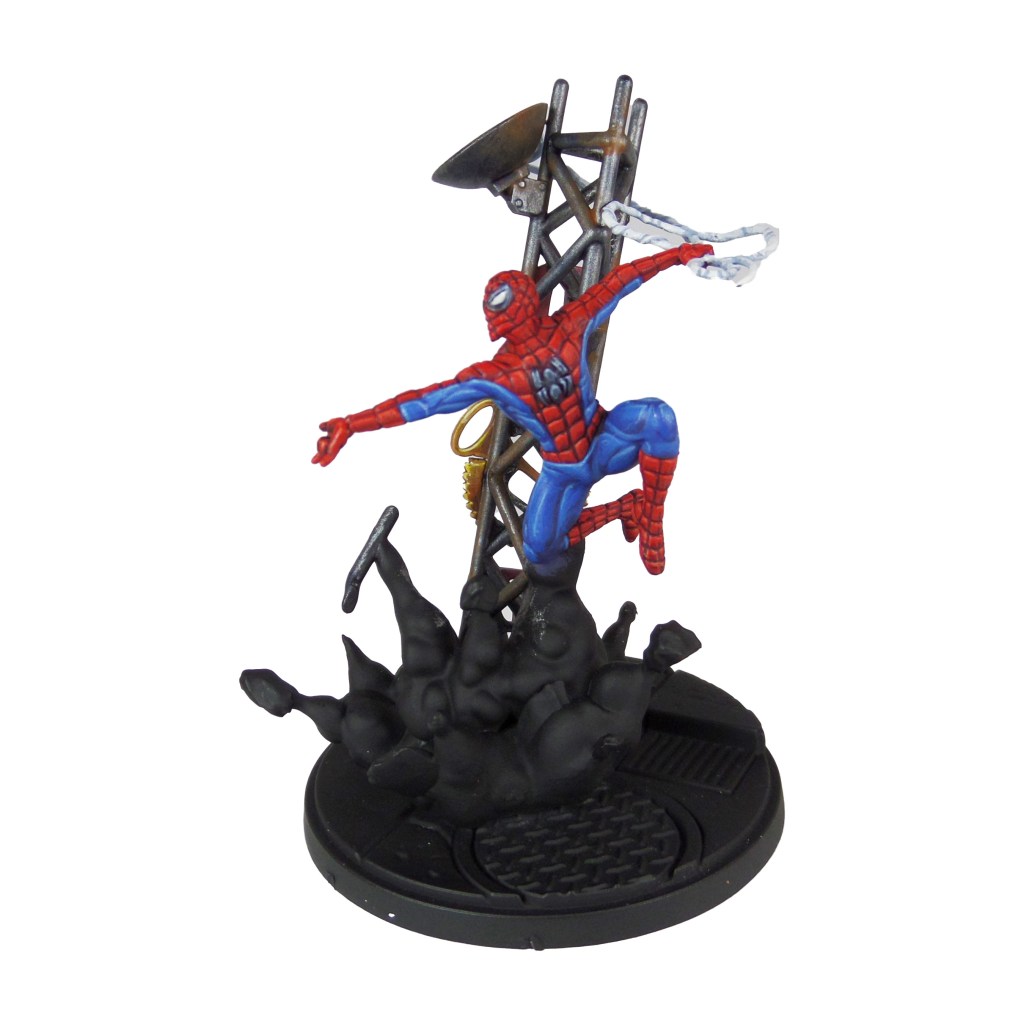
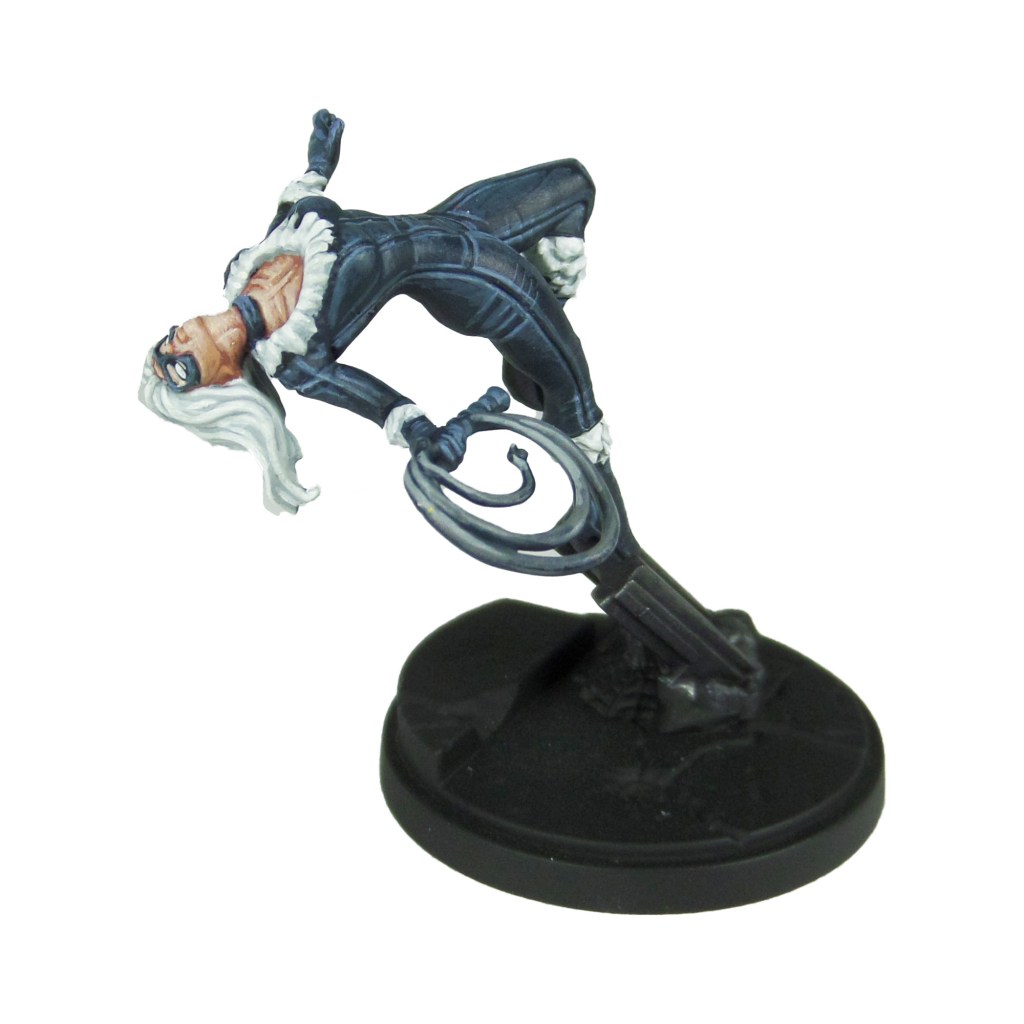
Welcome to my latest painting guide! Today we’re looking at the Amazing Spider-Man, a truly ‘amazing’ model, and Black Cat, one of the coolest ‘flip’ models I’ve seen.
I need your support. Because my guides takes time and supplies to do, any support you can offer would mean the world to me. A supportive message in the comments is enough, but if you have the means why not send me a gift on Ko-Fi or PayPal. Thank you!
Prep: Fully build both models. Undercoat black.
The Amazing Spider-man
Stage 1
Mephiston Red: Apply a basecoat to the red suit sections.
Macragge Blue: Apply a basecoat to the blue sections of the suit.
Leadbelcher: Apply a basecoat to the tower.
Fenrisian Grey: Apply a basecoat to the webbing.
Incubi Darkness: Apply a basecoat to the spider symbols and eye border.
Celestra Grey: Apply a basecoat to the eyes.
Khorne Red: Apply a basecoat to the Daily Bugle lettering.
Skrag Brown: Apply a basecoat to the Daily Bugle symbol.
Stage 2
Druchii Violet: Apply a shade to the red areas of the suit. Use a fairly light coat as this stage is to bring out the webbing.
Caledor Sky: Apply a layer to the blue sections of the suit.
Drakenhof Nightshade: Apply a shade to the tower and dish.
Blue Horror: Apply a layer to the webbing.
Thunderhawk Blue: Apply a thinned layer to the spider symbols and eye lining.
Ulthuan Grey: Apply a layer to the eyes.
Wazdakka Red: Apply an edge highlight and a thinned layer to the Daily Bugle lettering.
Tau Light Ochre: Apply an edge highlight and a thinned layer to the Daily Bugle symbol.
Stage 3
Evil Sunz Scarlet: Apply a layer to the red sections of the suit.
Teclis Blue: Apply a line highlight to the blue sections of the bodysuit.
Skrag Brown: Make a mix with around 5 parts water and apply lightly to the random sections of the tower and dish.
White Scar: Apply a layer to the webbing and eyes.
Russ Grey: Apply a line highlight to the spider symbols and eye lining.
Evil Sunz Scarlet: Apply an edge highlight to the Daily Bugle lettering.
Flash Gitz Yellow: Apply an edge highlight to the Daily Bugle Symbol.
Stage 4
Wild Rider Red: Apply a line highlight to the top of each section of red suit.
Lothern Blue: Applya line highlight ot the blue sections of the suit.
Ironbreaker: Apply a light highlight to the tower and dish.
Fenrisian Grey: Apply a spot highlight to the spider symbols and eye lining.
Wild Rider Red: Apply an edge highlight to the top edges of the Daily Bugle lettering.
Dorn Yellow: Apply a spot highlight to the Daily Bugle Symbol.
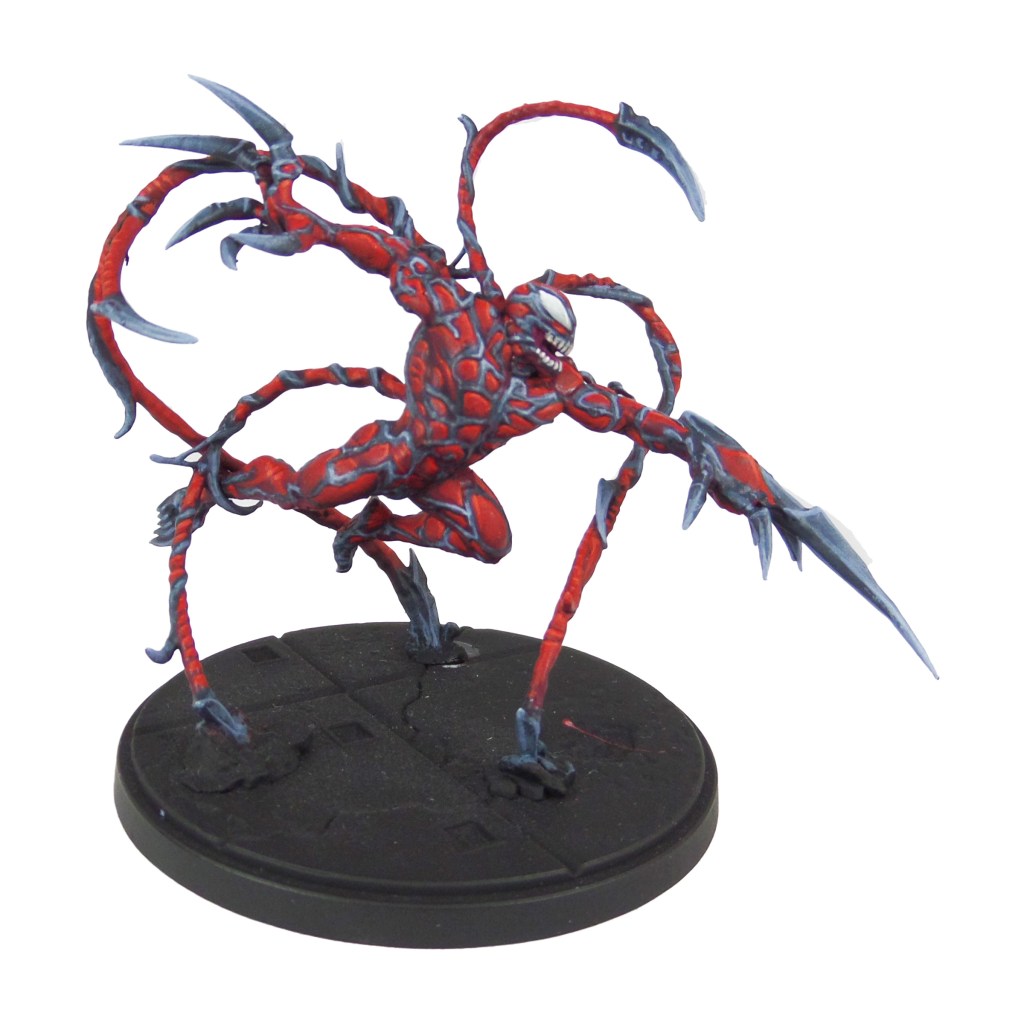
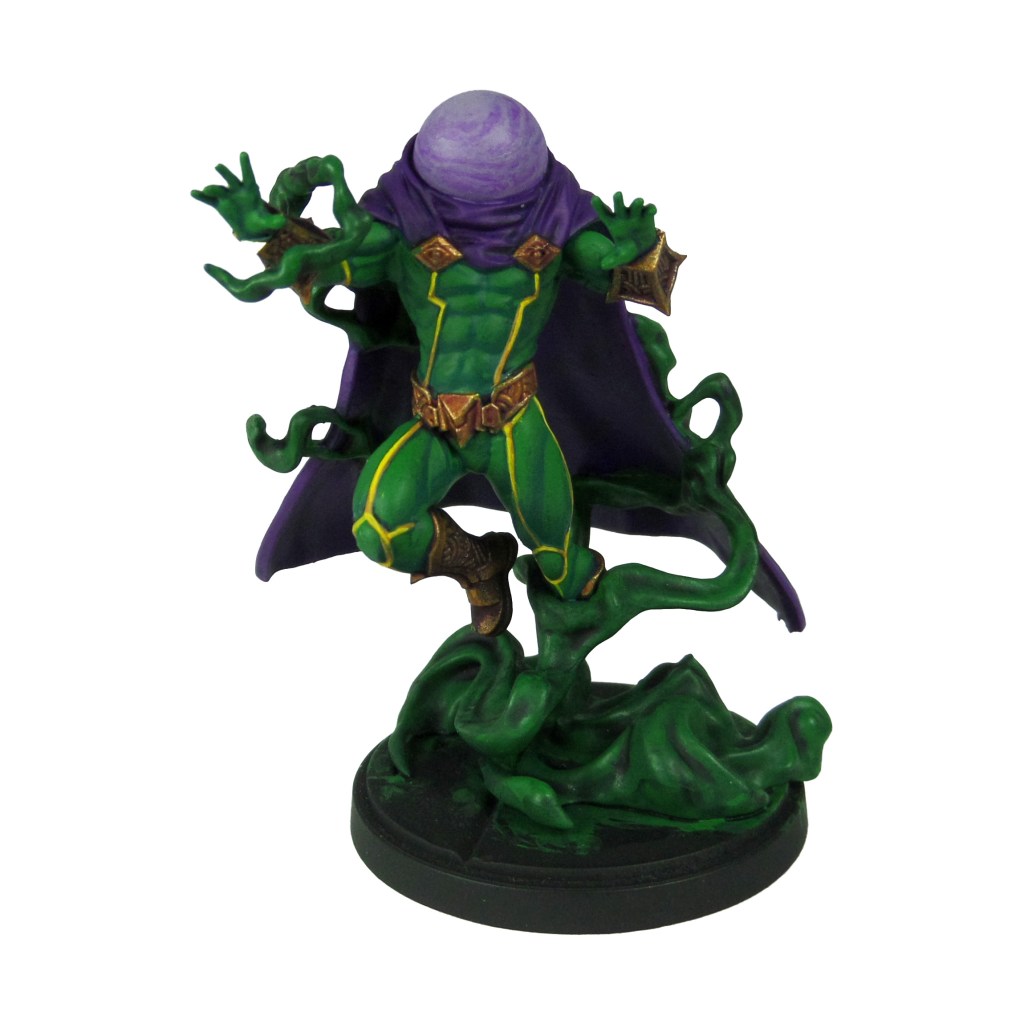
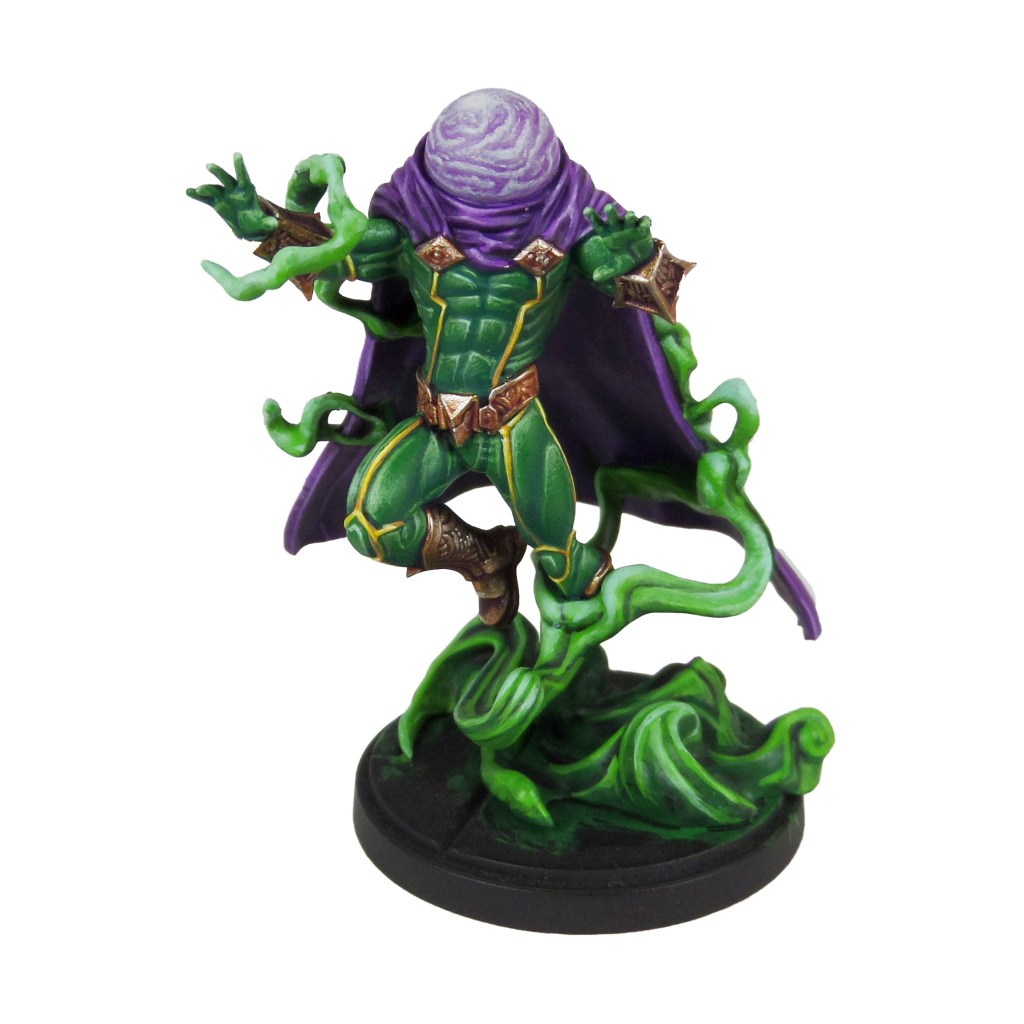
Welcome to my latest painting guide! We begin to flesh out the Spider-foes, with Carnage & Mysterio! Another fantastic set of sculpts that I couldn’t wait to get my hands on.
I need your support. Because my guides takes time and supplies to do, any support you can offer would mean the world to me. A supportive message in the comments is enough, but if you have the means why not send me a gift on Ko-Fi or PayPal. Thank you!
Prep: Fully build both models. Undercoat black.
Carnage
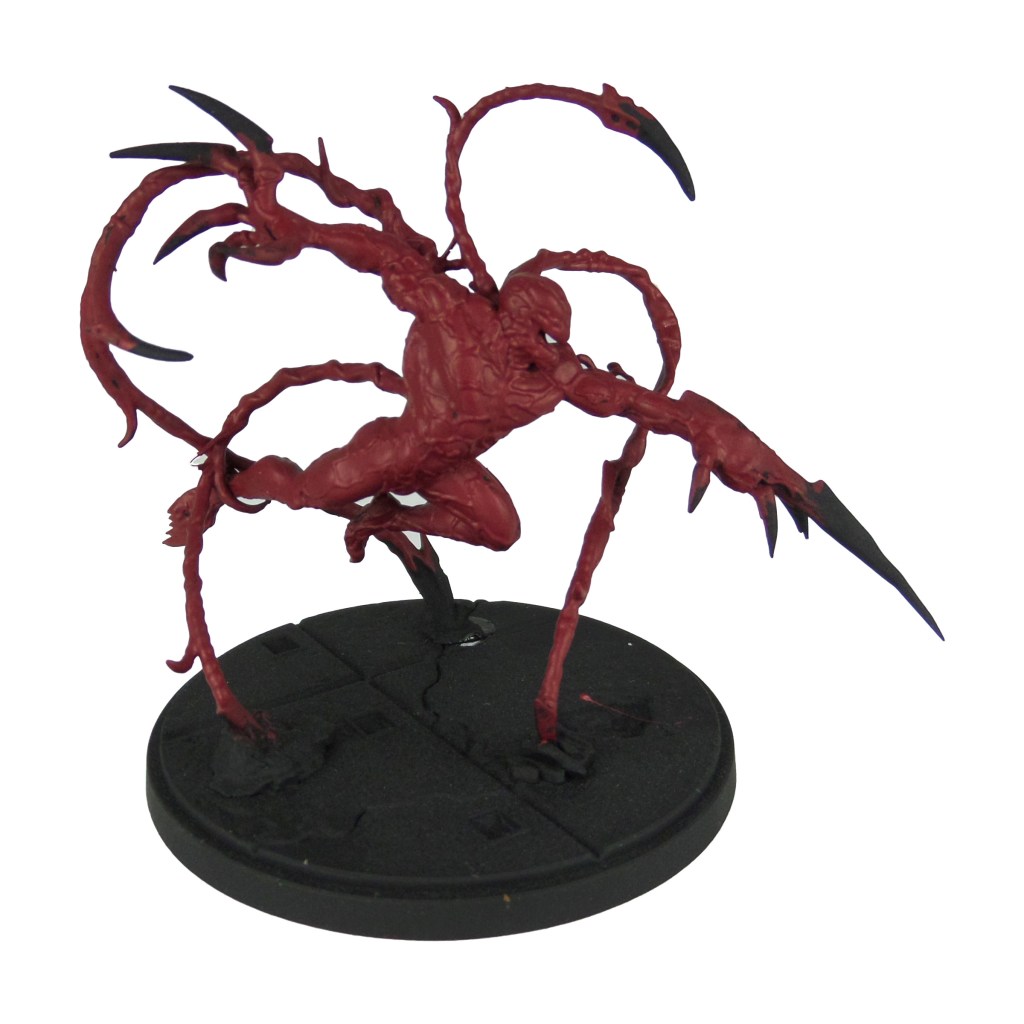
Stage 1
Khorne Red: Apply a basecoat to the whole model.
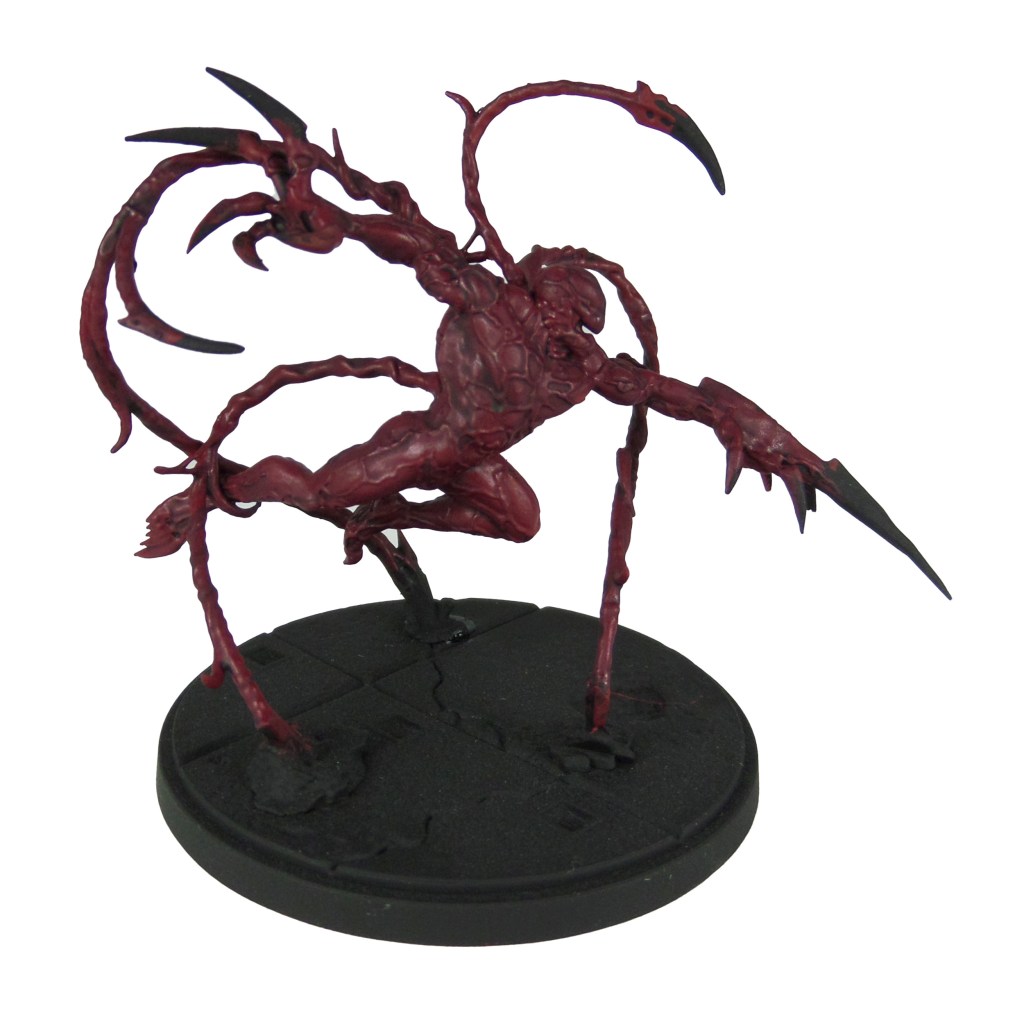
Stage 2
Druchii Violet: Apply a shade to the whole model.
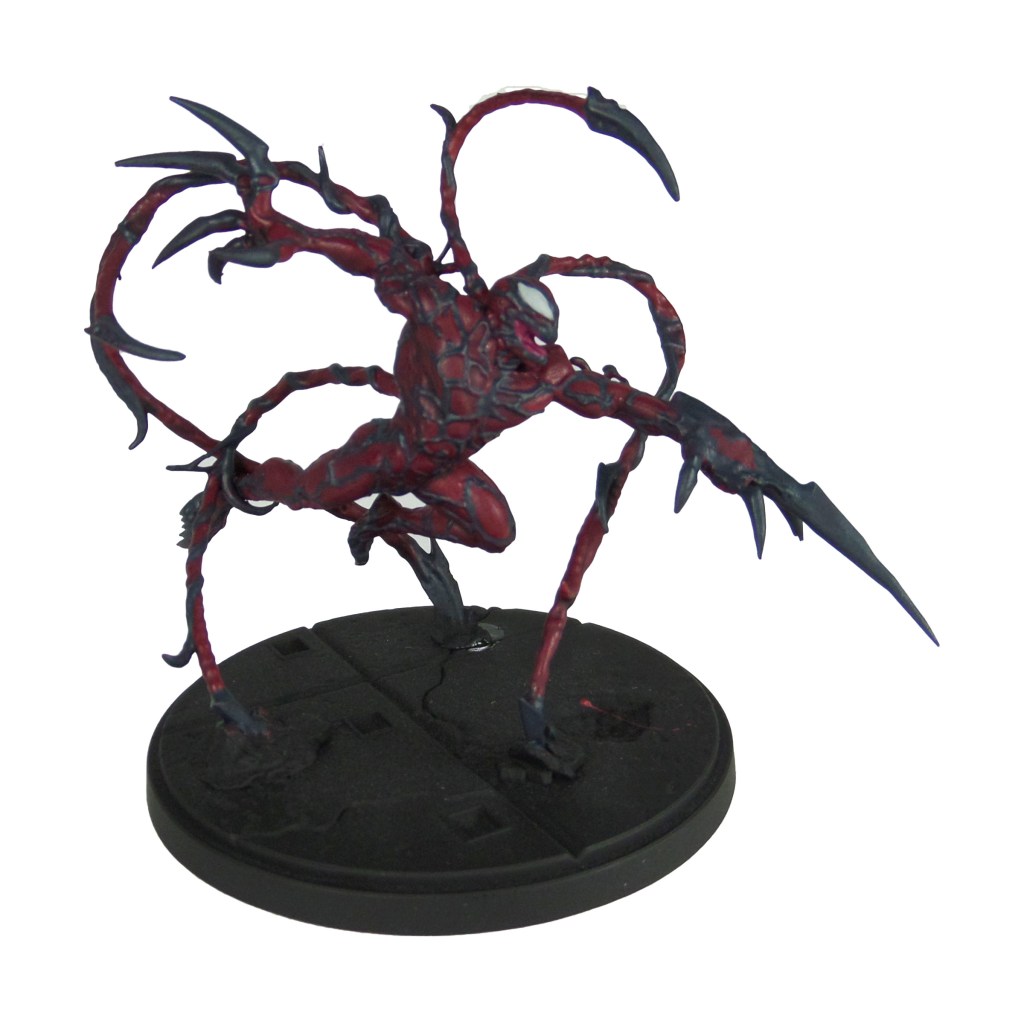
Stage 3
Incubi Darkness: Apply a basecoat to the webbing and claws/blades.
Celestra Grey: Apply a basecoat to the eyes.
Screamer Pink: Apply a basecoat to the mouth.
Stage 4
Mephiston Red: Apply a layer to the skin.
Thunderhawk Blue: Apply a layer to the webbing.
Ulthuan Grey: Apply a layer to the eyes.
Carrionburg Crimson: Apply a shade to the mouth.
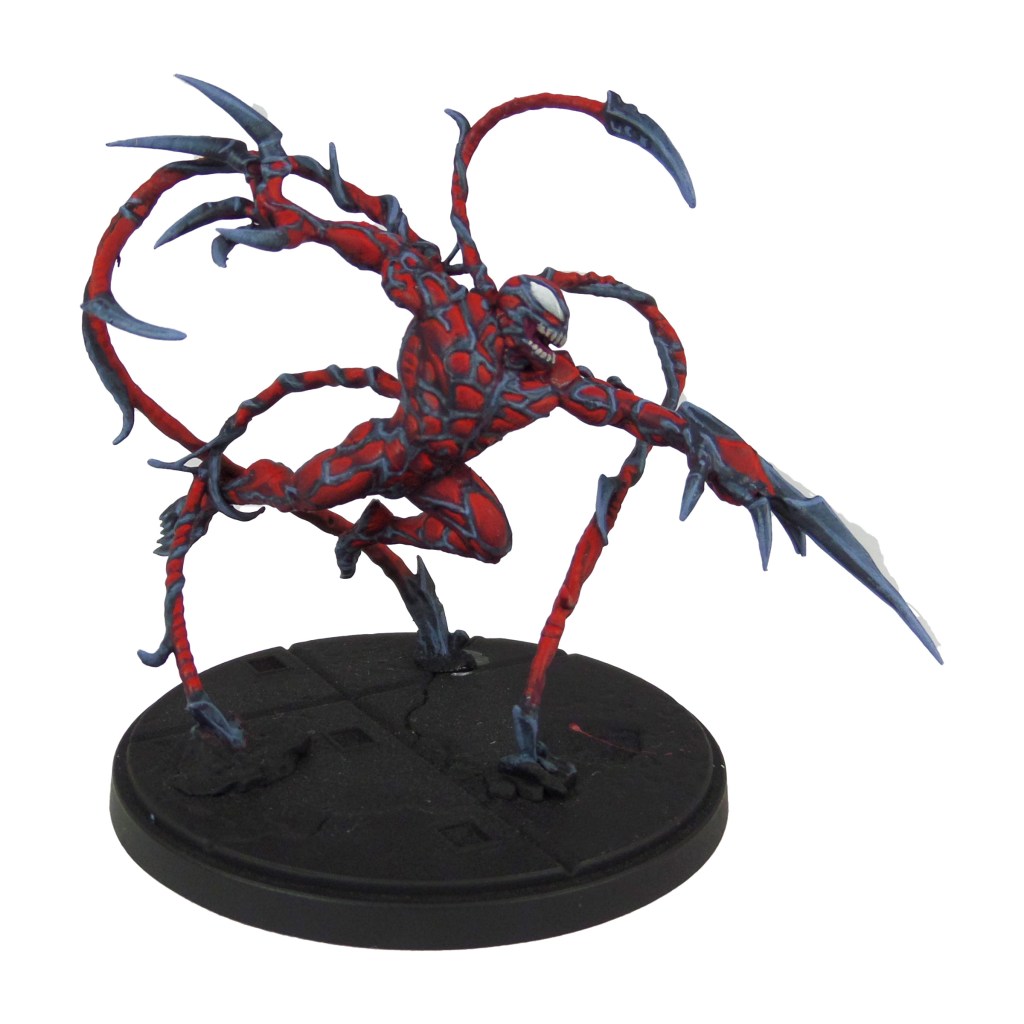
Stage 5
Evil Sunz Scarlet: Apply a line highlight to the skin.
Russ Grey: Apply a line highlight to the webbing.
White Scar: Apply a layer to the eyes.
Rakarth Flesh: Apply a layer to the teeth.
Stage 6
Wild Rider Red: Apply a spot highlight to the skin.
Fenrisian Grey: Apply a spot highlight to the webbing.
Pallid Wych Flesh: Apply a spot highlight tothe tips of the teeth.
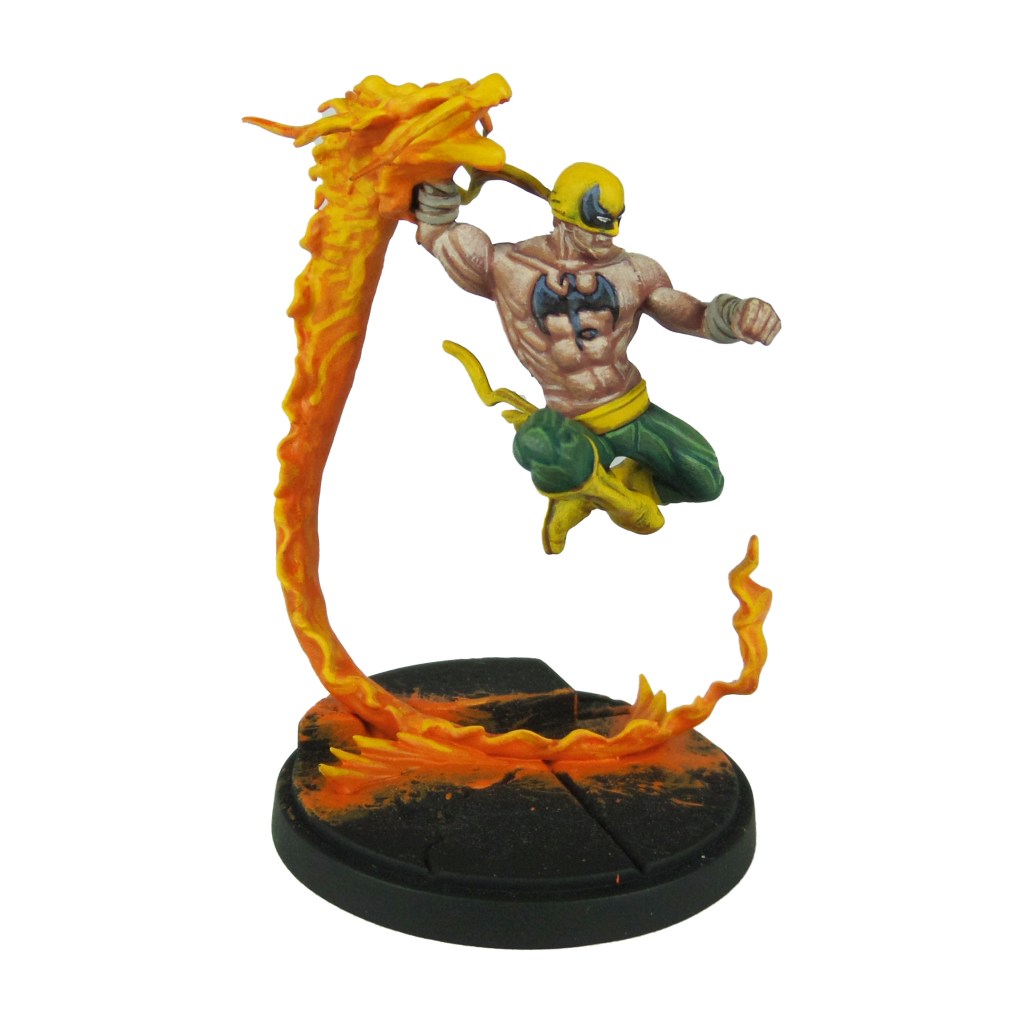
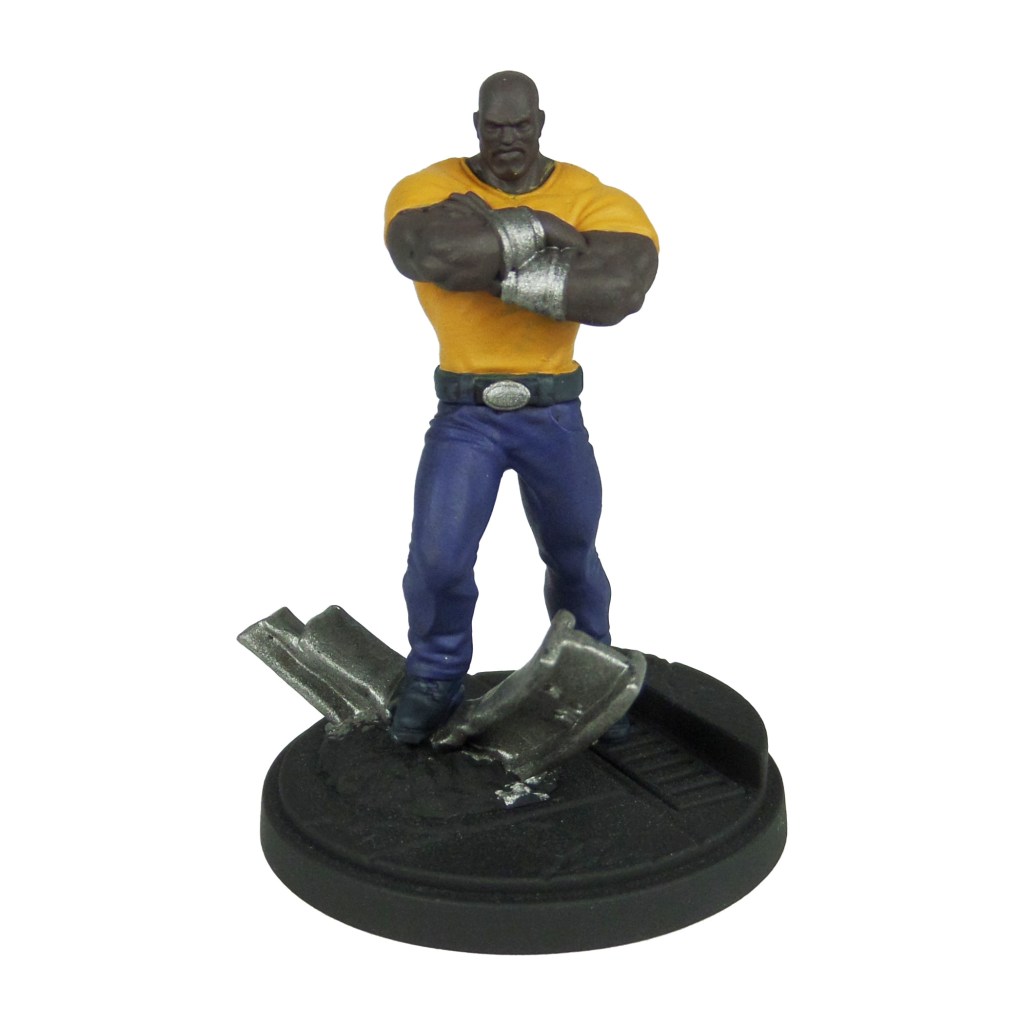
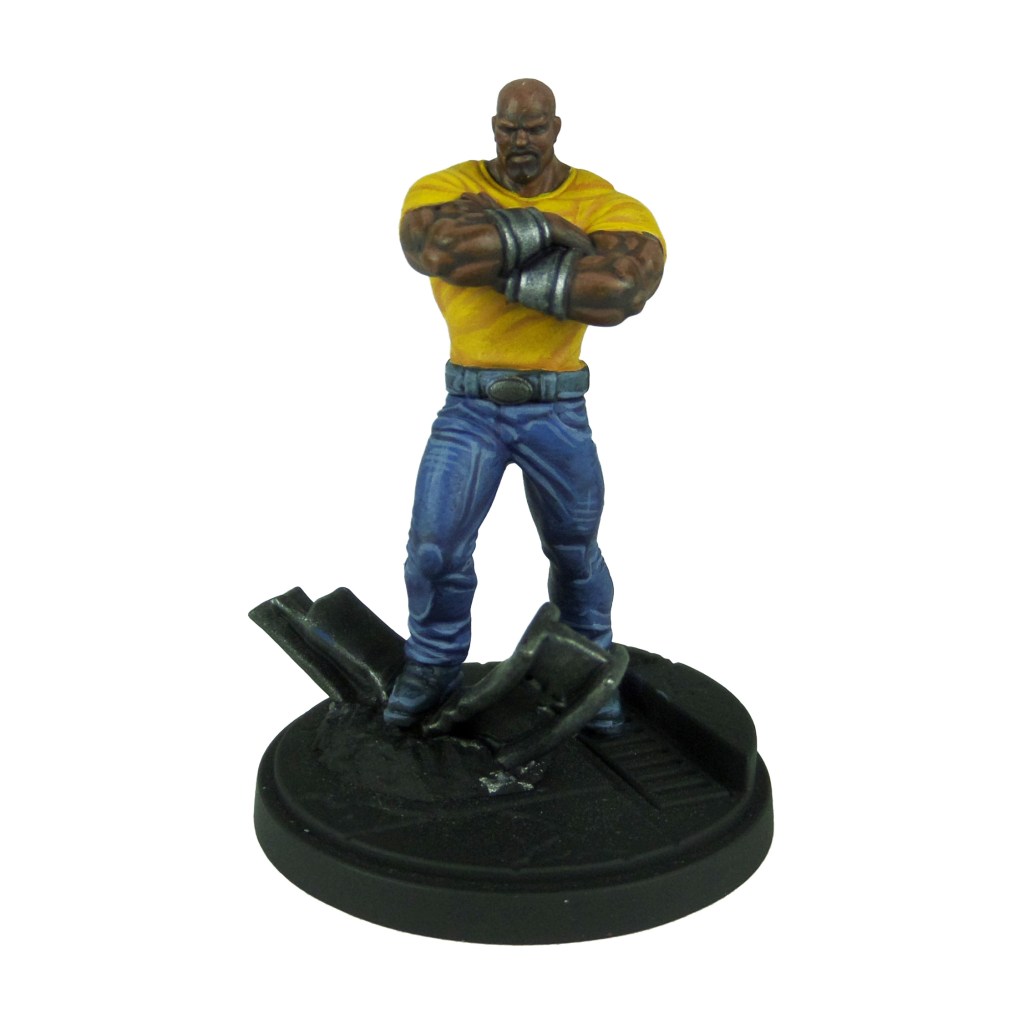
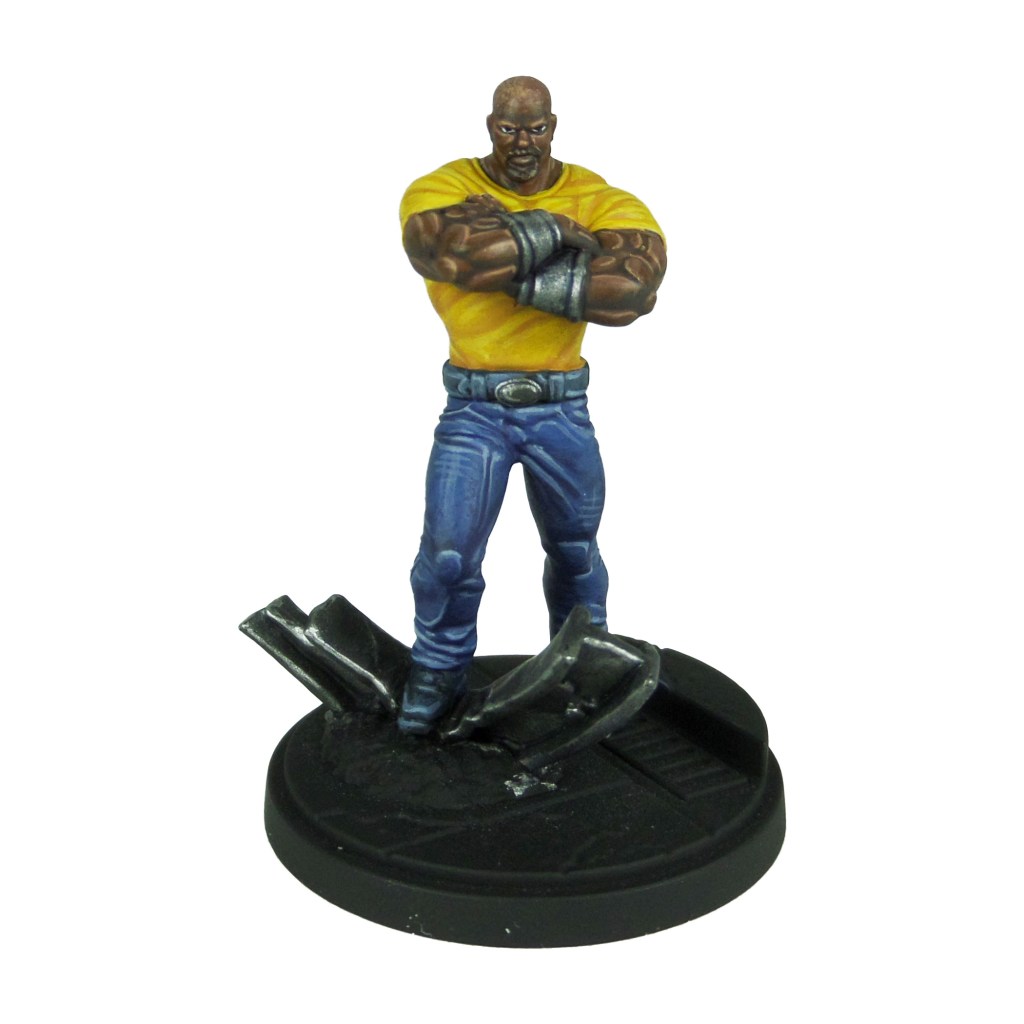
Welcome to my latest painting guide! This time covering the Heroes for Hire. Whilst Luke Cage might be an intimidating if a little boring sculpt, Iron Fist punches it out the park!
I need your support. Because my guides takes time and supplies to do, any support you can offer would mean the world to me. A supportive message in the comments is enough, but if you have the means why not send me a gift on Ko-Fi or PayPal. Thank you!
Prep: Fully build both models. Undercoat black.
Iron Fist
Stage 1
Kabalite Green: Apply a basecoat to the trousers.
Bugman’s Glow: Apply a basecoat to the skin.
Averland Sunset: Apply a basecoat to the boots, belt and cowl.
Trollslayer Orange: Apply a basecoat to the fire.
Karak Stone: Apply a basecoat to the wrist wrappings.
Abaddon Black: Apply a basecoat to the dragon symbol and eyes.
Stage 2
Loren Forest: Apply a layer to the trousers.
Cadian Fleshtone: Apply a layer to the skin.
Agrax Earthshade: Apply a shade to the boots, belt, cowl and wrist wrappings.
Fire Dragon Bright: Apply a layer to the fire.
Incubi Darkness: Apply a layer to the dragon and eye designs.
Celestra Grey: Apply a layer to the eyes.
Stage 3
Skarsnik Green: Apply a line highlight to the trousers.
Basic Skin Tone 70.815: Apply a thinned layer of the skin.
Yriel Yellow: Apply a thinned layer to the boots, belt and cowl. Apply a thinned layer to the fire, focussing on the headband raised areas.
Russ Grey: Apply a line highlight to the dragon and eye designs.
White Scar: Apply a layer to the eyes.
Rakarth Flesh: Apply a layer to the wrist wrappings.
Stage 4
Orruk Flesh: Apply a spot highlight to the trousers.
Light Flesh 70.928: Apply a line highlight to the skin.
Dorn Yellow: Apply a line highlight to the boots, belt and cowl. Also apply a thinned layer to the head of the flames.
Fenrisian Grey: Apply a spot highlight to the dragon and eye designs.
Pallid Wych Flesh: Apply a line highlight to the wrist wrappings.
Welcome to my latest painting guide! Today I’m tackling the the amazing Captain America & War Machine set. This obviously has a few similarities with the Steve Rogers Captain America, so check out that guide for some close ups of how to paint the shield.
I need your support. Because my guides takes time and supplies to do, any support you can offer would mean the world to me. A supportive message in the comments is enough, but if you have the means why not send me a gift on Ko-Fi or PayPal. Thank you!
Prep: Fully build both models and undercoat black.
Captain America
Stage 1
Celestra Grey: Apply a basecoat to the cowl, detailing, sleeves and wing panels.
Khorne Red: Apply a basecoat to the boots, gloves, wings and lenses.
Kantor Blue: Apply a basecoat to the bodysuit.
Rhinox Hide: Apply a basecoat to the skin and hair.
Leadbelcher: Apply a basecoat to the belt, shield back, backpack and glasses frames.
Stage 2
Ulthuan Grey: Apply a layer to the whites.
Mephiston Red: Apply a layer to the reds.
Caledor Sky: Apply a layer to the blues.
Mournfang Brown: Apply a layer to the skin and a stippling to the hair.
Nuln Oil: Apply a shade to the metals.
Stage 3
White Scar: Apply a layer to the whites.
Evil Sunz Scarlet: Apply a thinned layer to the reds.
Teclis Blue: Apply a thinned layer to the blues.
Knight-Questor Flesh: Apply a line highlight to the skin.
Steel Legion Drab: Apply a spot highlight to the hair.
Drakenhof Nightshade: Apply a shade to the metals.
Stage 4
Wild Rider Red: Apply a line highlight to the reds.
Lothern Blue: Apply a line highlight to the blues.
Cadian Fleshtone: Apply a spot highlight to the skin.
Stormhost Silver: Apply a line highlight to the metals.
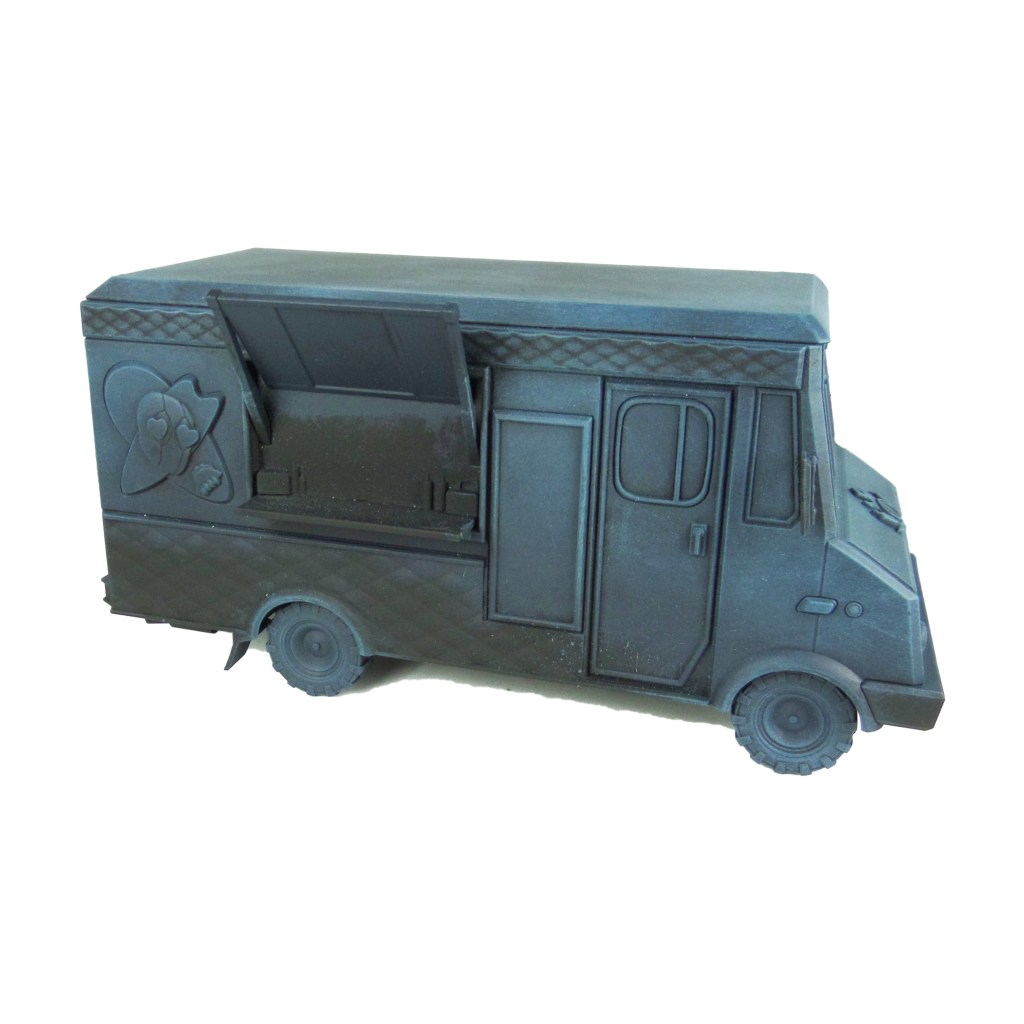
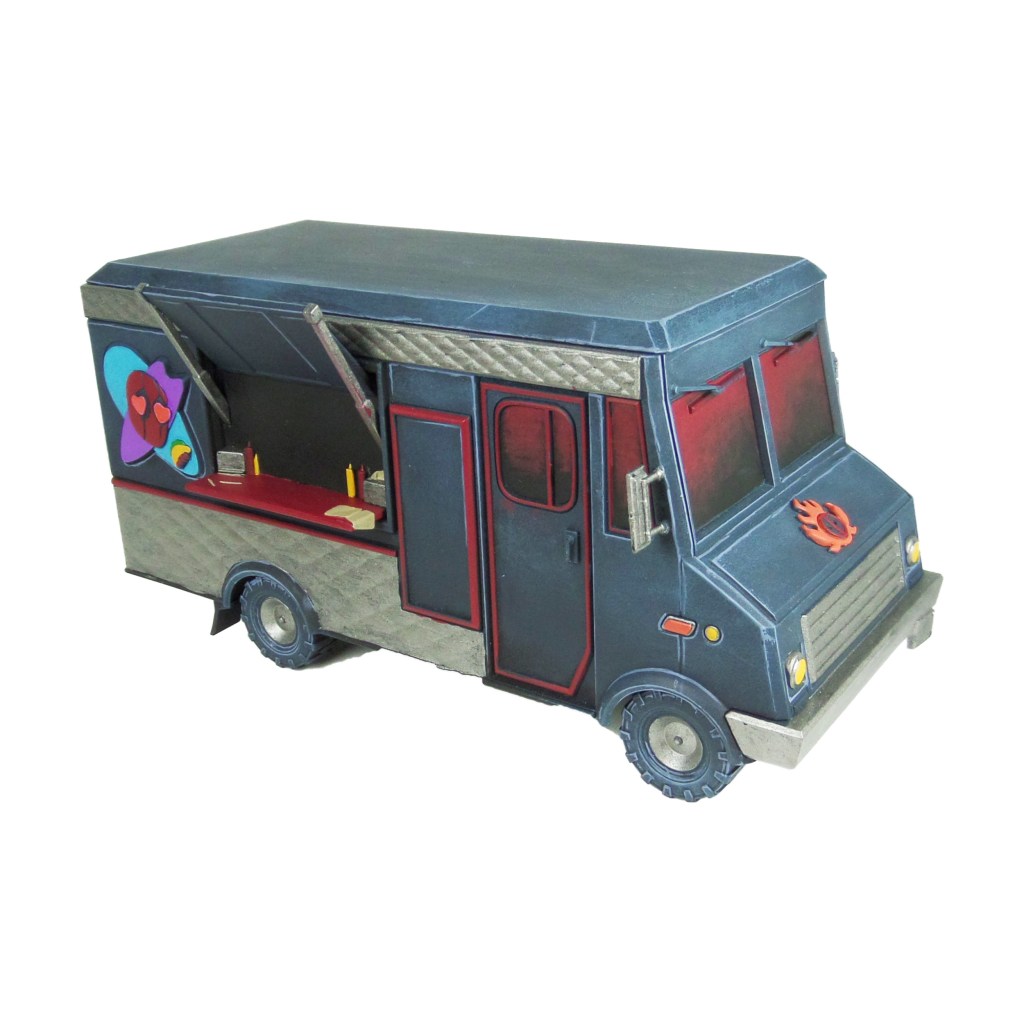
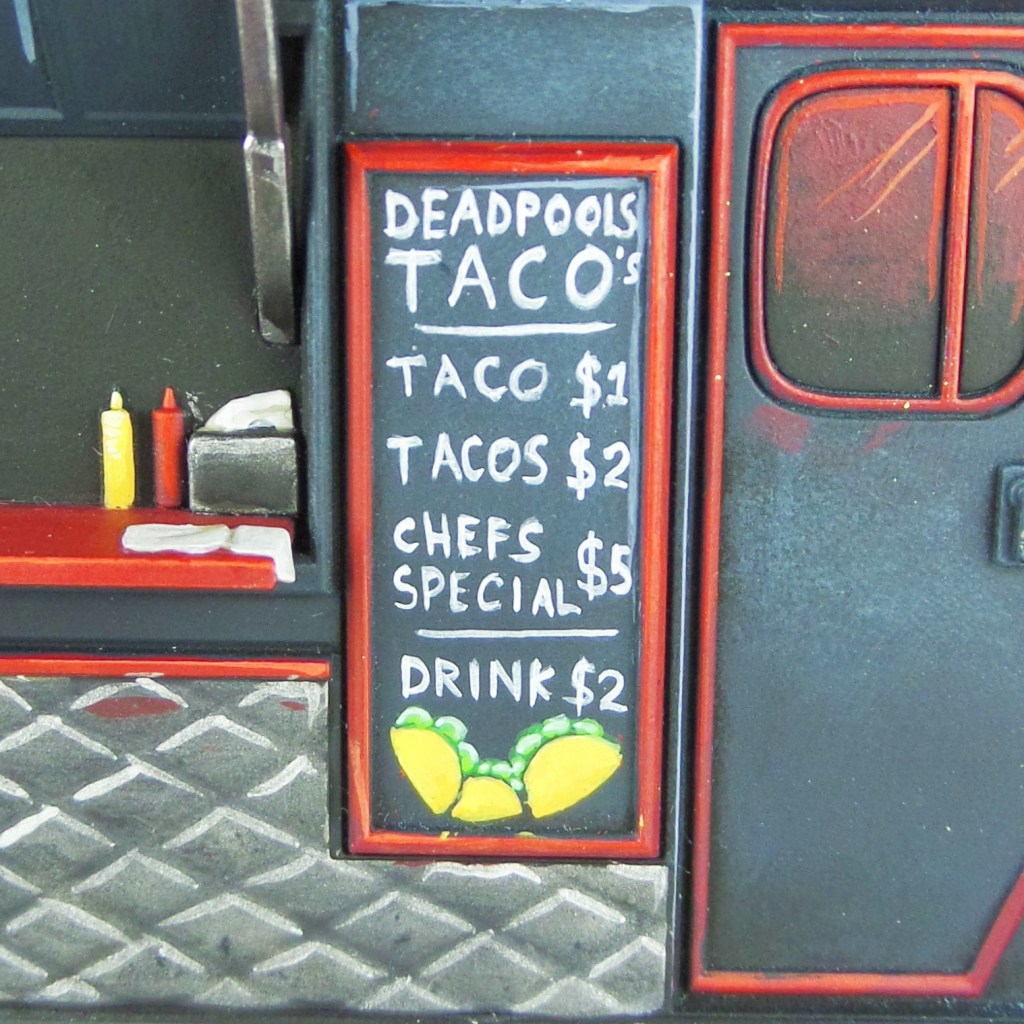
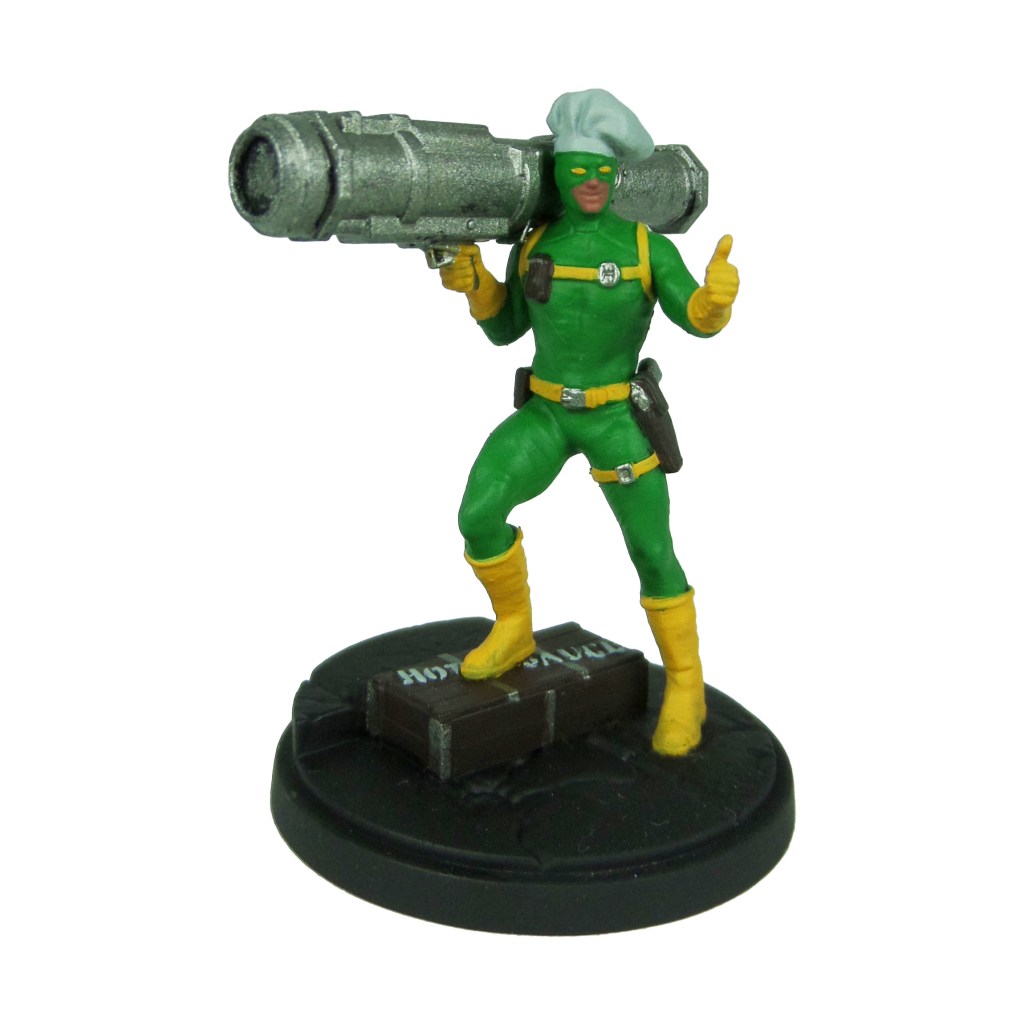
Welcome to my latest painting guide! Today I’m tackling the Taco Truck that comes with Deadpool. It’s a really fun addition to the pack loaded with details.
I need your support. Because my guides takes time and supplies to do, any support you can offer would mean the world to me. A supportive message in the comments is enough, but if you have the means why not send me a gift on Ko-Fi or PayPal. Thank you!
Prep: Fully build the truck and undercoat black.
Main Colour
Stage 1
Incubi Darkness: Apply a basecoat.
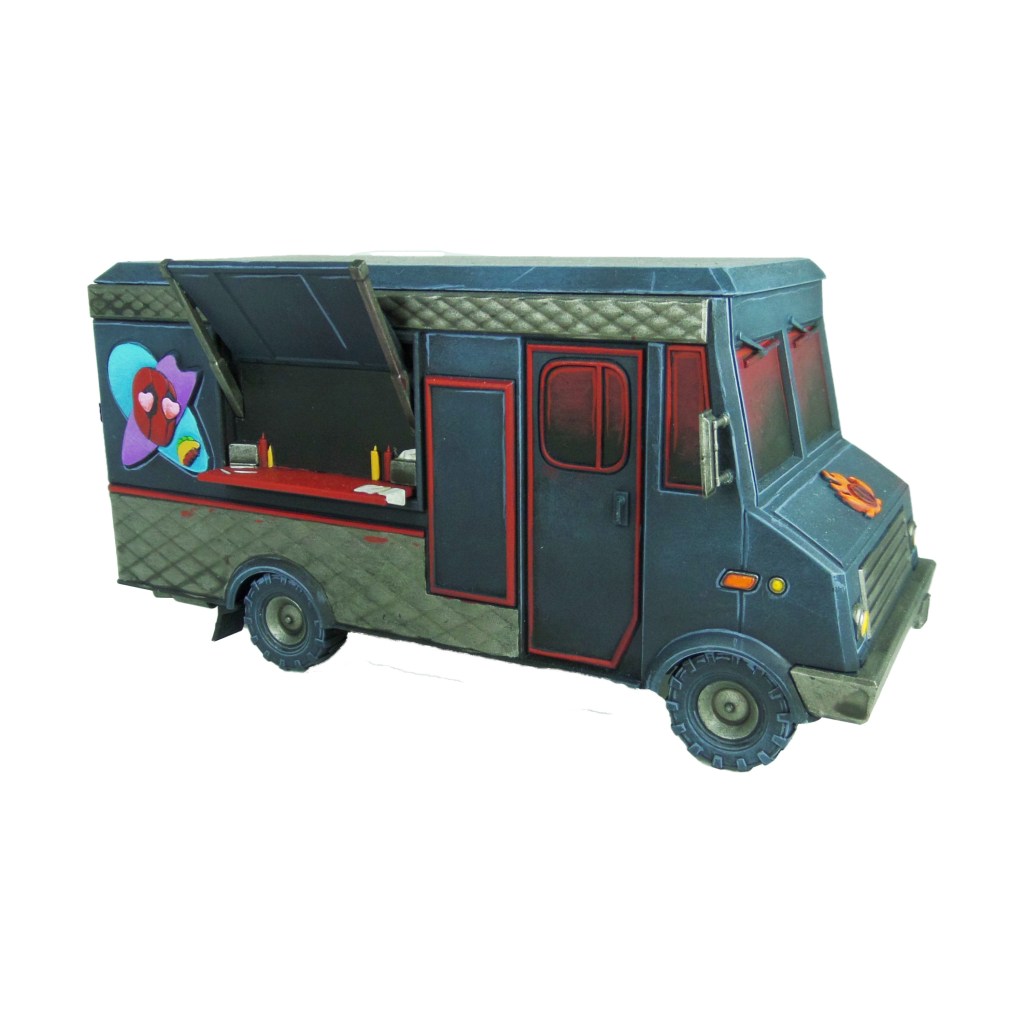
Stage 2
Thunderhawk Blue: Apply a drybrush, focussing toward the top and edges.
Stage 3
Russ Grey: Apply a line highlight.
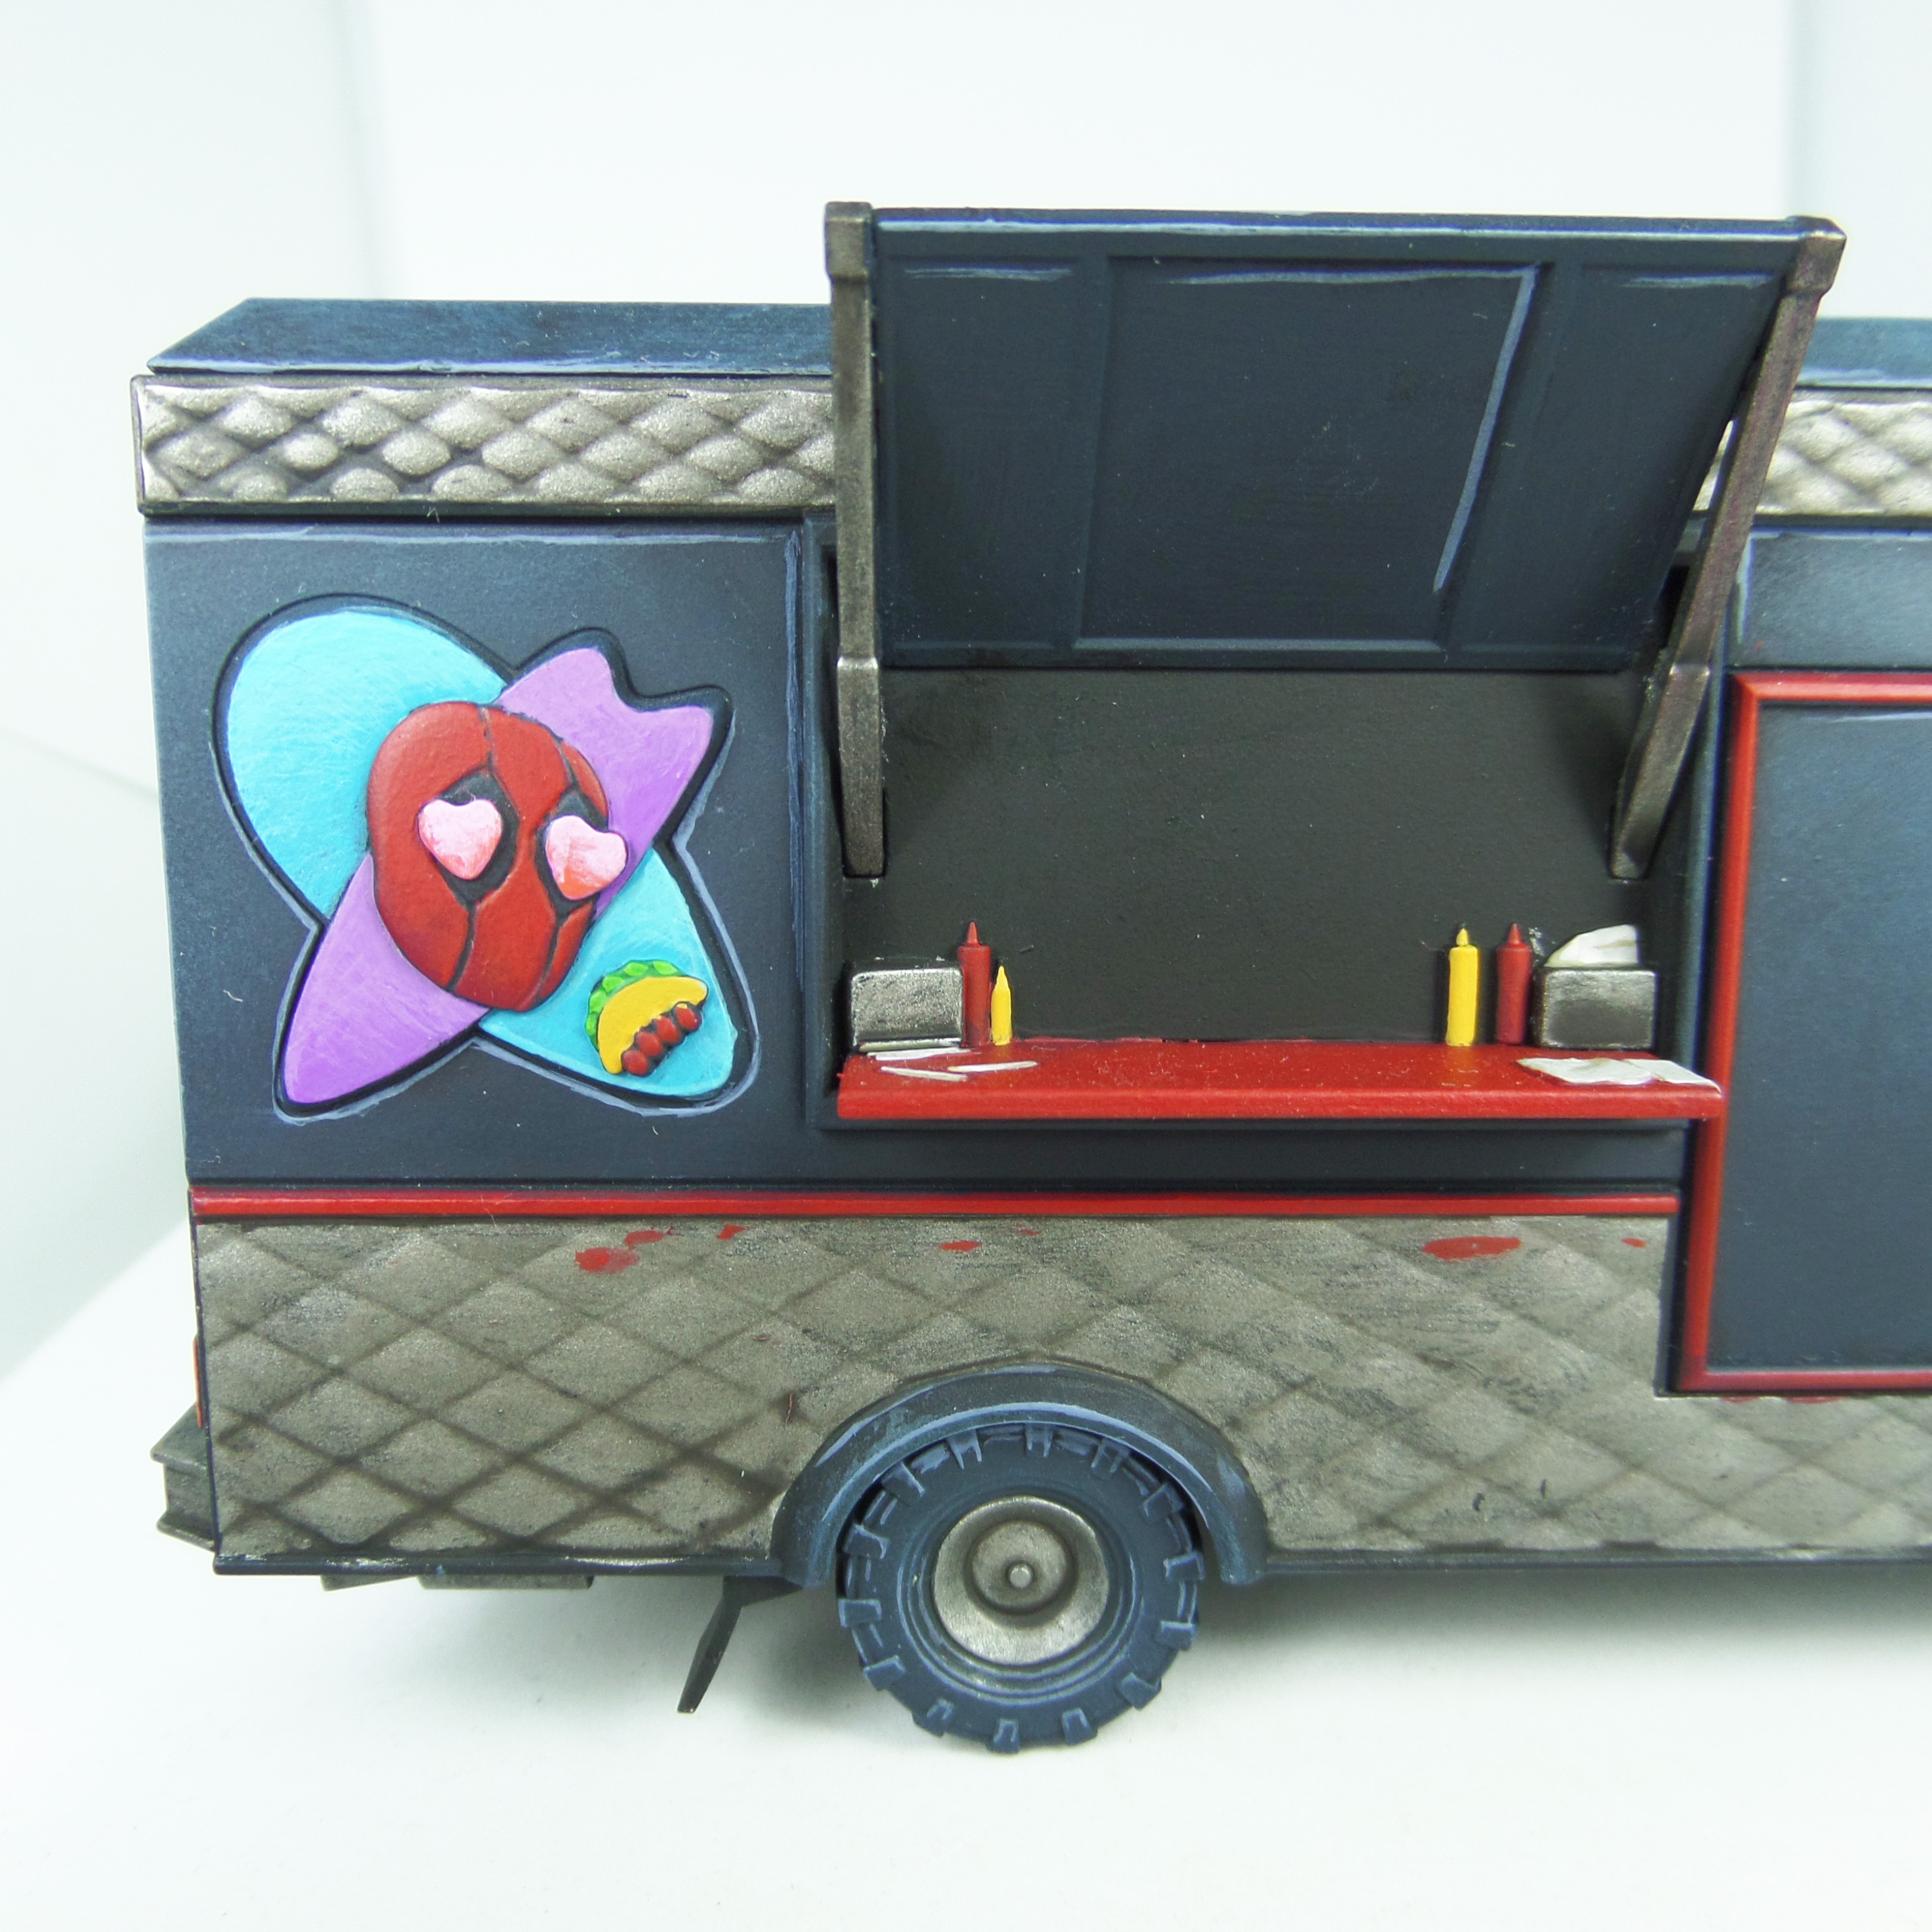
Details
Stage 1
Leadbelcher: Apply a basecoat to the metals.
Khorne Red: Apply a basecoat to the reds.
Averland Sunset: Apply a basecoat to the mustard bottles and lights.
Squig Orange: Apply a basecoat to the turn signals and front decal flames.
Karak Stone: Apply a basecoat to the napkins.
Emperor’s Children: Apply a basecoat to the love hearts.
Tau Light Ochre: Apply a basecoat to the taco shell.
Warpstone Glow: Apply a basecoat to the taco lettuce.
Temple Guard Blue: Apply a basecoat to the sign background.
Genestealer Purple: Apply a basecoat to the sign background.
Stage 2
Nuln Oil: Apply a shade to the metals.
Mephiston Red: Apply a layer to the reds.
Yriel Yellow: Apply a layer to the lights.
Trollslayer Orange: Apply a layer to the turn signals and front decal flames.
Pallid Wych Flesh: Apply a layer to the napkins.
Fulgrim Pink: Apply a layer to the love hearts.
Zamesi Desert: Apply a layer to the taco shell.
Moot Green: Apply a layer to the taco lettuce.
Baharroth Blue: Apply a layer to the sign background.
Kakophoni Purple: Apply a layer to the sign background.
Stage 3
Drakenhof Nightshade: Apply a shade to the metals.
Evil Sunz Scarlet: Apply a line highlight to the reds.
Phalanx Yellow: Apply a layer to the yellow lights.
Fire Dragon Bright: Apply a layer to the turn signals and front decal flames.
White Scar: Apply a line highlight to the napkins.
Fulgrim Pink/White Scar: Make a 1:1 mix and apply a line highlight to the love hearts.
Karak Stone: Apply a line highlight to the tacos.
Gauss Blaster Green: Apply a line highlight to the taco lettuce.
Baharroth Blue/White Scar: Make a 1:1 mix and apply a line highlight to the sign background.
Dechala Lilac: Apply a line highlight to the sign background.
Stage 4
Stormhost Silver: Apply a line highlight to the metals.
Wild Rider Red: Apply a spot highlight to the reds.
Dorn Yellow: Apply a spot highlight to the yellow lights.
Lugganath Orange: Apply a spot highlight to the turn signals and decal flames.
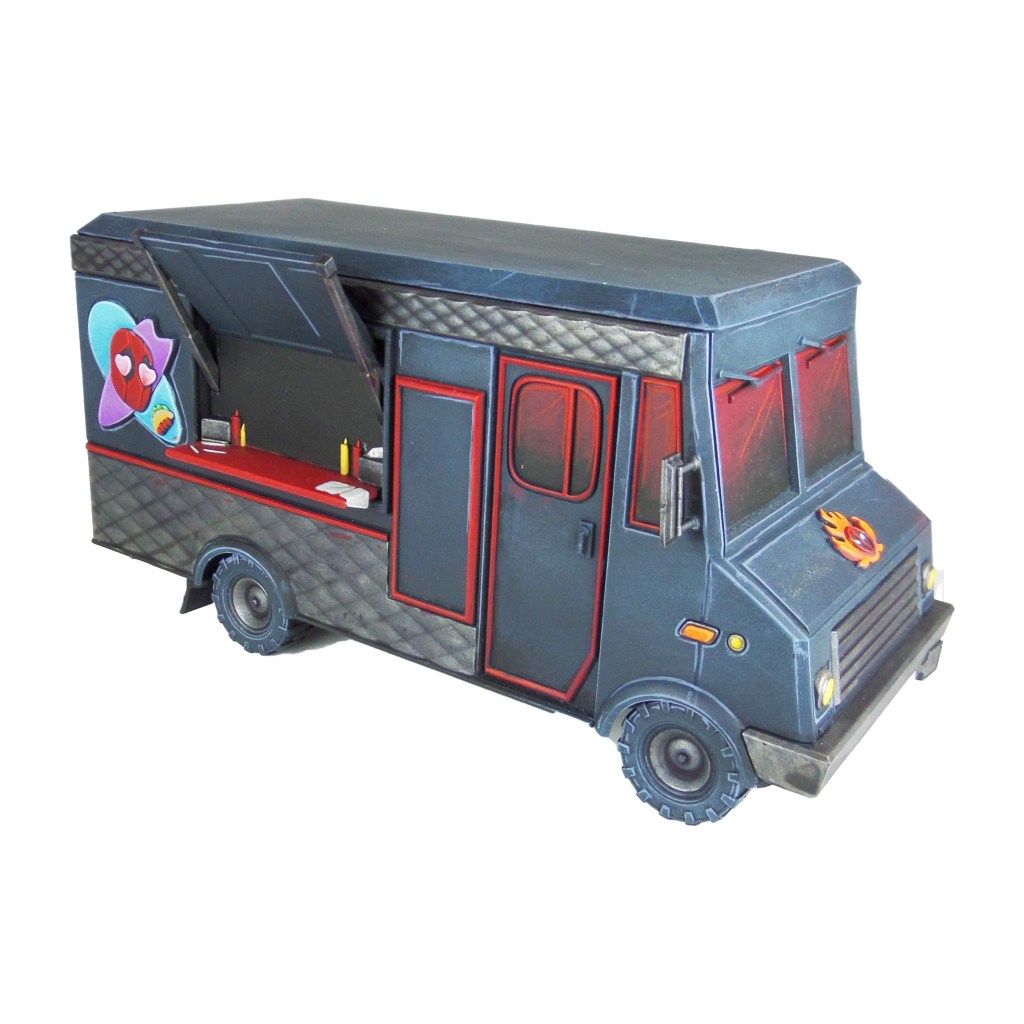
Menu
Stage 1
White Scar: Water down the paint and carefully apply your menu choices.
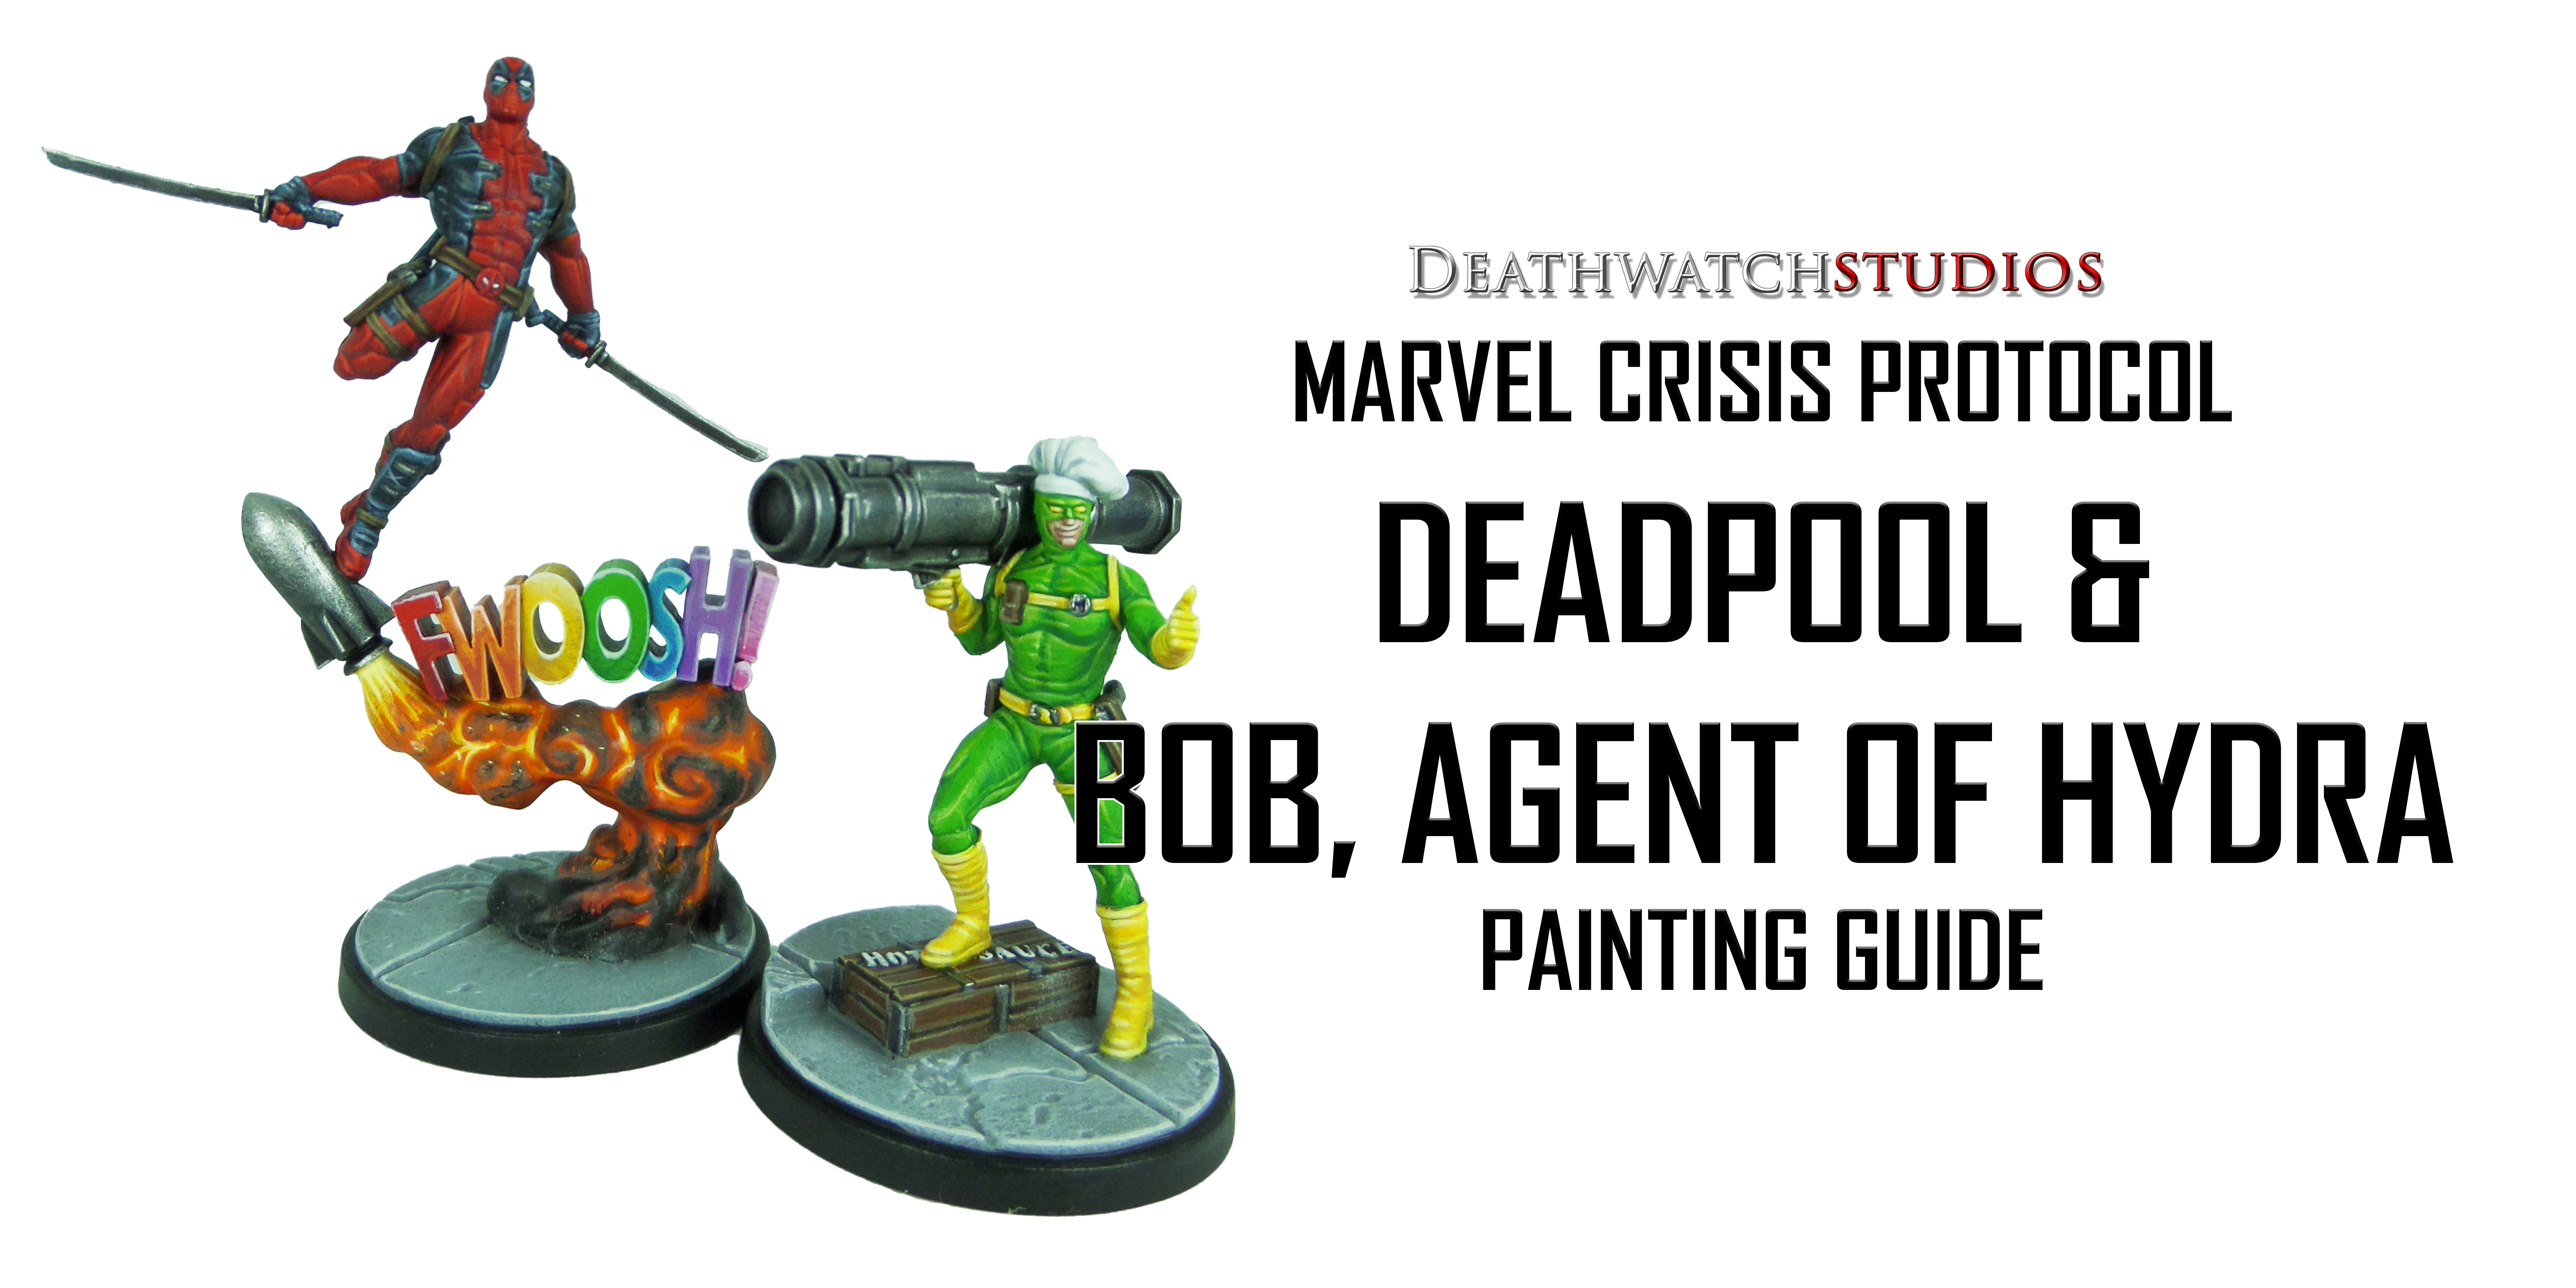
Welcome to my latest painting guide! This time I tackle the epic Deadpool and Bob, agent of hydra. This is a superb kit filled with cool features and a lot of extra parts. Don’t worry, I’ll be following up with the Taco Truck very soon!
I need your support. Because my guides takes time and supplies to do, any support you can offer would mean the world to me. A supportive message in the comments is enough, but if you have the means why not send me a gift on Ko-Fi or PayPal. Thank you!
Prep: Fully build both models, but do not glue the Fwoosh! to Deadpool. Undercoat black.
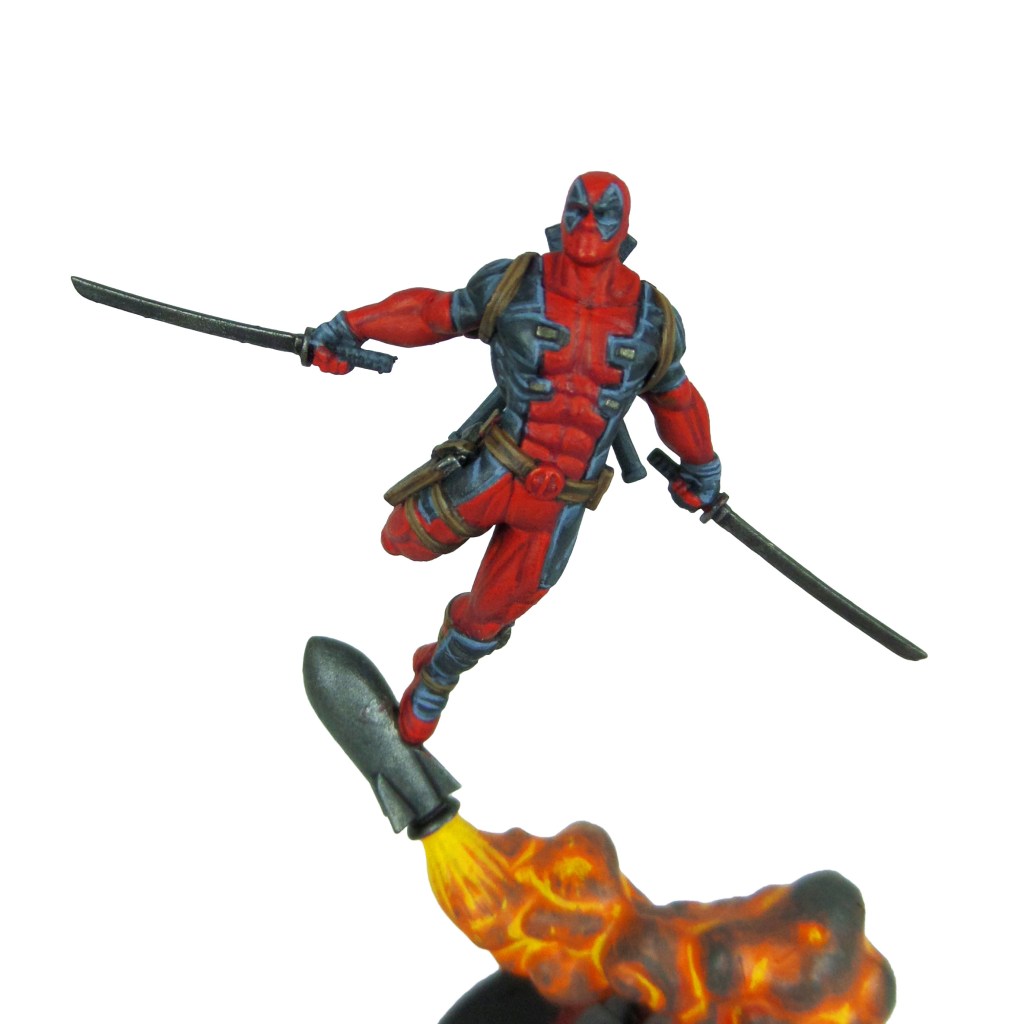
Deadpool
Stage 1
Khorne Red: Ap[ply a basecoat to the bodysuit.
Incubi Darkness: Apply a basecoat to the bodysuit markings, boot, gloves, scabbards and eyes.
Rhinox Hide: Apply a basecoat to the straps.
Leadbelcher: Apply a basecoat to the metals.
Stage 2
Mephiston Red: Apply a layer to the bodysuit.
Thunderhawk Blue: Apply a thinned layer to the bodysuit markings, boots, gloves, scabbards and eyes.
Mournfang Brown: Apply a layer to the straps.
Nuln Oil: Apply a shade to the metals.
Stage 3
Evil Sunz Scarlet: Apply a line highlight to the bodysuit.
Russ Grey: Apply a line highlight to the
bodysuit markings, boots, gloves, scabbards and eyes.
Steel Legion Drab: Apply a line highlight to the straps.
Drakenhof Nightshade: Apply a shade to the metals.
Stage 4
Wild Rider Red: Apply a spot highlight to the bodysuit.
Fenrisian Grey: Apply a spot highlight to the bodysuit markings, boots, gloves, scabbards and eyes.
Karak Stone: Apply a spot highlight to the straps.
Ironbreaker: Apply a layer to the metals.
White Scar: Apply a layer to the eyes on the head and buckle.
Fwoosh! Stage 1
Khorne Red: Apply a basecoat to each letter.
Squig Orange
Tau Light Ochre
Warpstone Glow
Caledor Sky
Genestealer Purple
Emperor’s Children
Fwoosh!Stage 2
Mephiston Red: Apply an edge highlight as well as a thinned layer to the front, leading from the top.
Fire Dragon Bright
Yriel Yellow
Moot Green
Temple Guard Blue
Kakophoni Purple
Fulgrim Pink
Fwoosh! Stage 3
Evil Sunz Scarlet: Apply an edge highlight and another thinned layer.
Lugganath Orange
Dorn Yellow
Gauss Blaster Green
Baharroth Blue
Dechala Lilac
Fulgrim Pink/White Scar
Fwoosh! Stage 4
White Scar: Apply an edge highlight to the top edges.
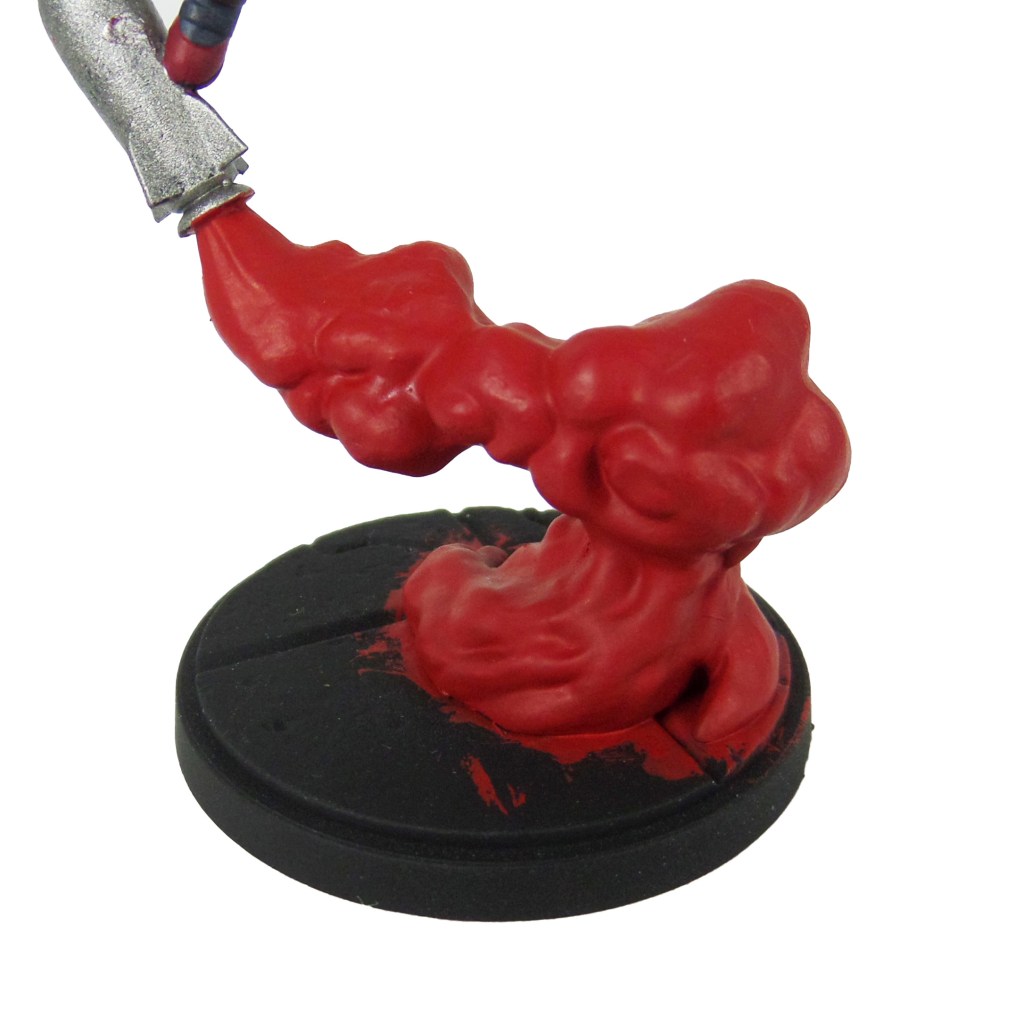
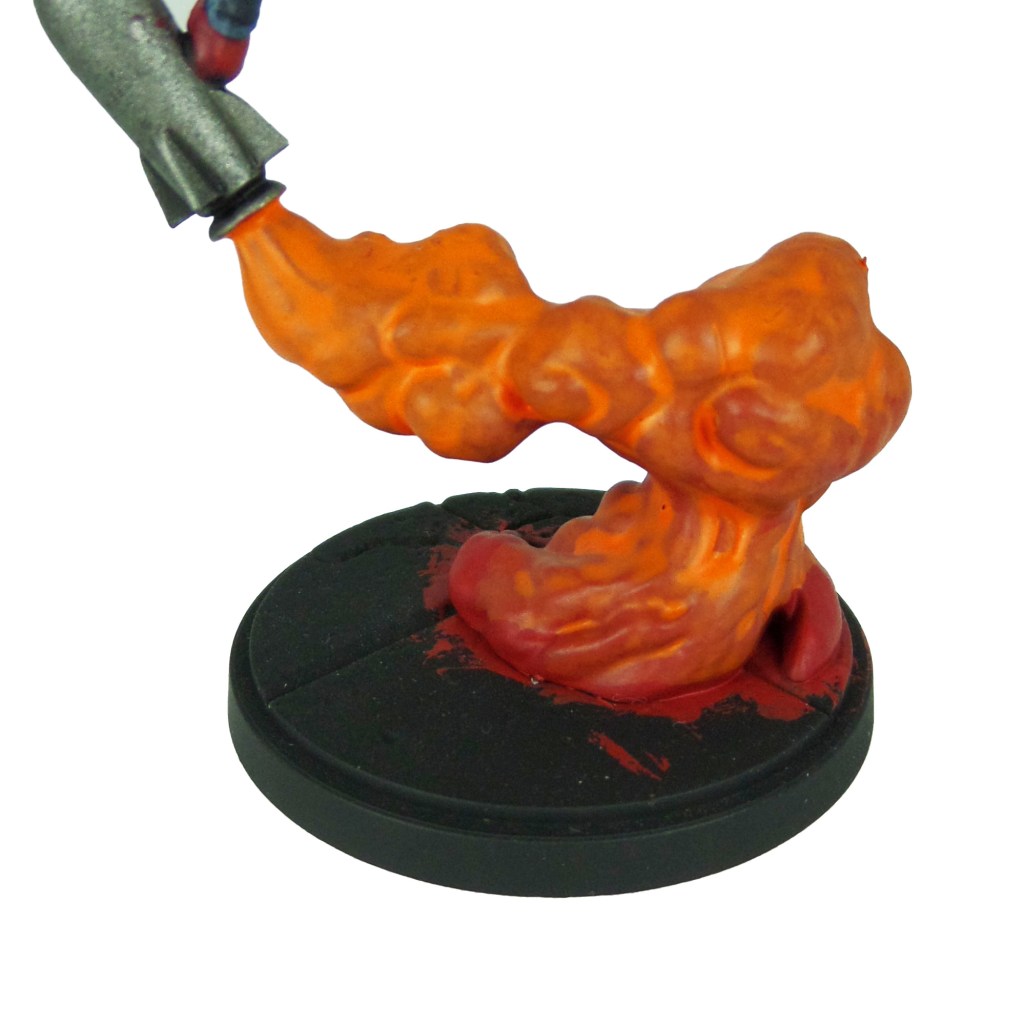
Missile Trail Stage 1
Mephiston Red: Apply a basecoat to the explosion.
Missile Trail Stage 2
Trollslayer Orange: Apply a very thinned over the explosion. Build this up over a few coats, waiting for each to dry before moving onto the next.
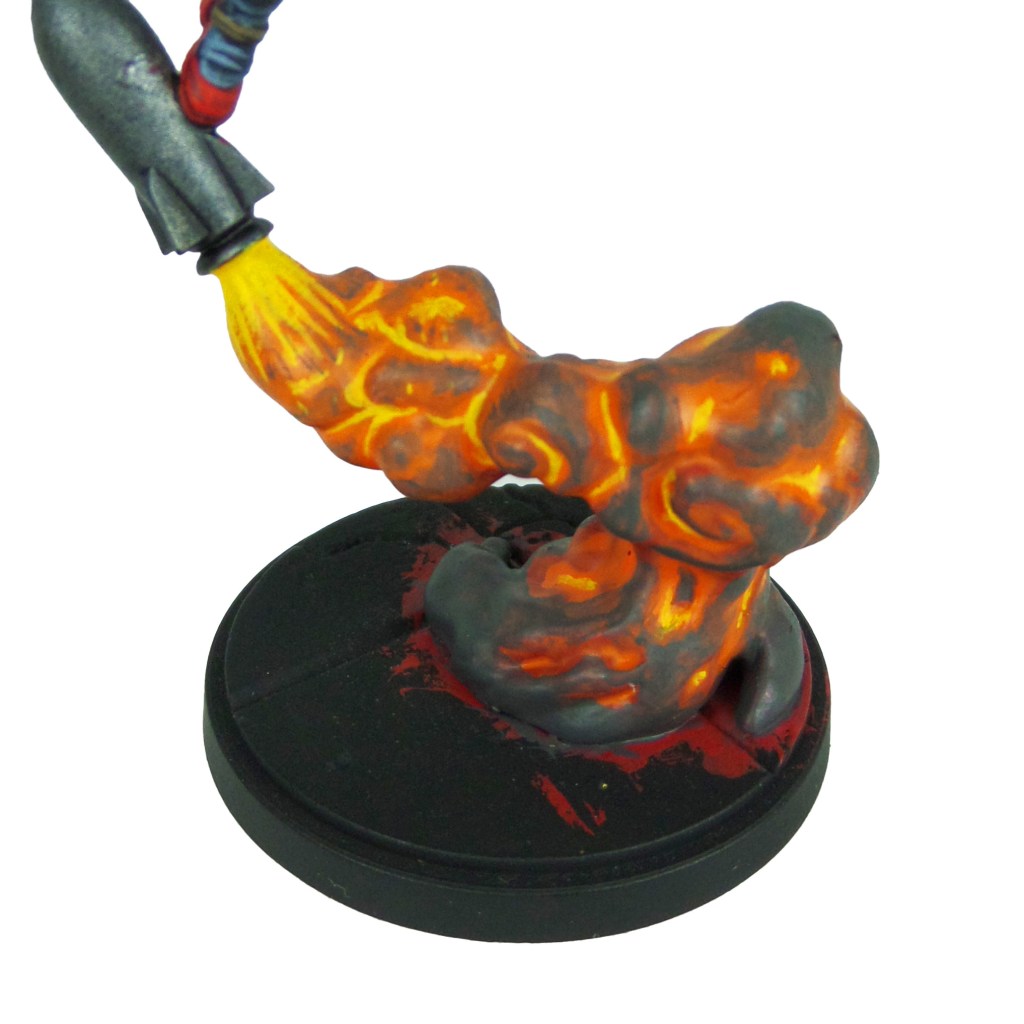
Missile Trail Stage 3
Skavenblight Dinge: Apply a thinned layer to the outer most areas of the explosion.
Yriel Yellow: Apply a thinned layer to the crevices of the explosion moving closer to the centre than the last stage.
Missile Trail Stage 4
Abaddon Black: Apply a thinned layer to the very tips of the explosion.
Dorn Yellow: Apply a spot highlight to the centre of the explosion.
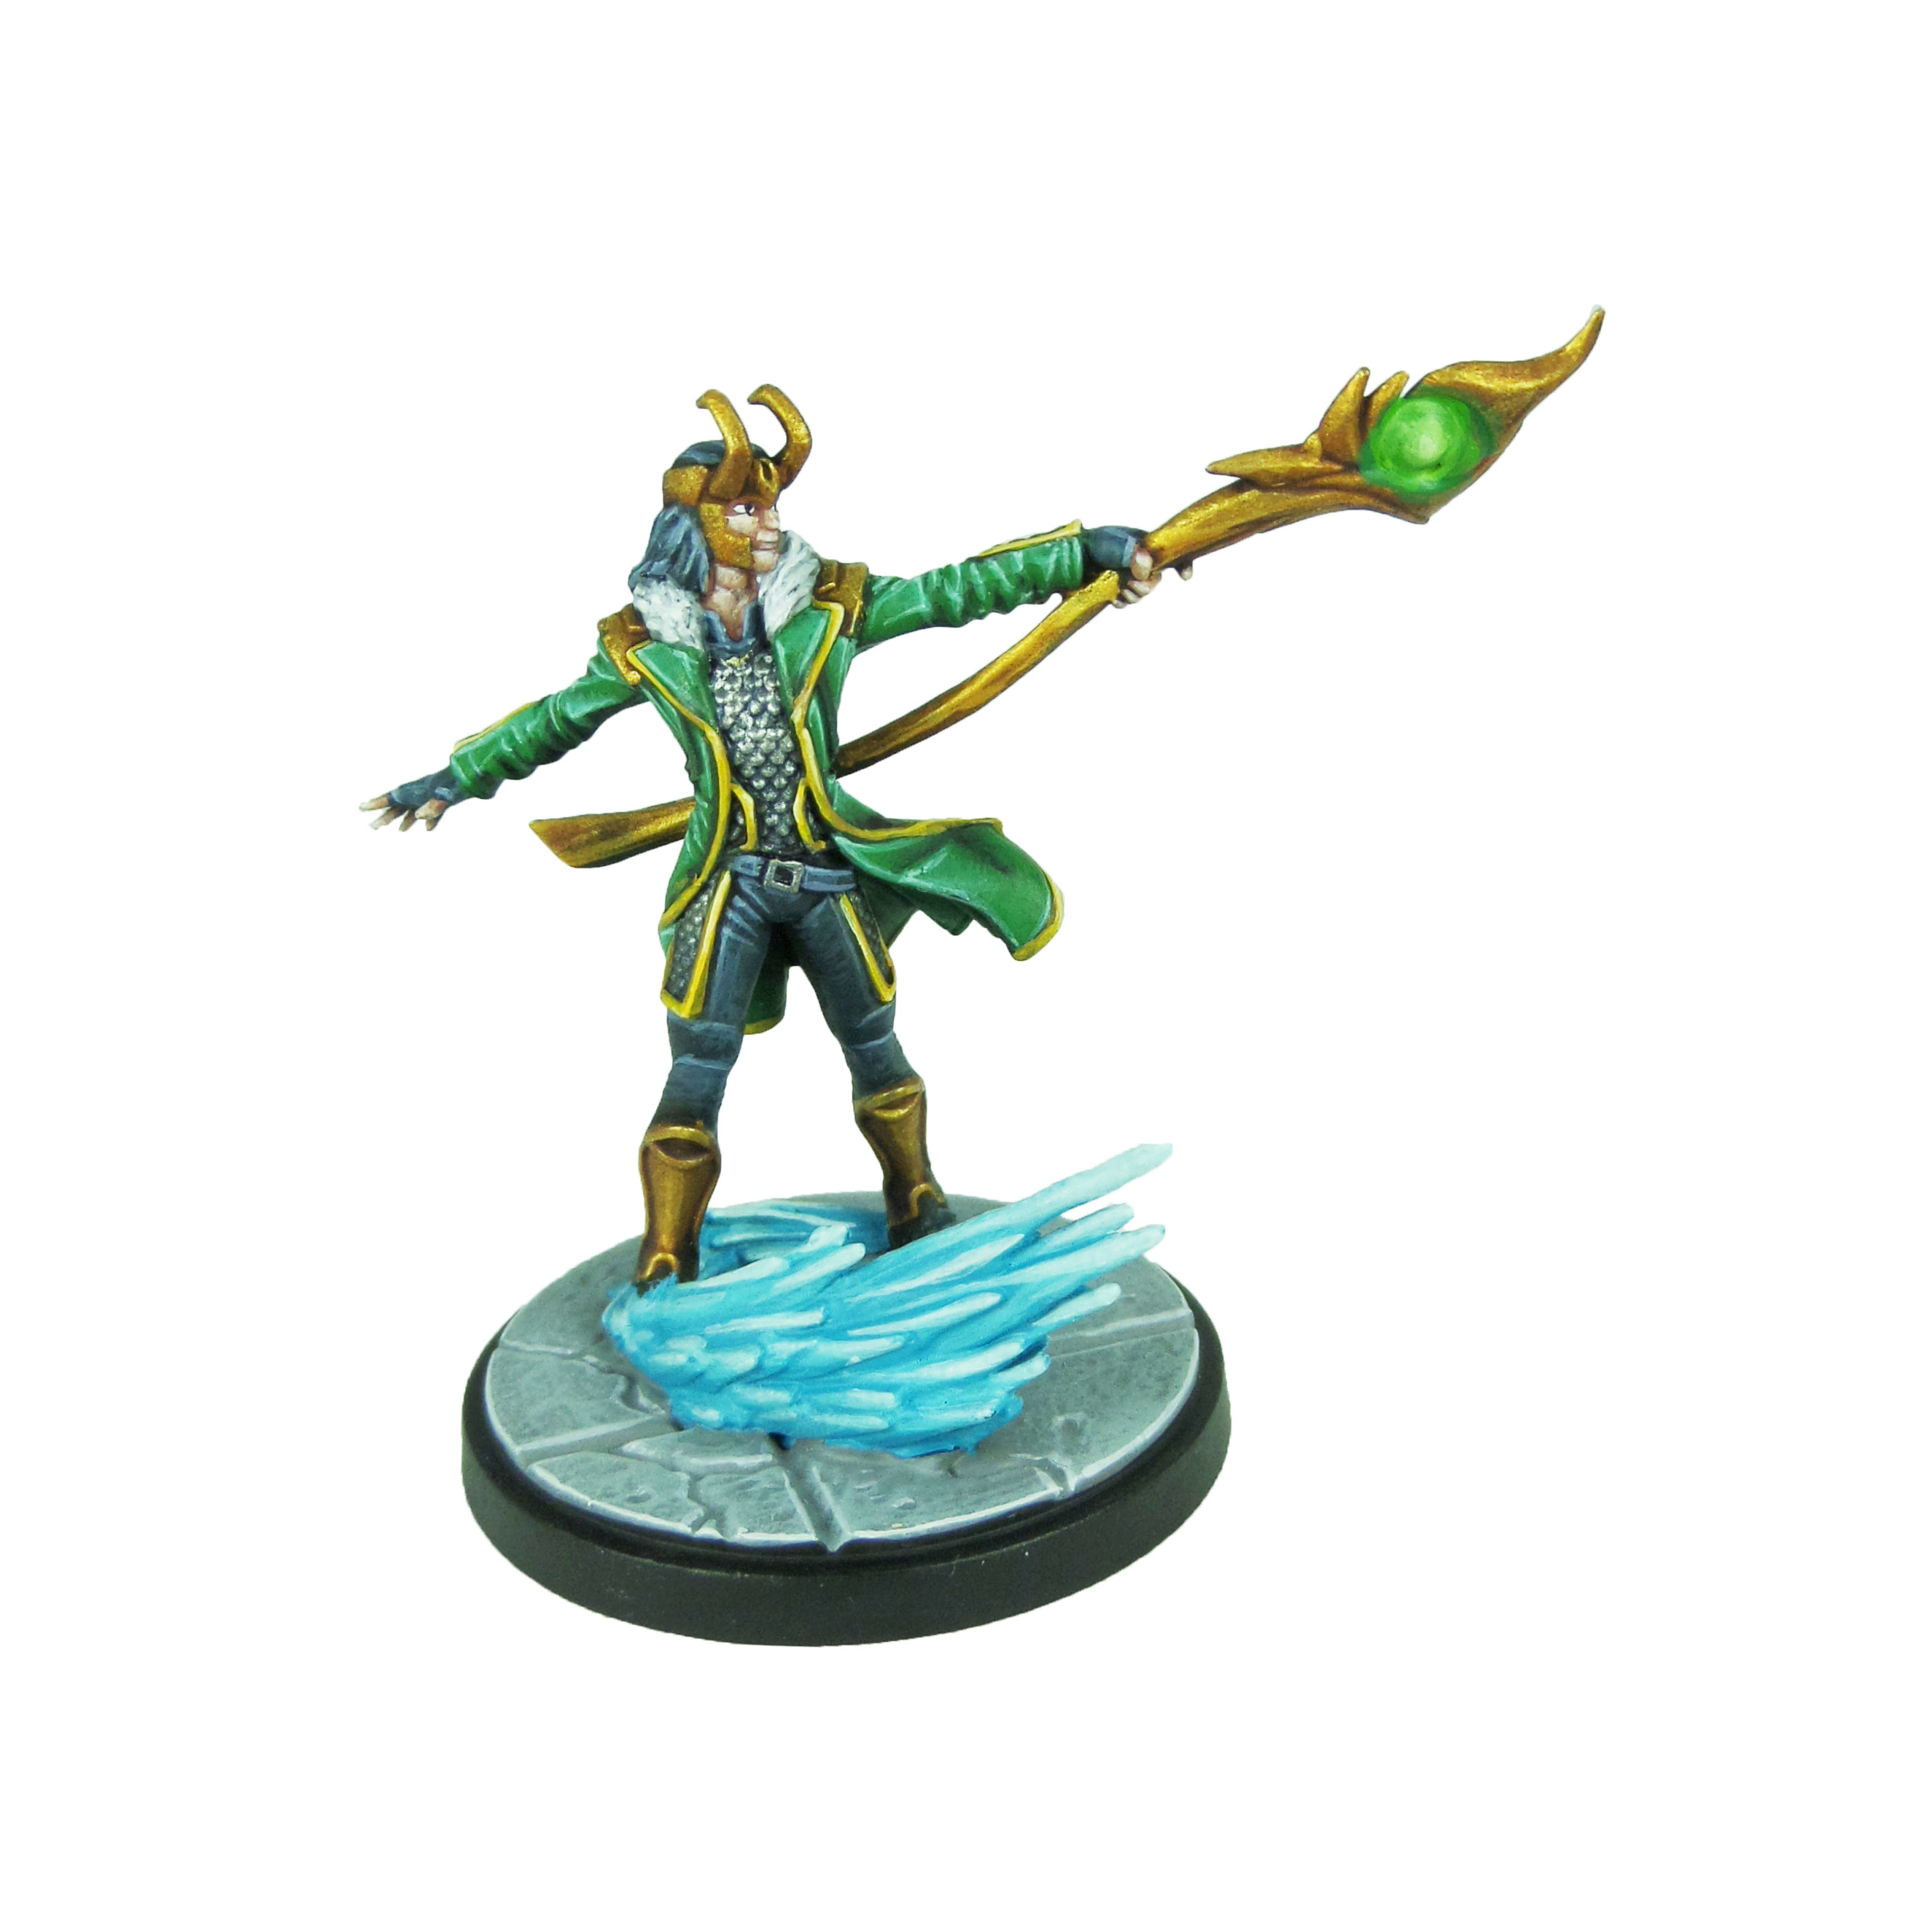
I recently worked on a small commission for the Asgardians for Marvel Crisis Protocol.
It was really nice to jump back to some of the earliest models and have another bash at them. They were to be painted as my guides which gave me a bit of an advantage going in.
I noticed a change to my level of painting from the previous models. Progress is always really nice to see and who knows maybe I’ll give Thor another paint in a year’s time.