MCP – Sentinel Mk4 & Sentinel Prime Painting Guide

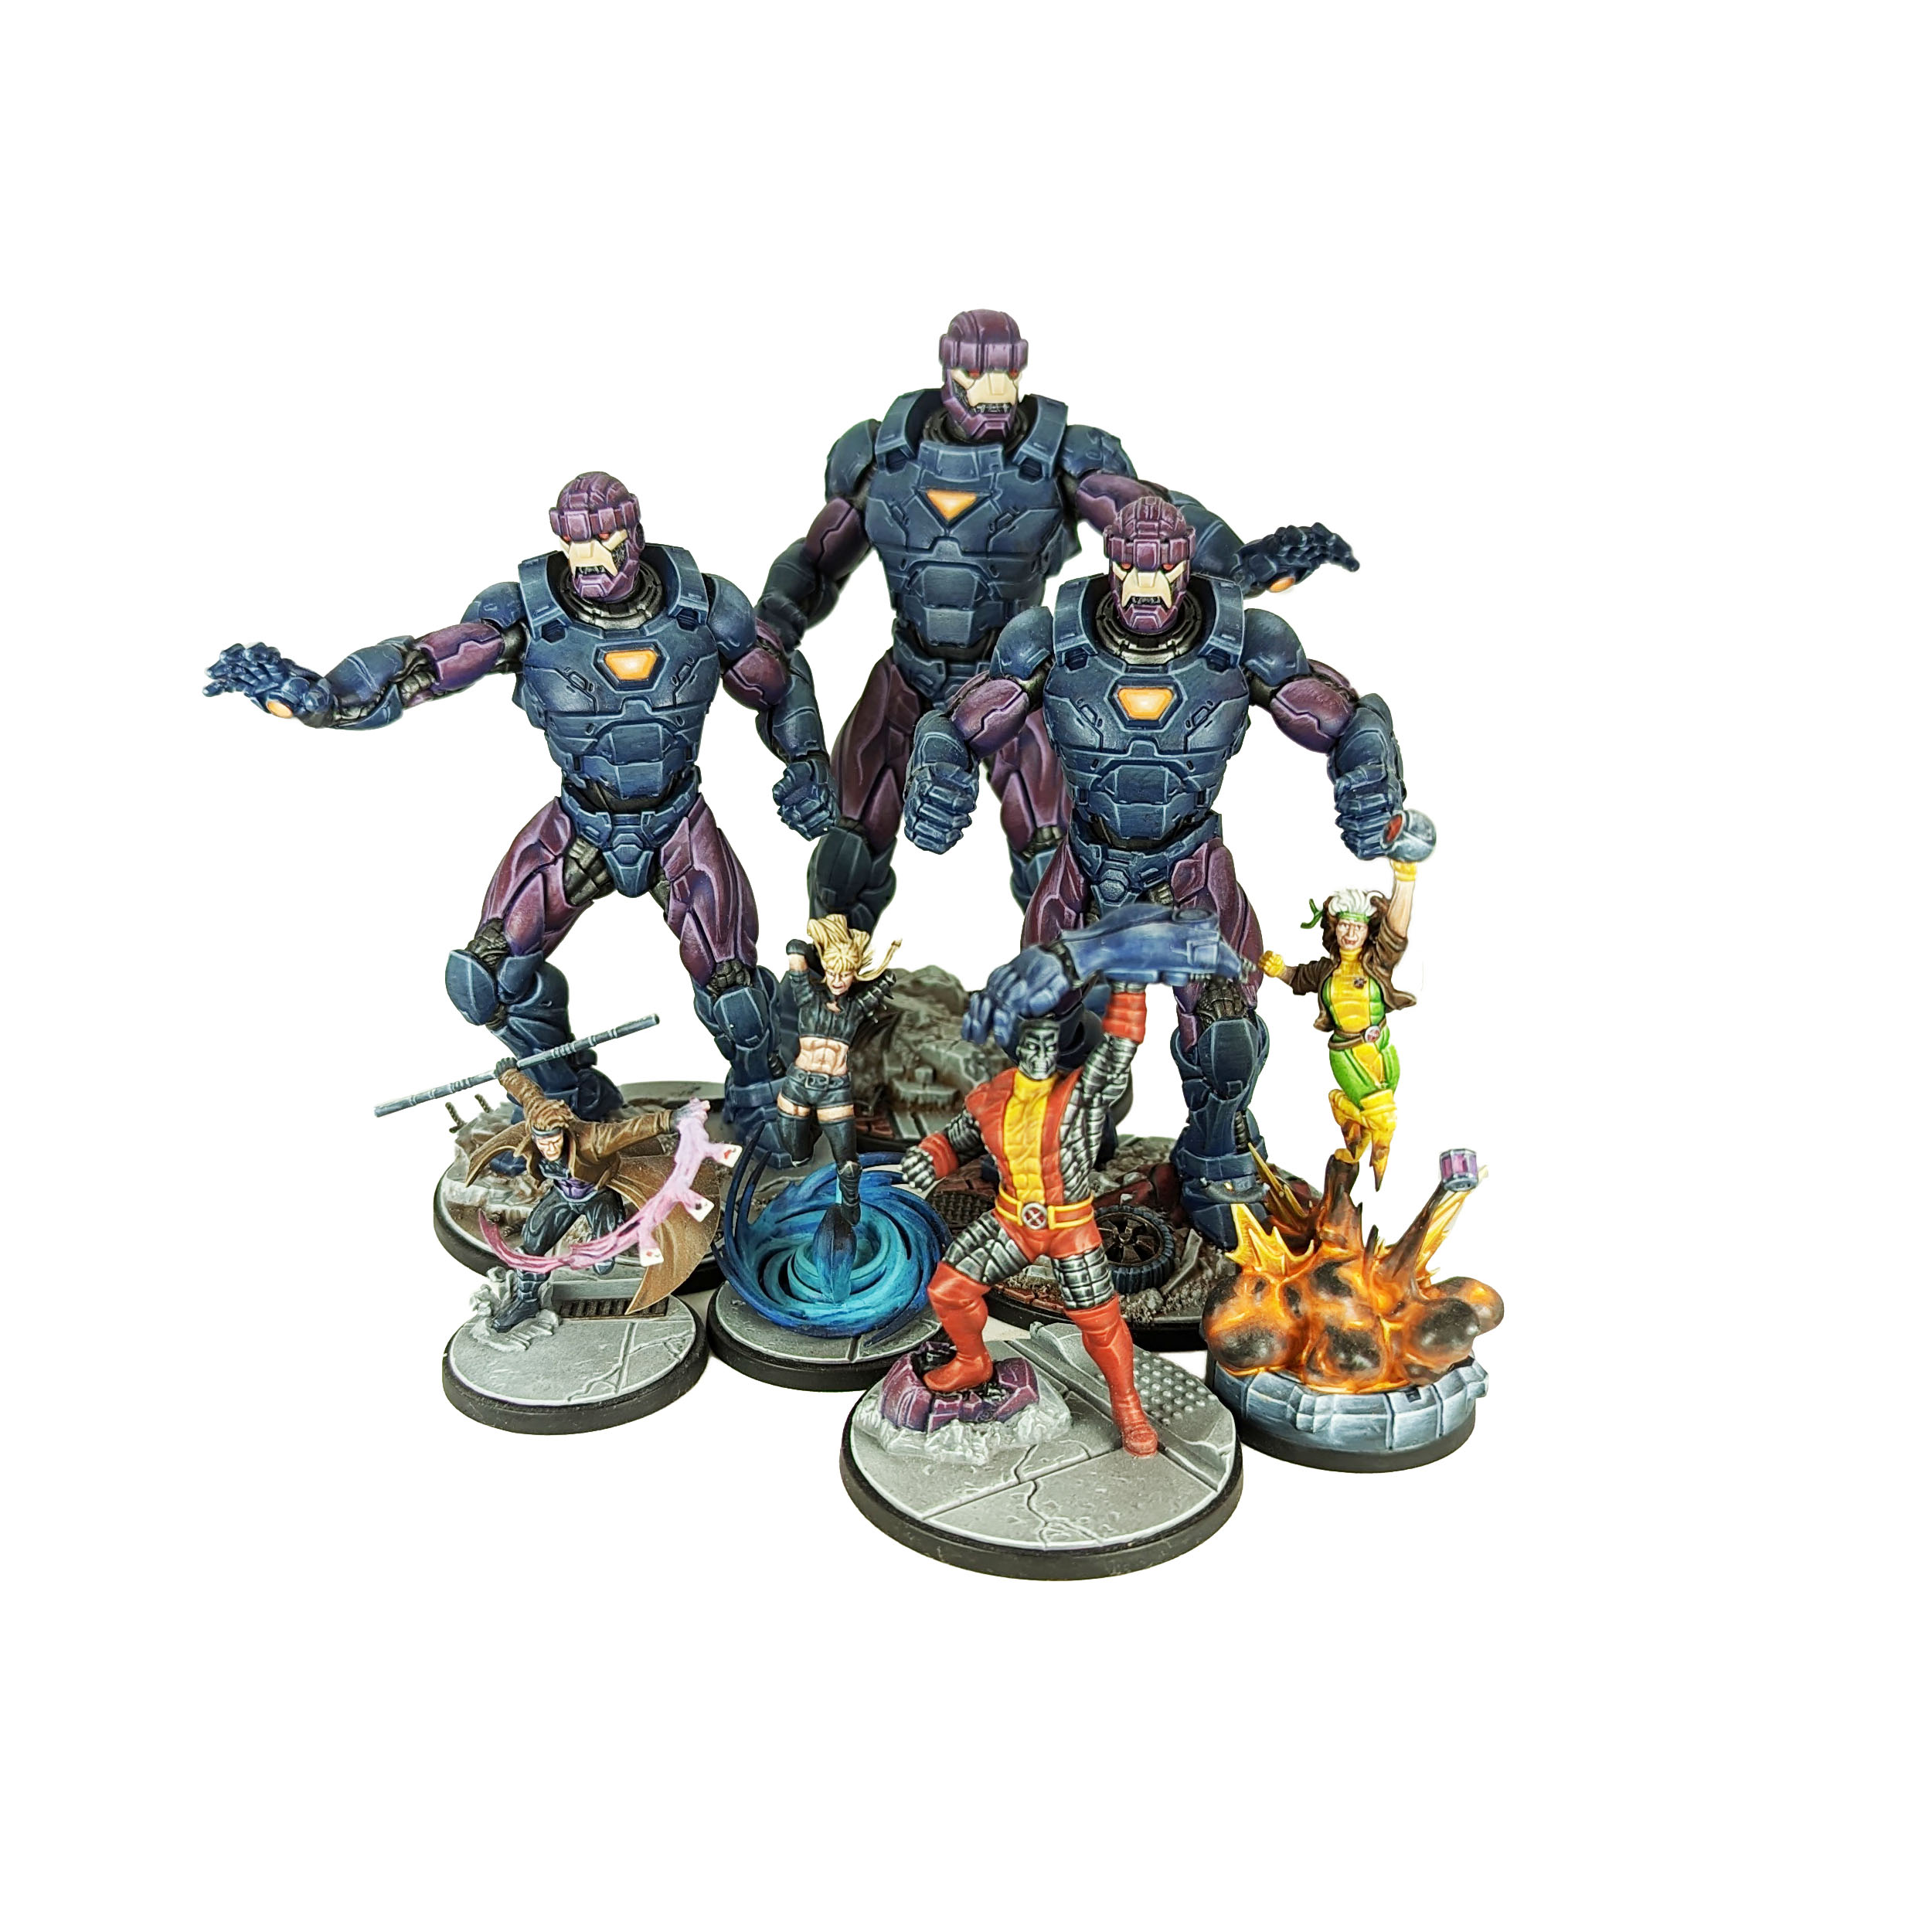
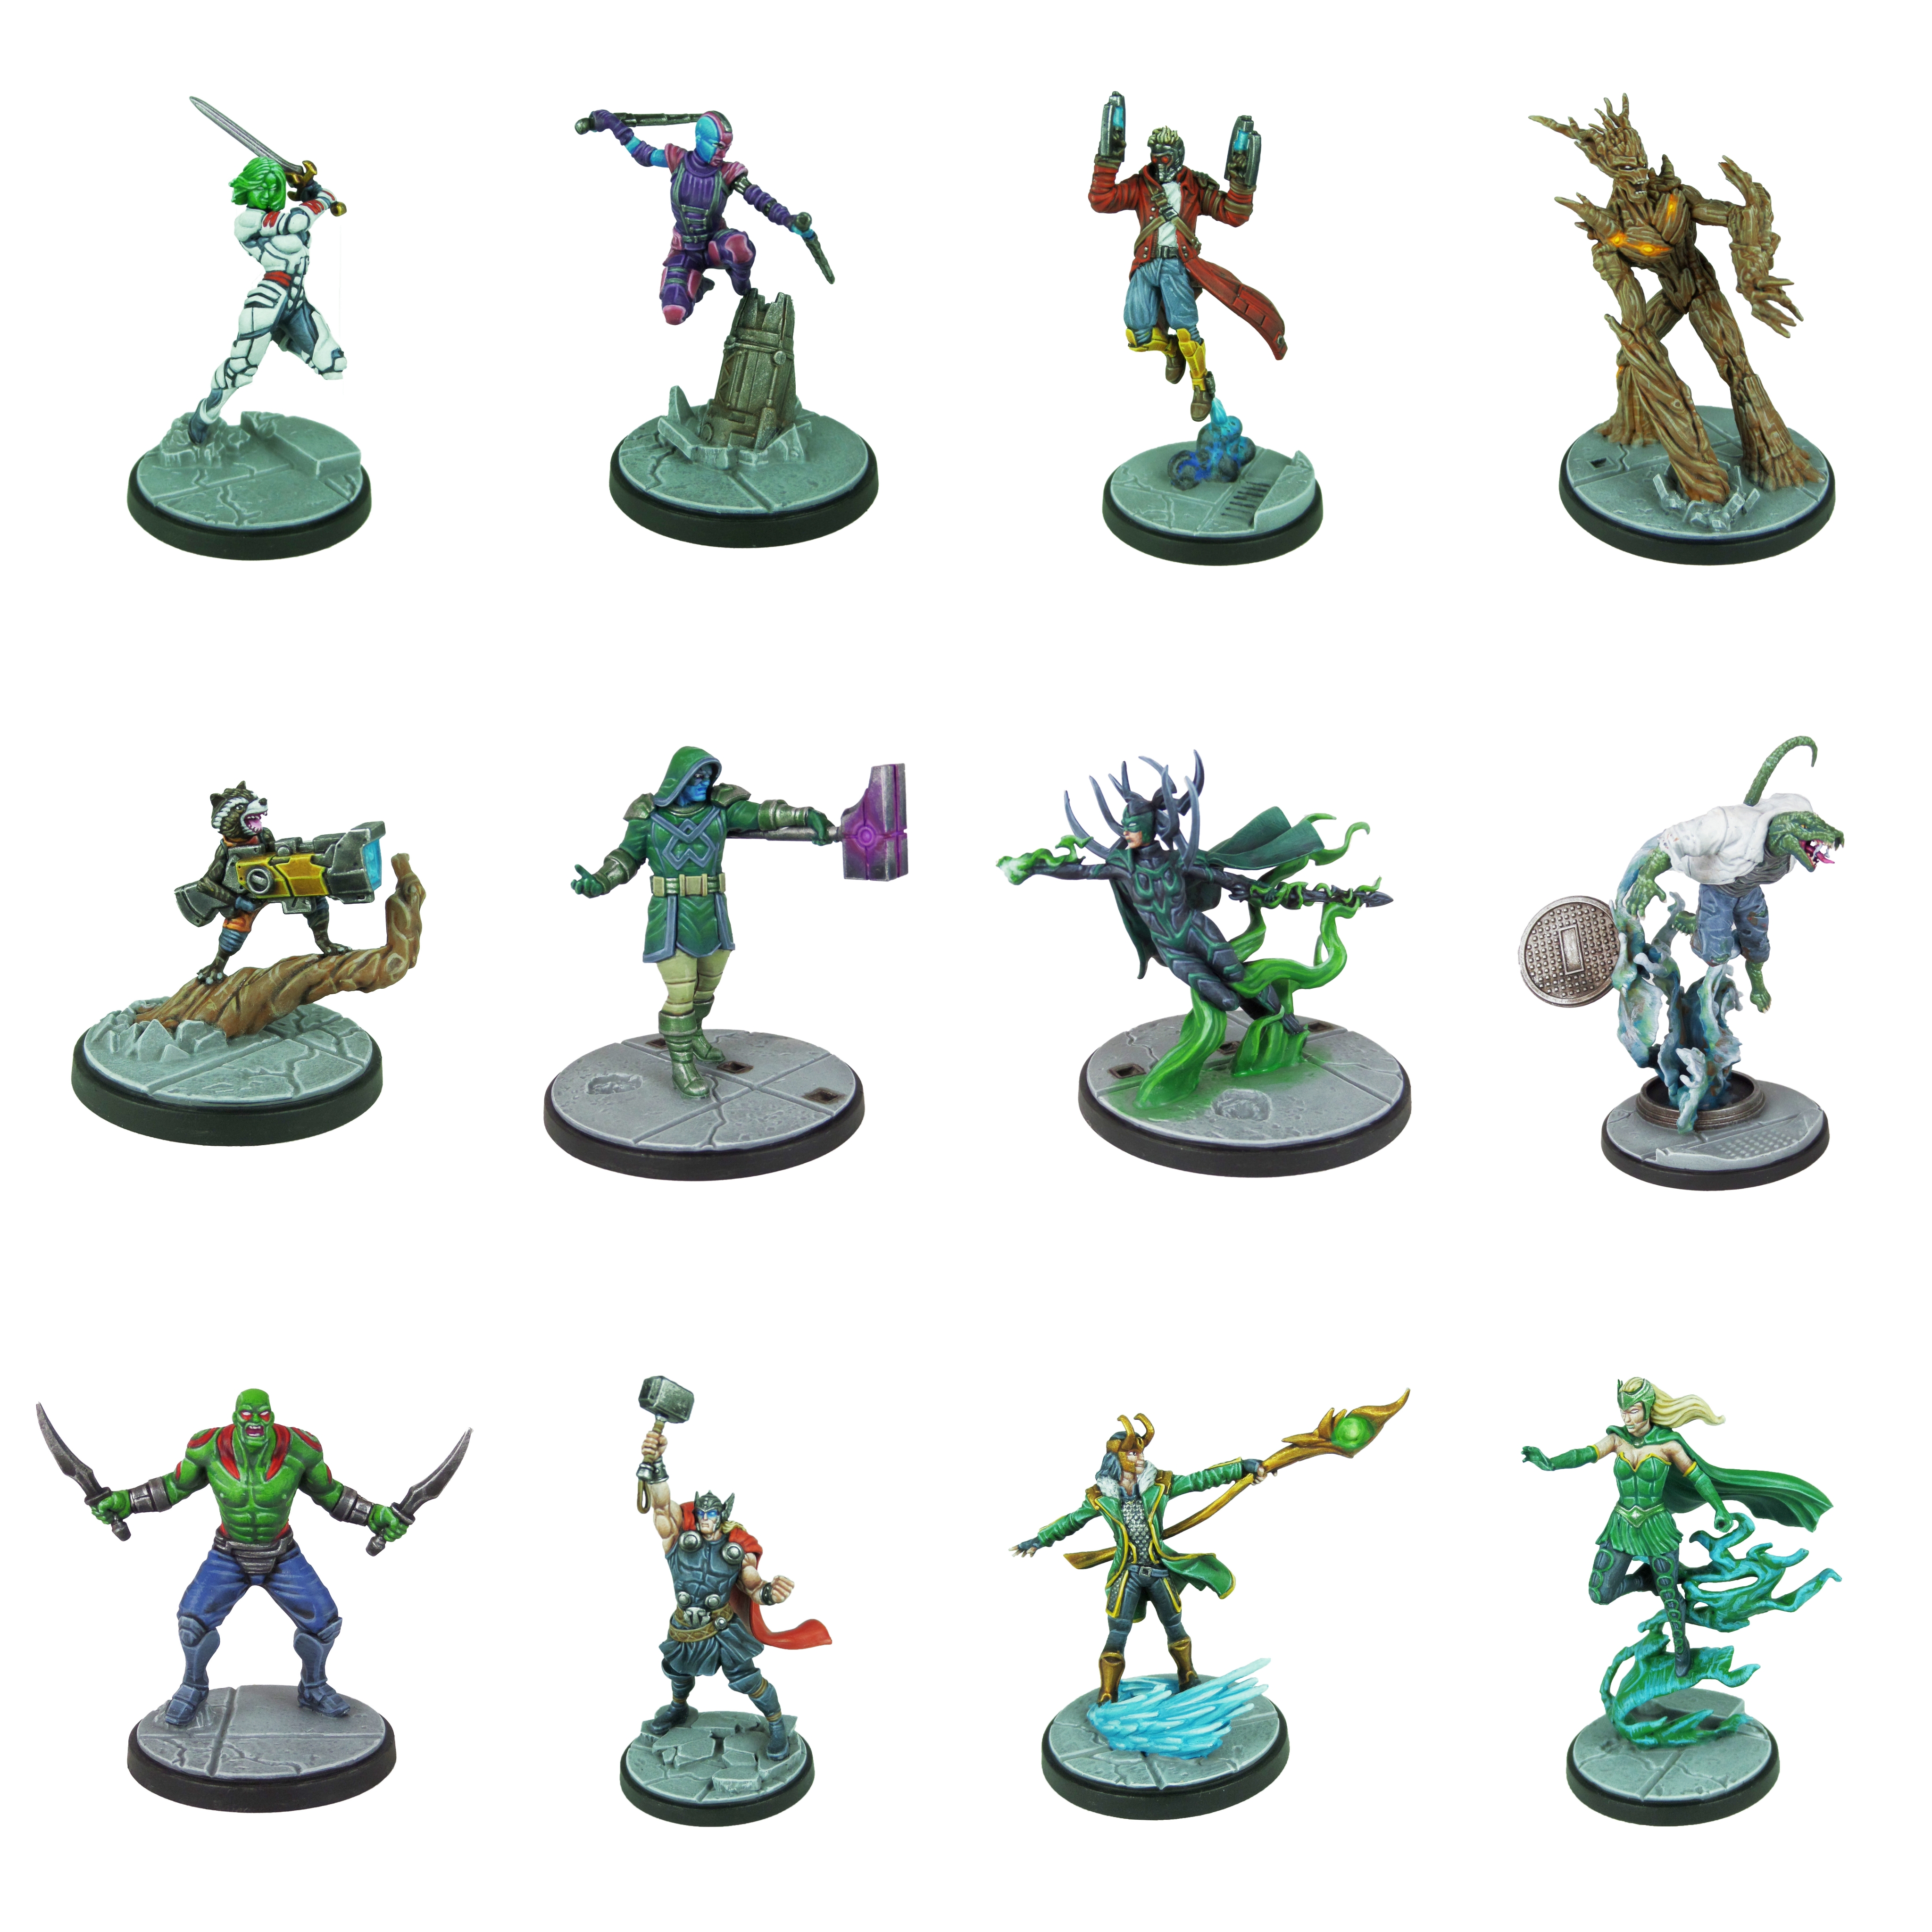
Welcome to my latest painting guide! The Sentinels are here! I’ve been dreaming of these since MCP was announced and they really live up to my expectations!


I need your support. Because my guides takes time and supplies to do, any support you can offer would mean the world to me. A supportive message in the comments is enough, but if you have the means why not send me a gift on Ko-Fi or PayPal. Thank you!


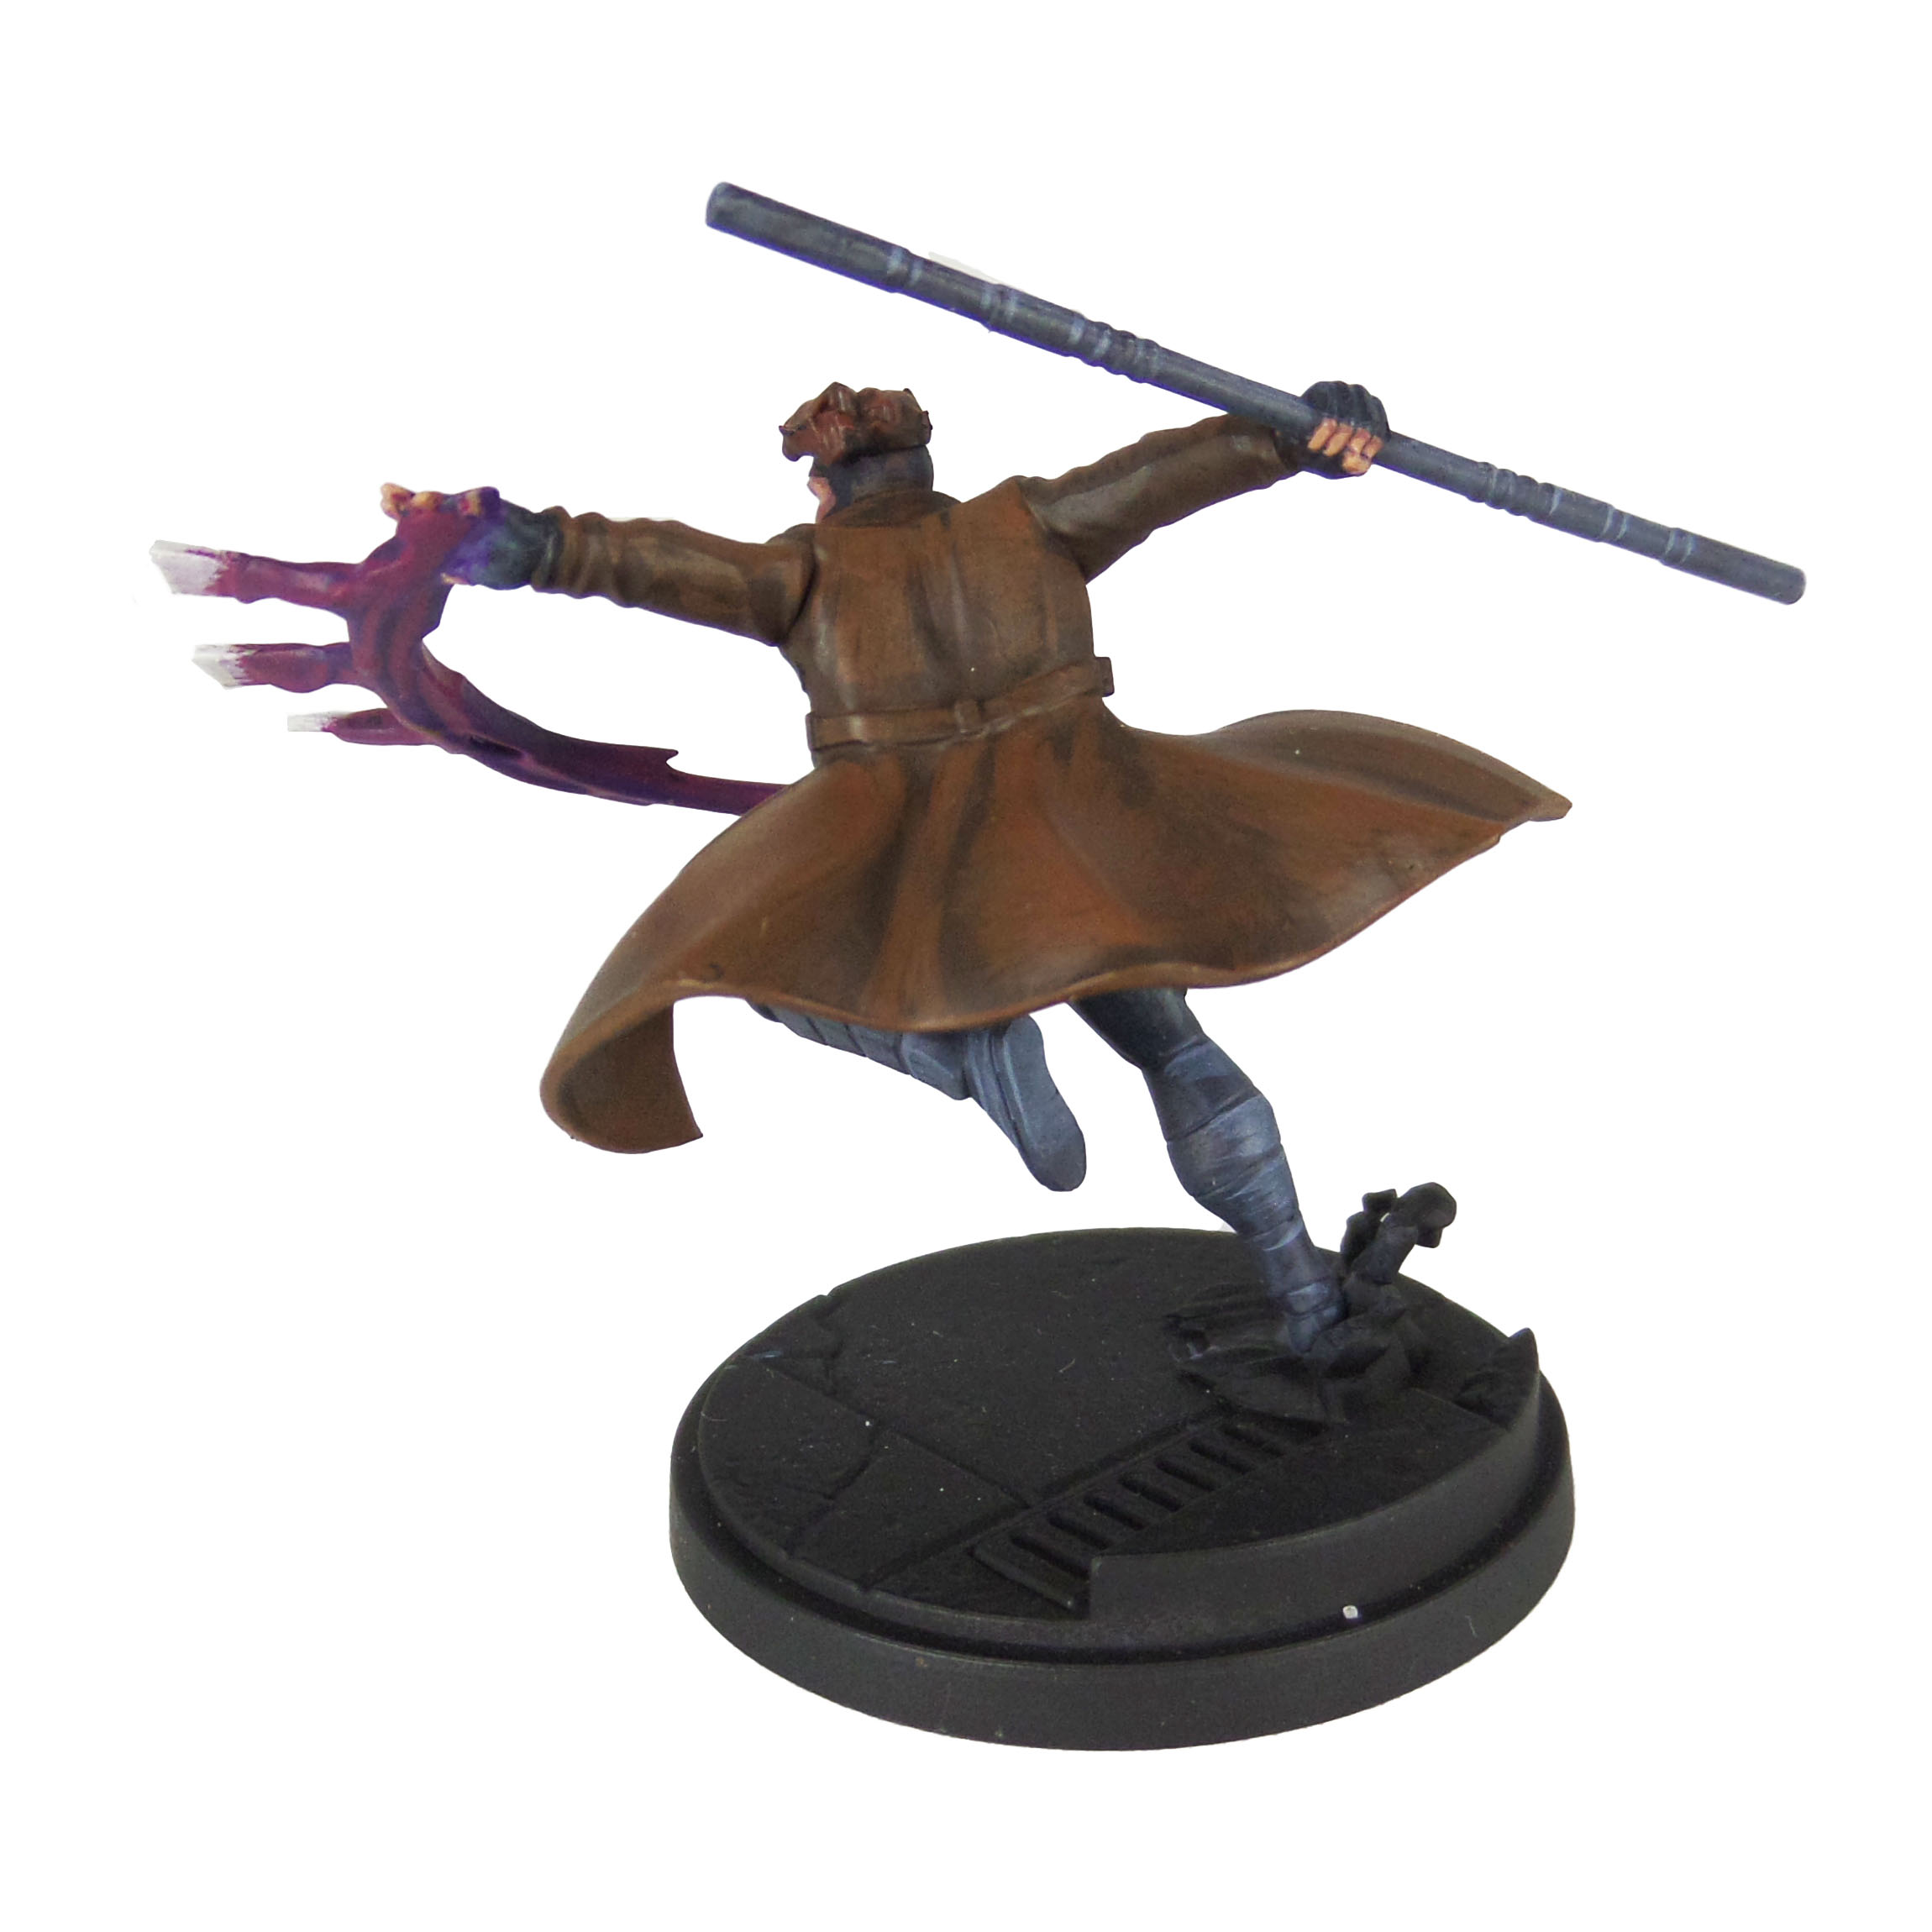
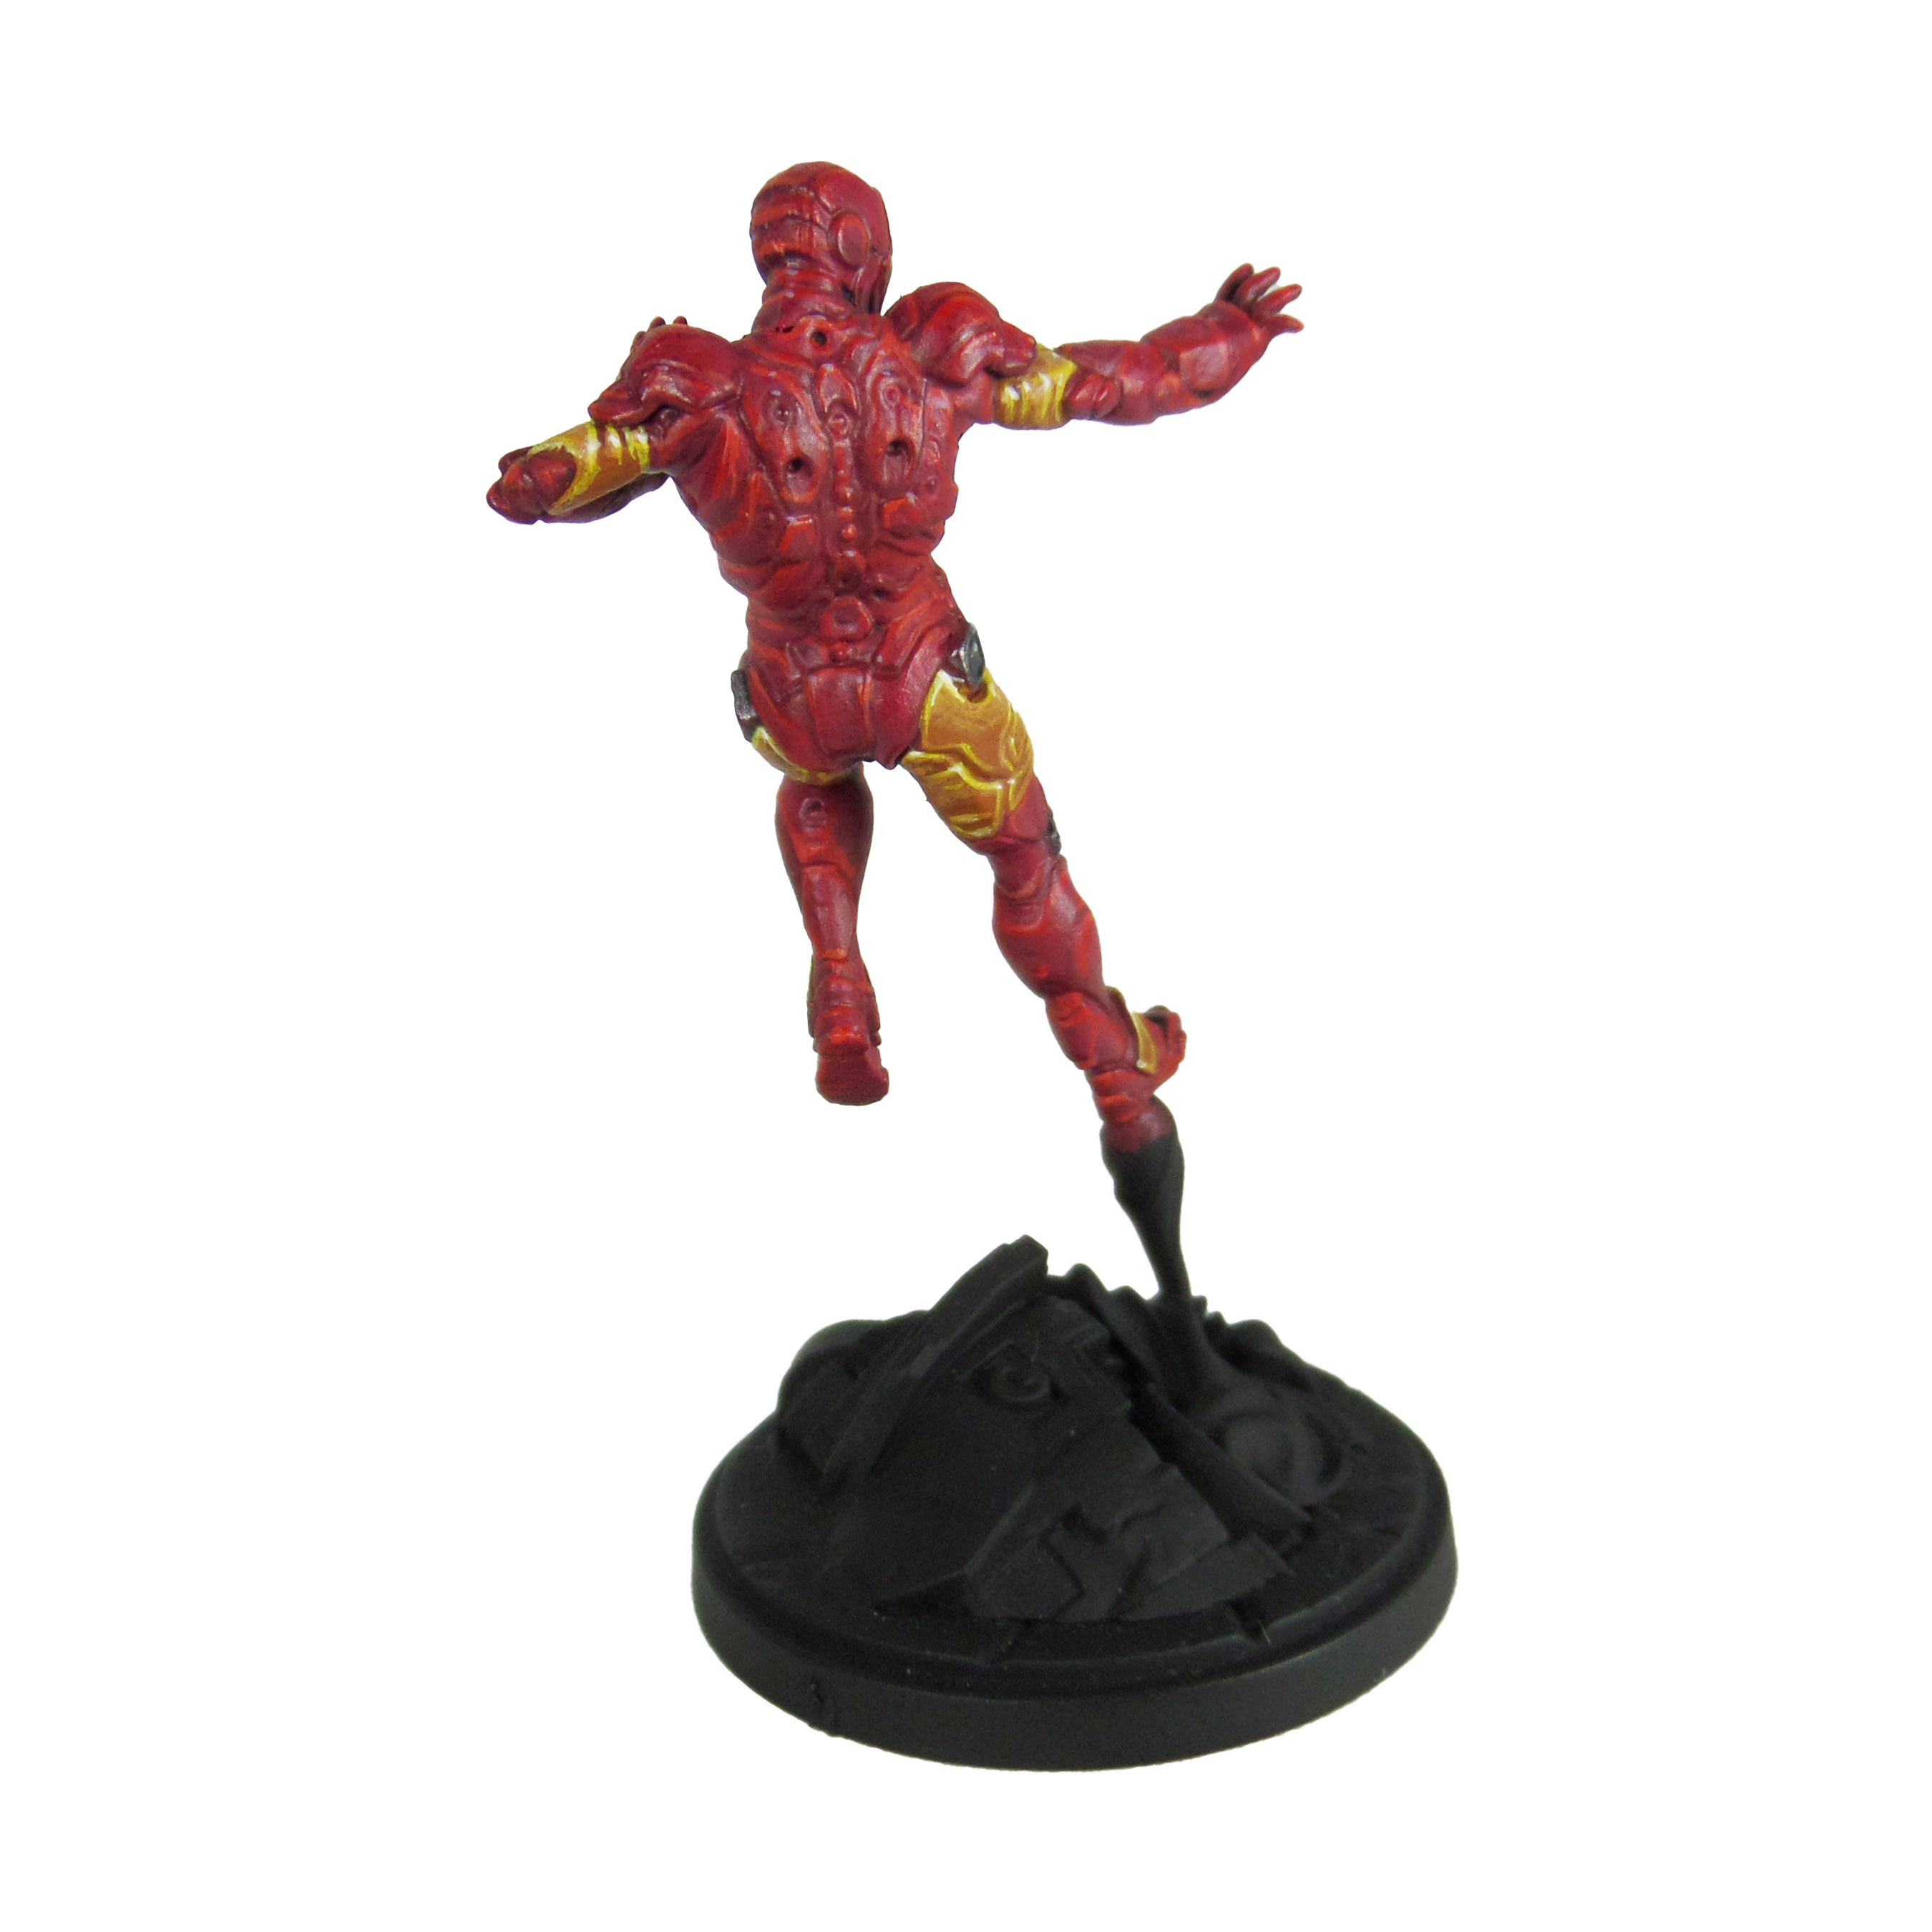
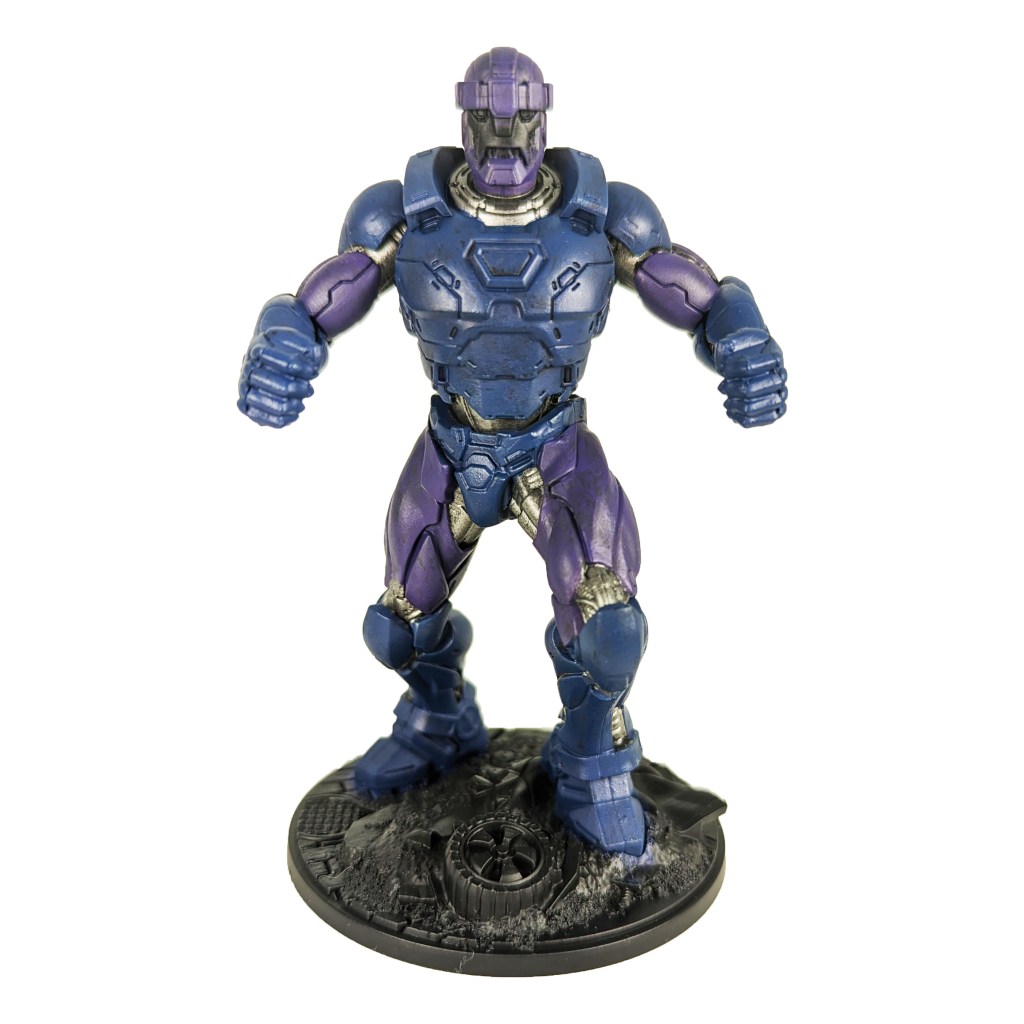
Prep: Fully build the models. Undercoat black.
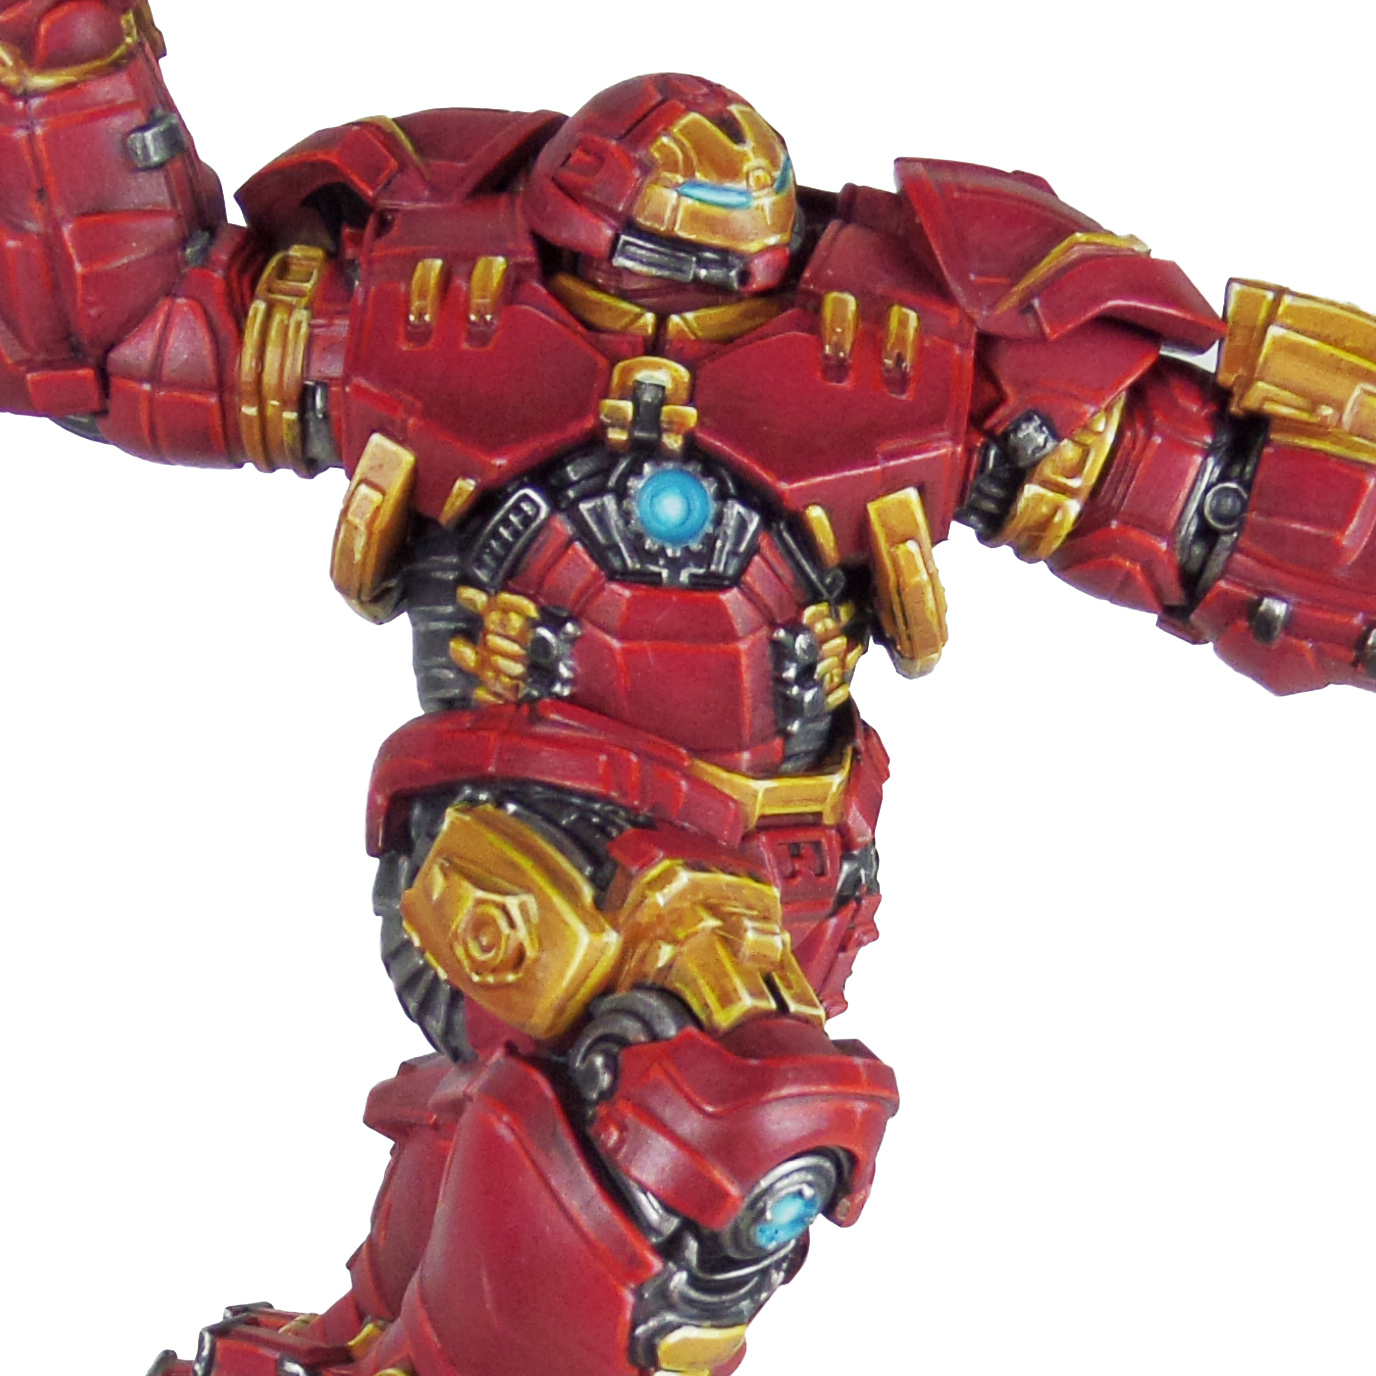
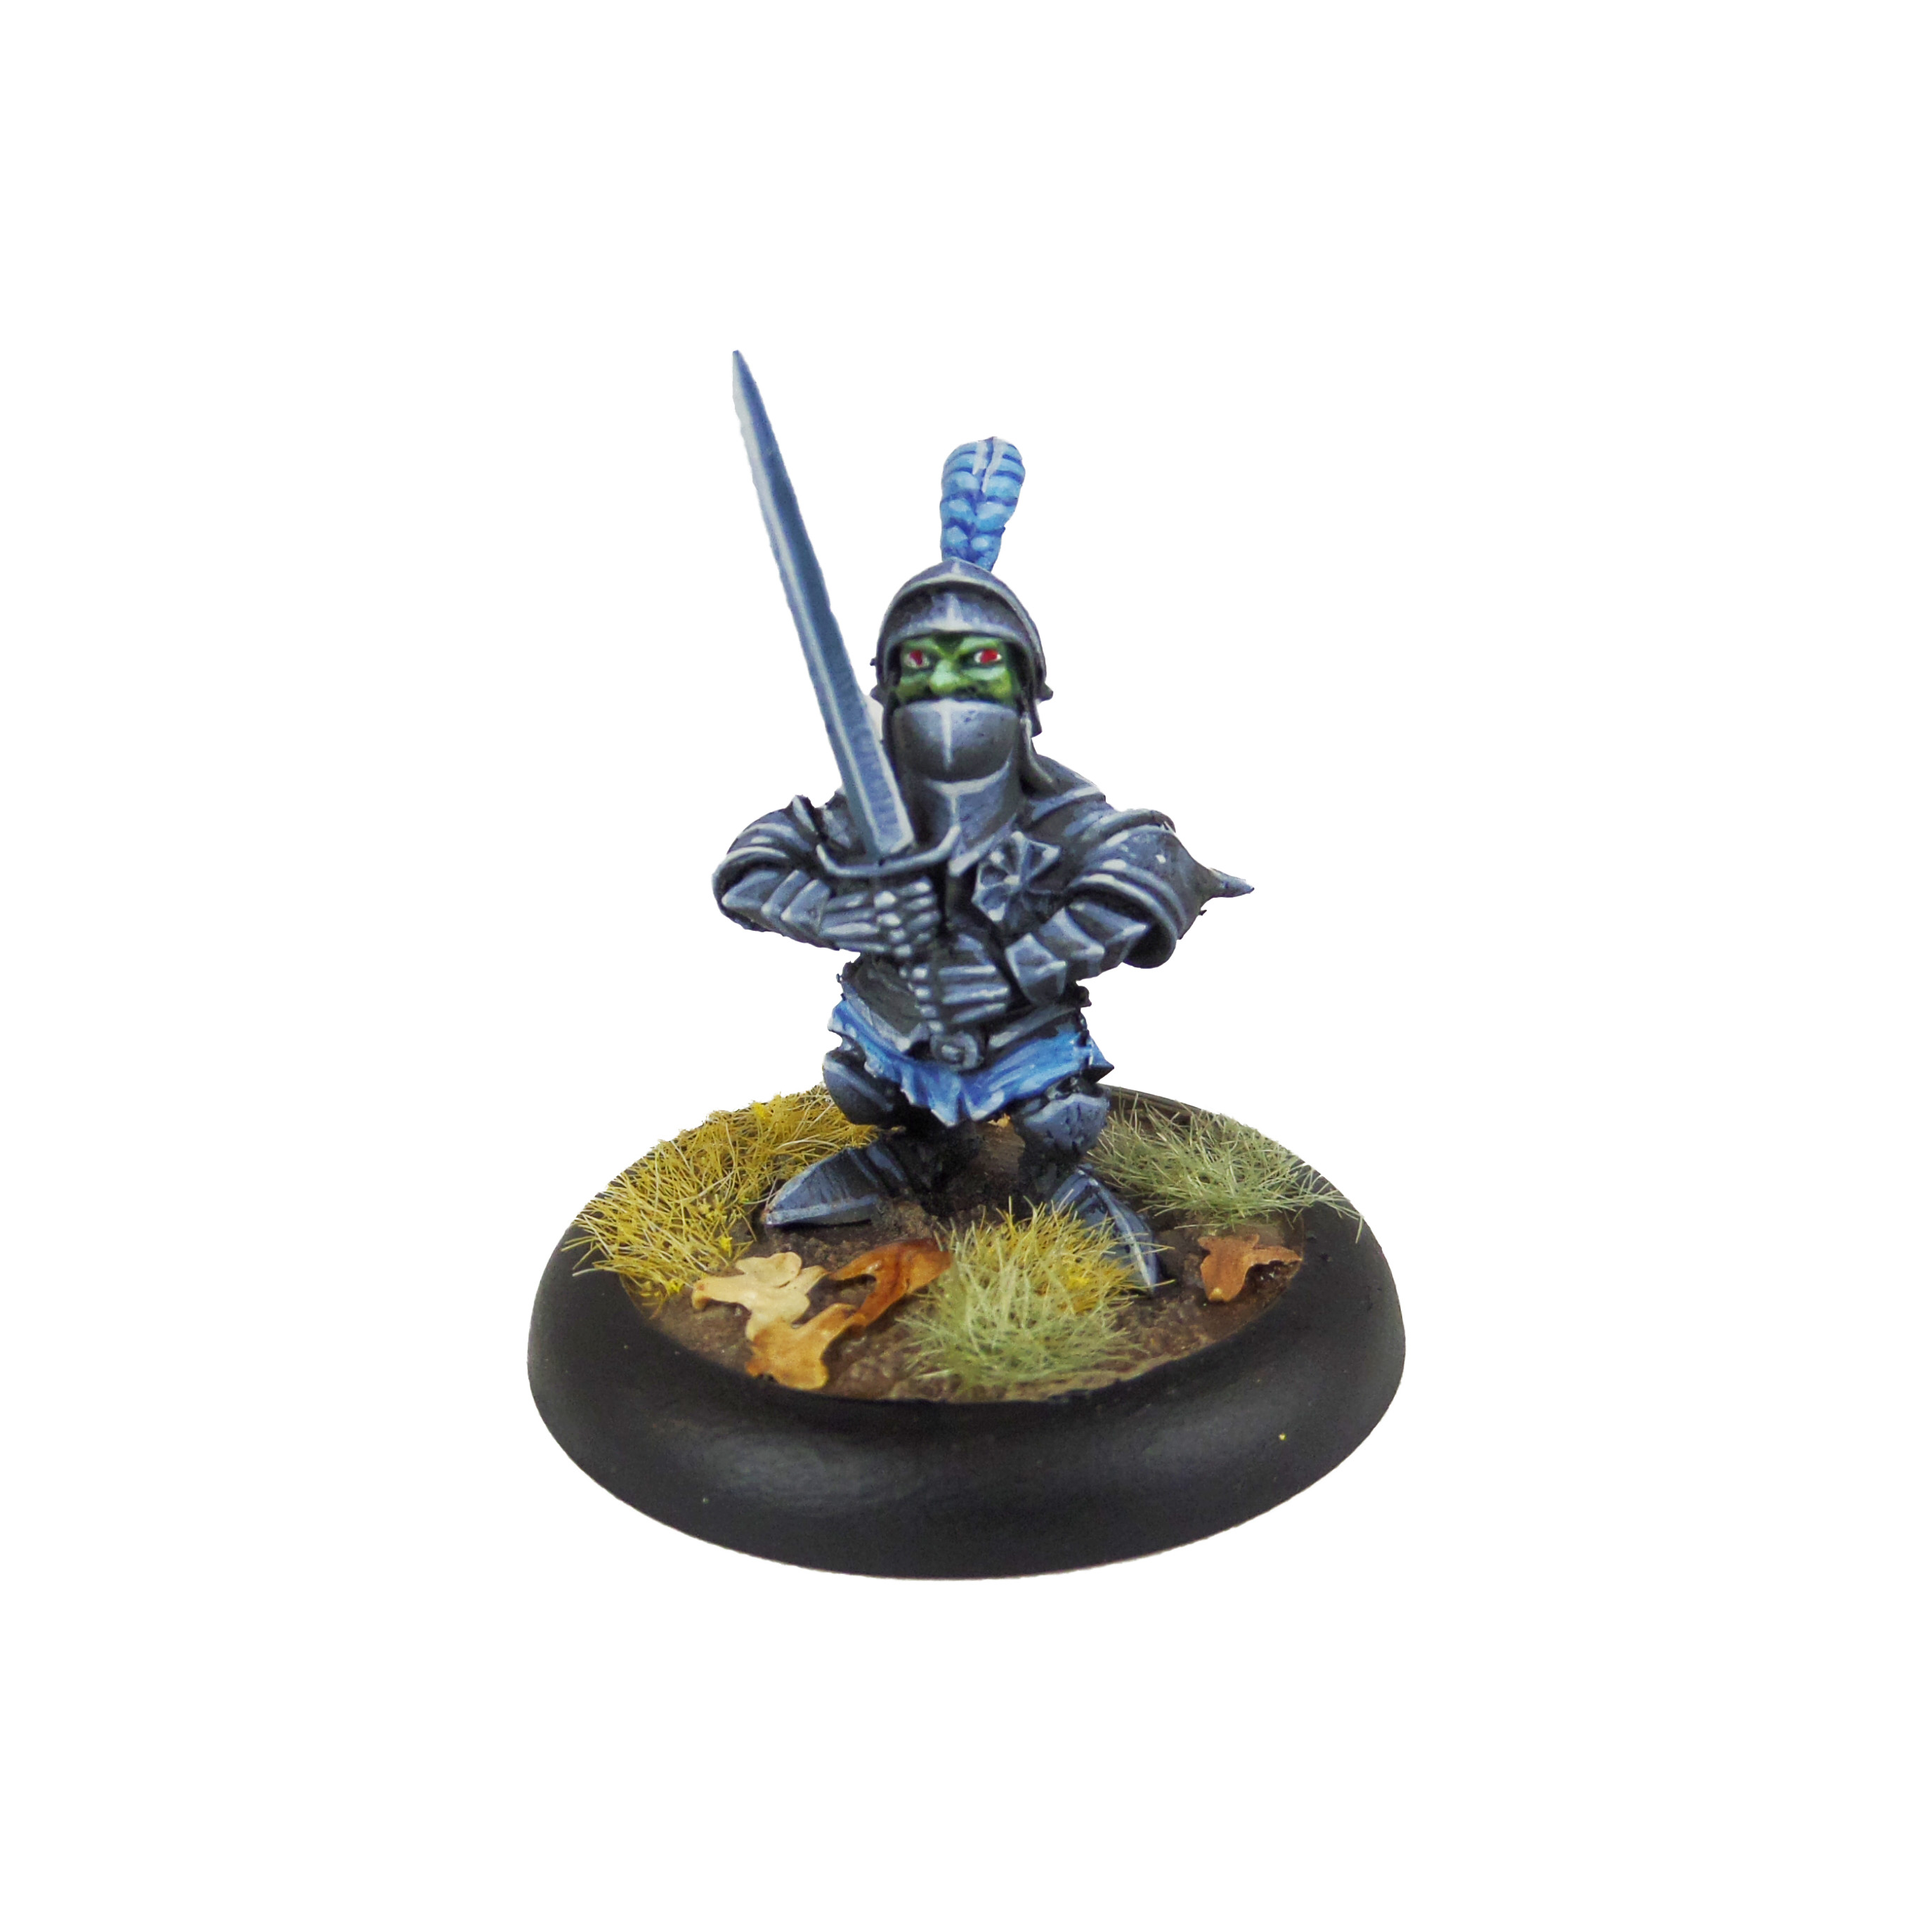
Main Body Colours

Stage 1

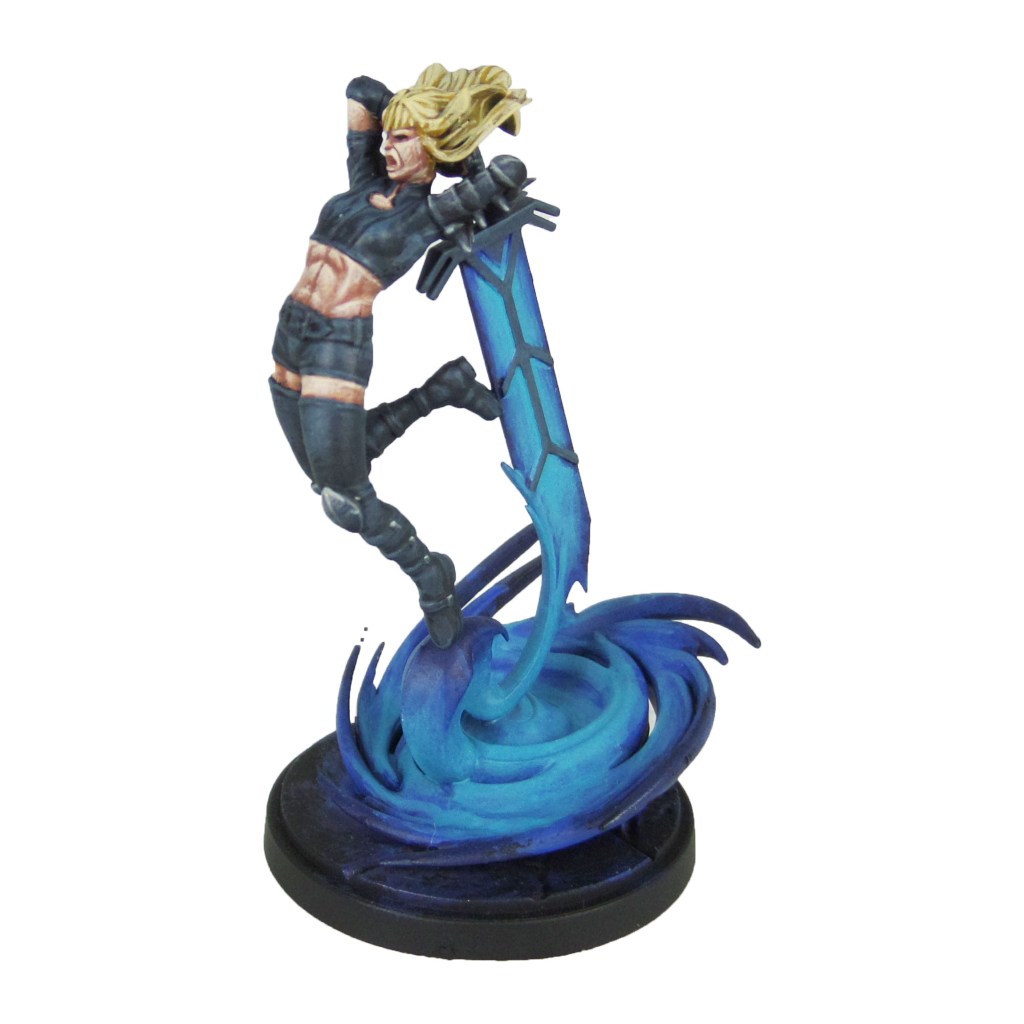
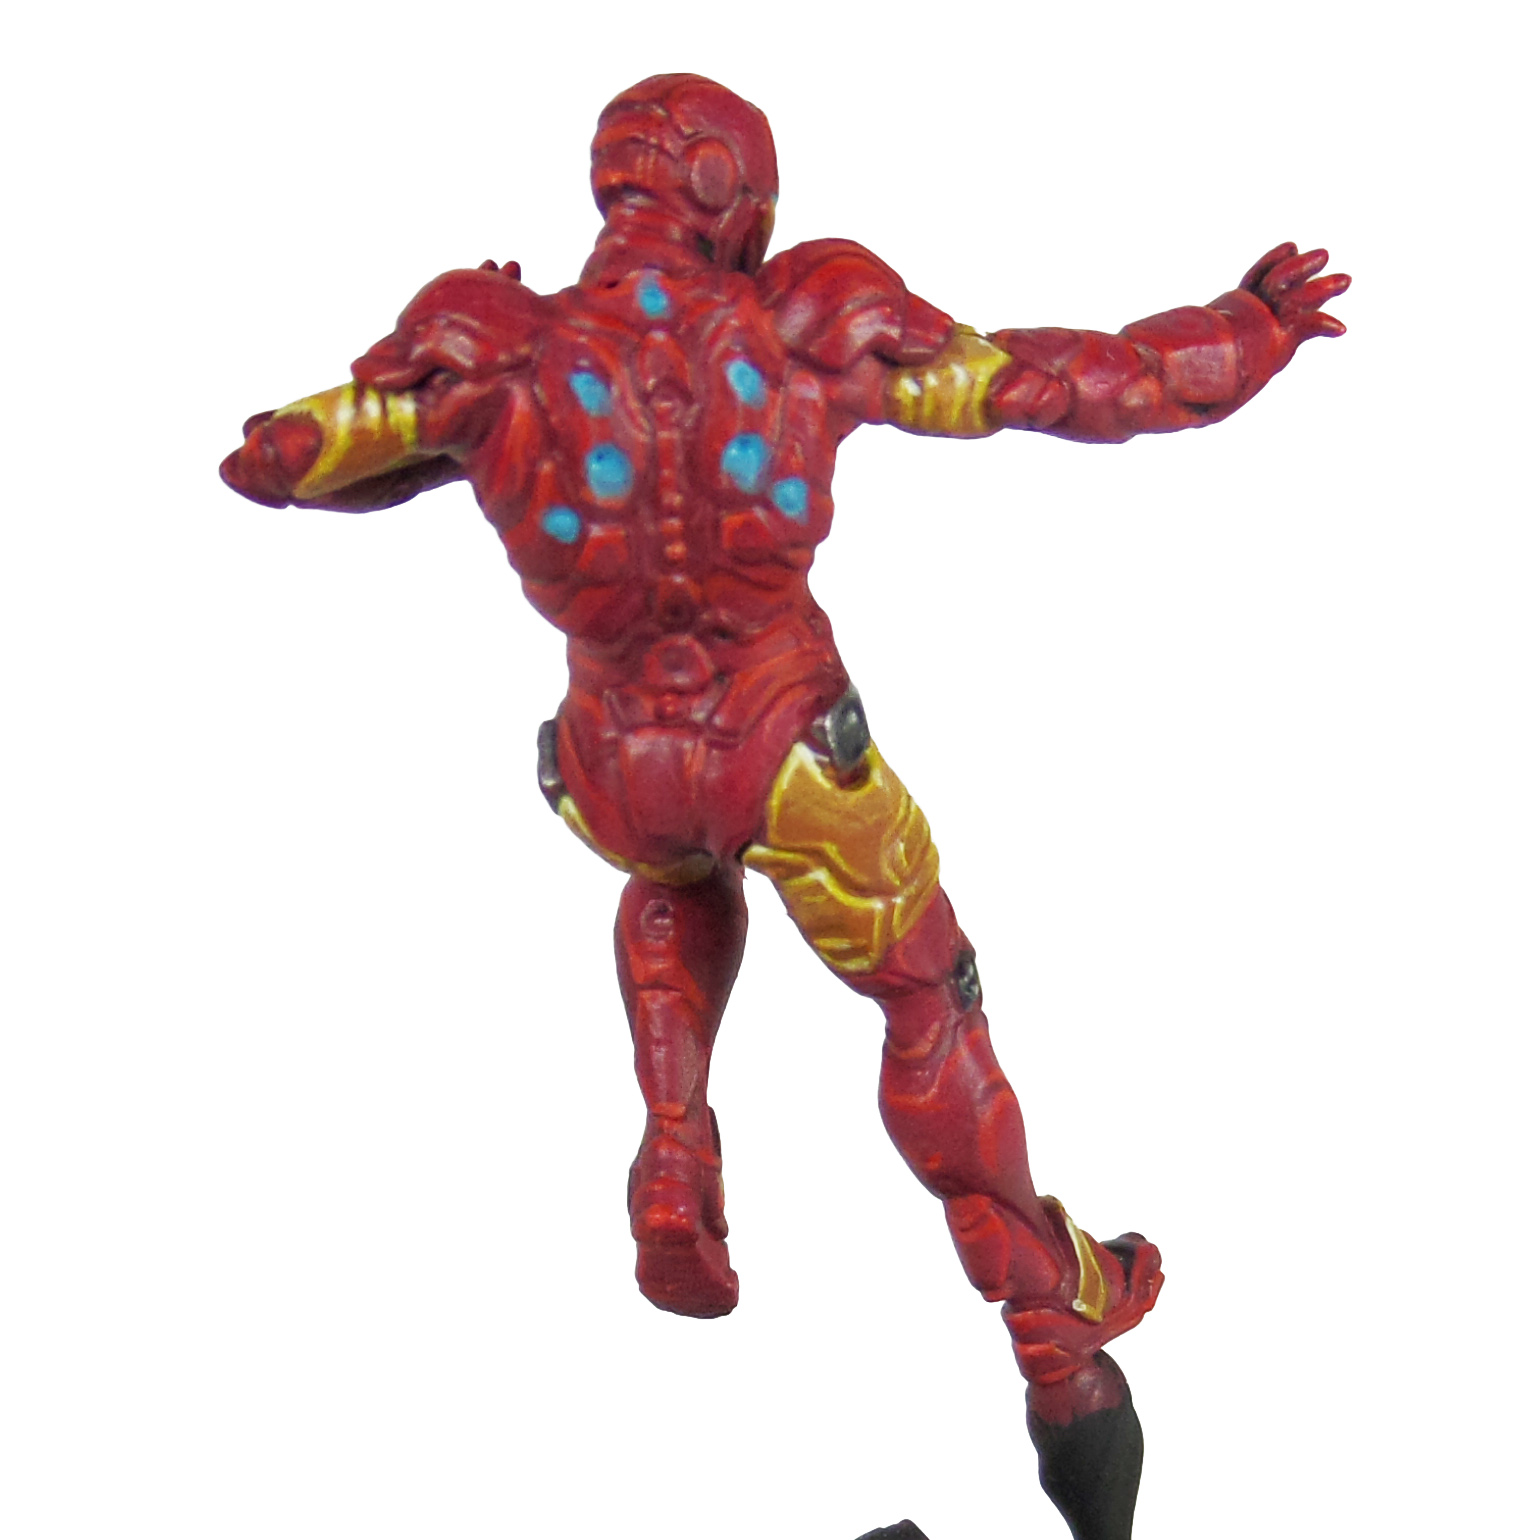
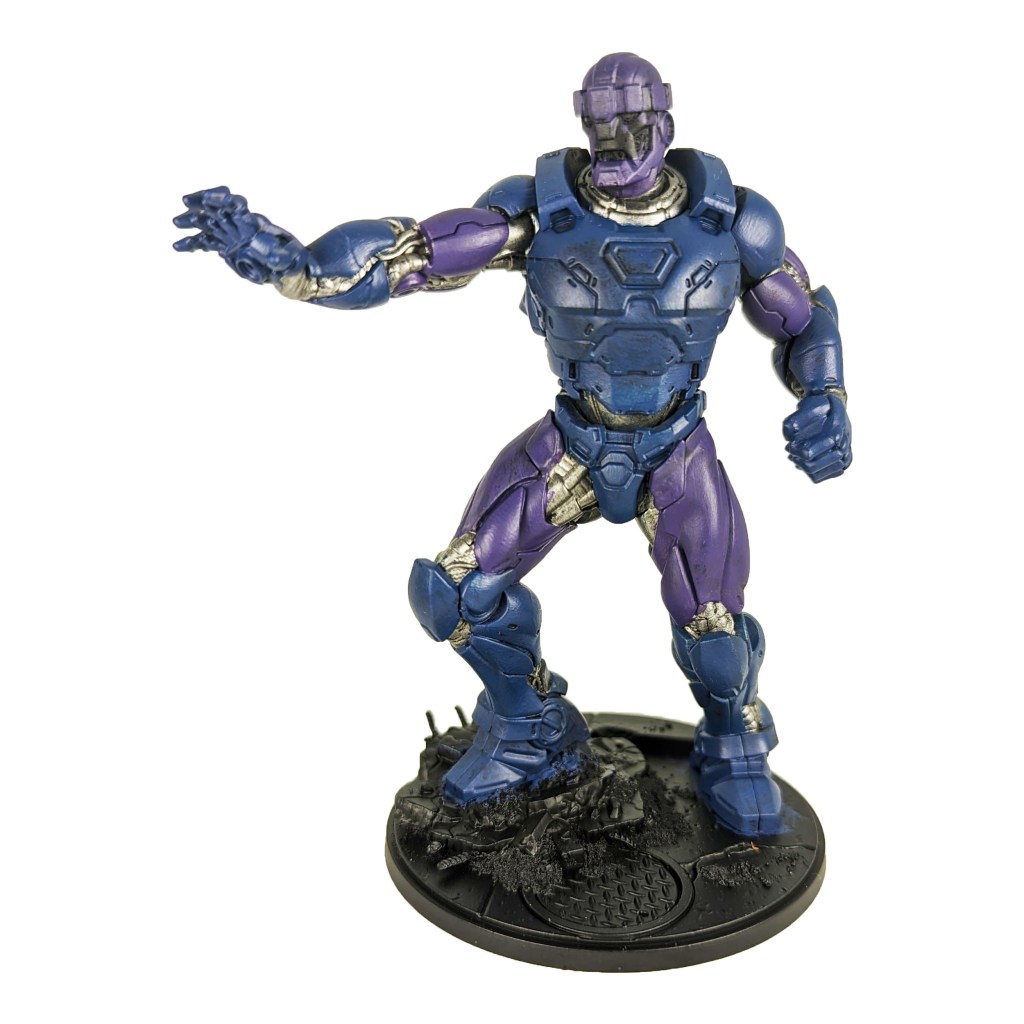
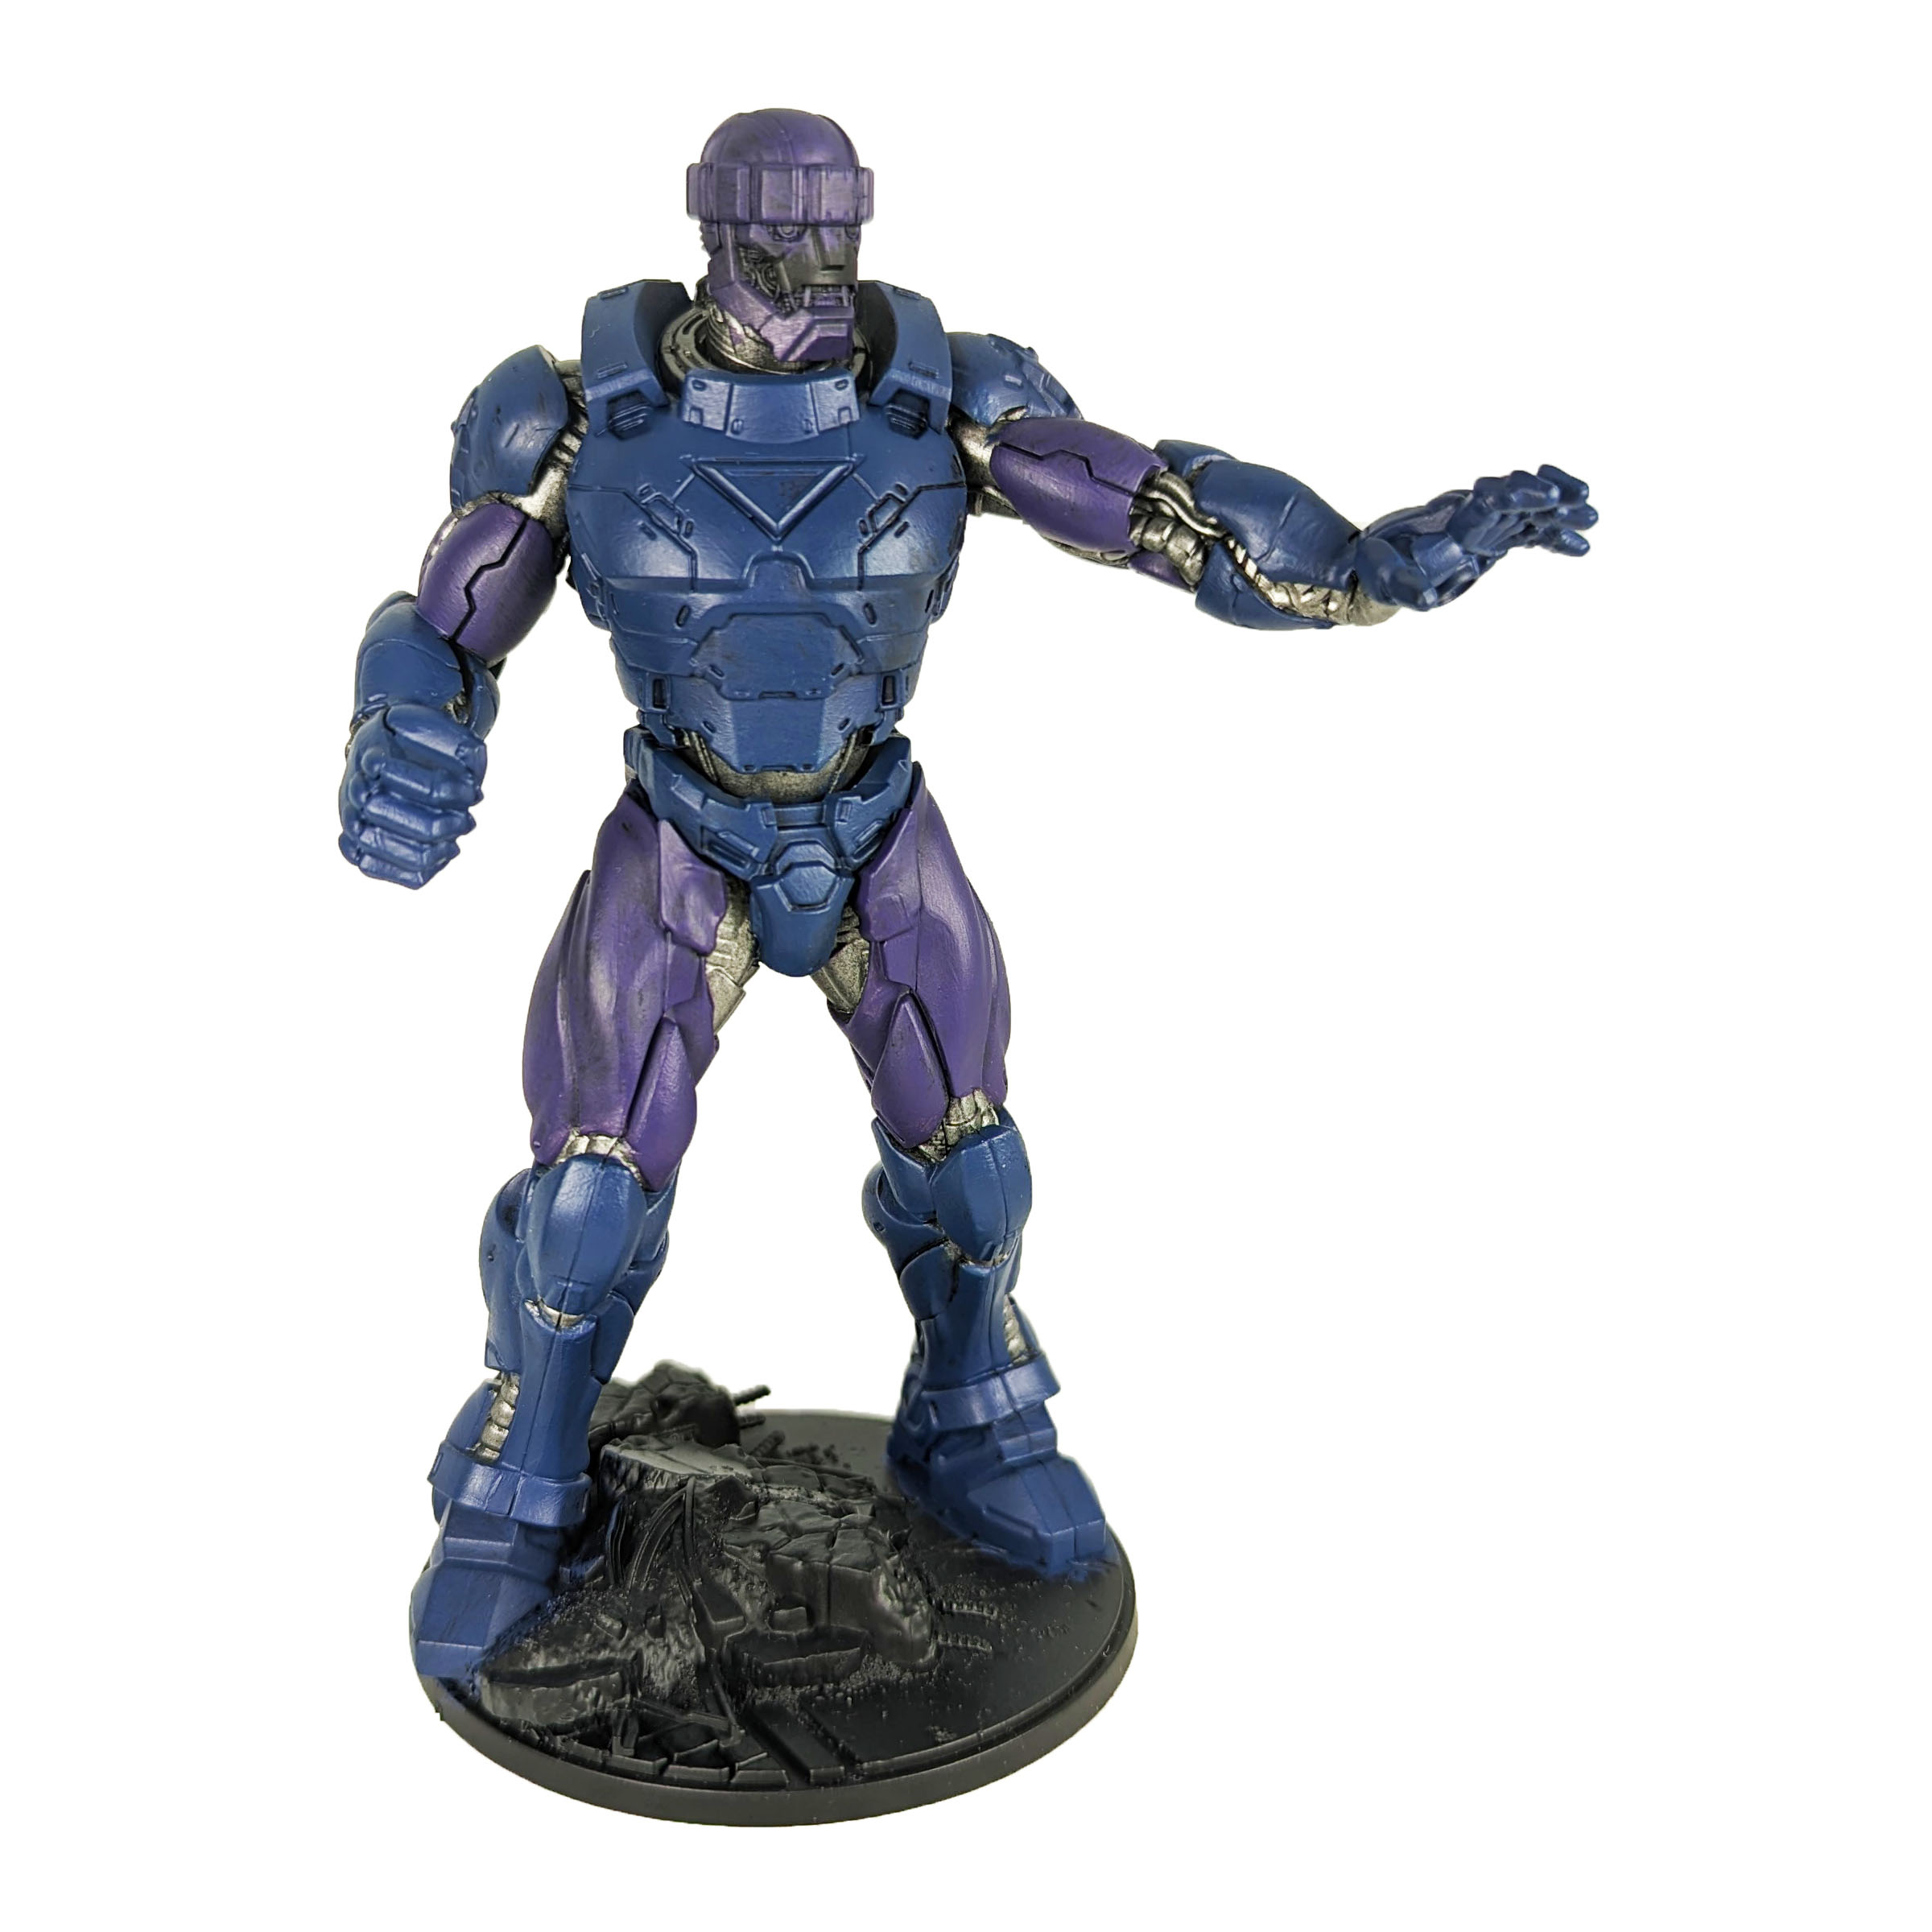
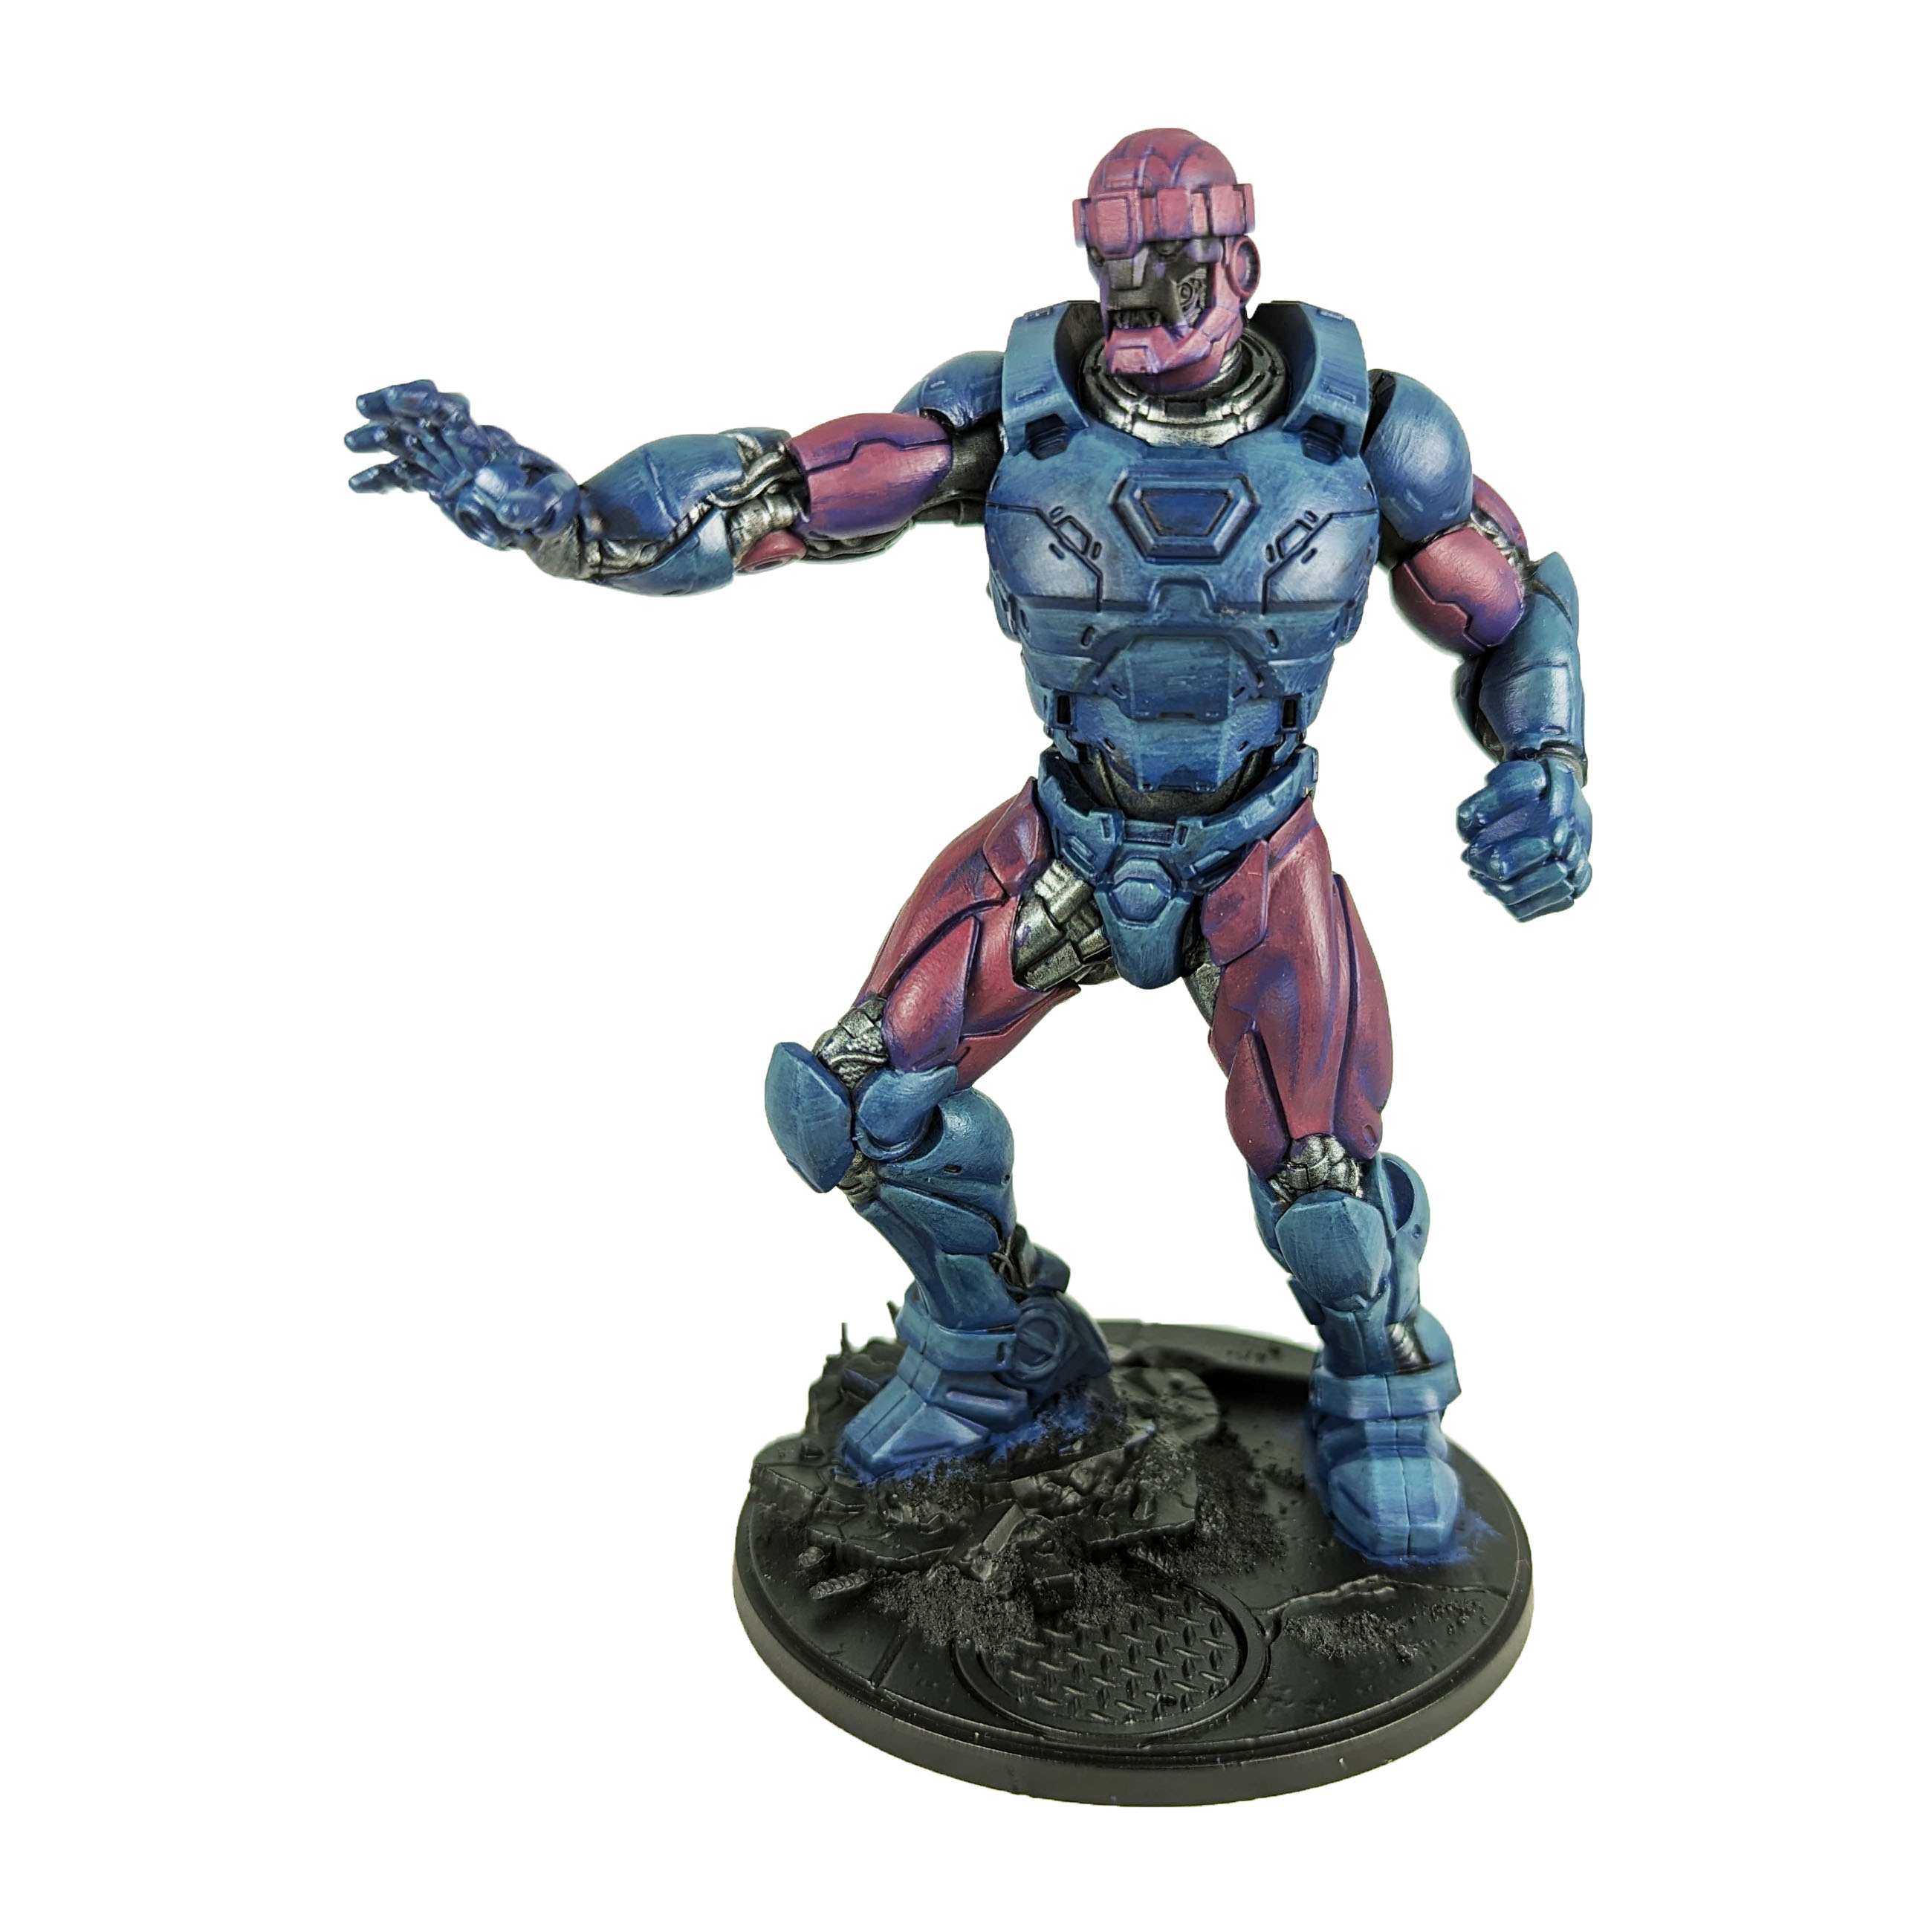
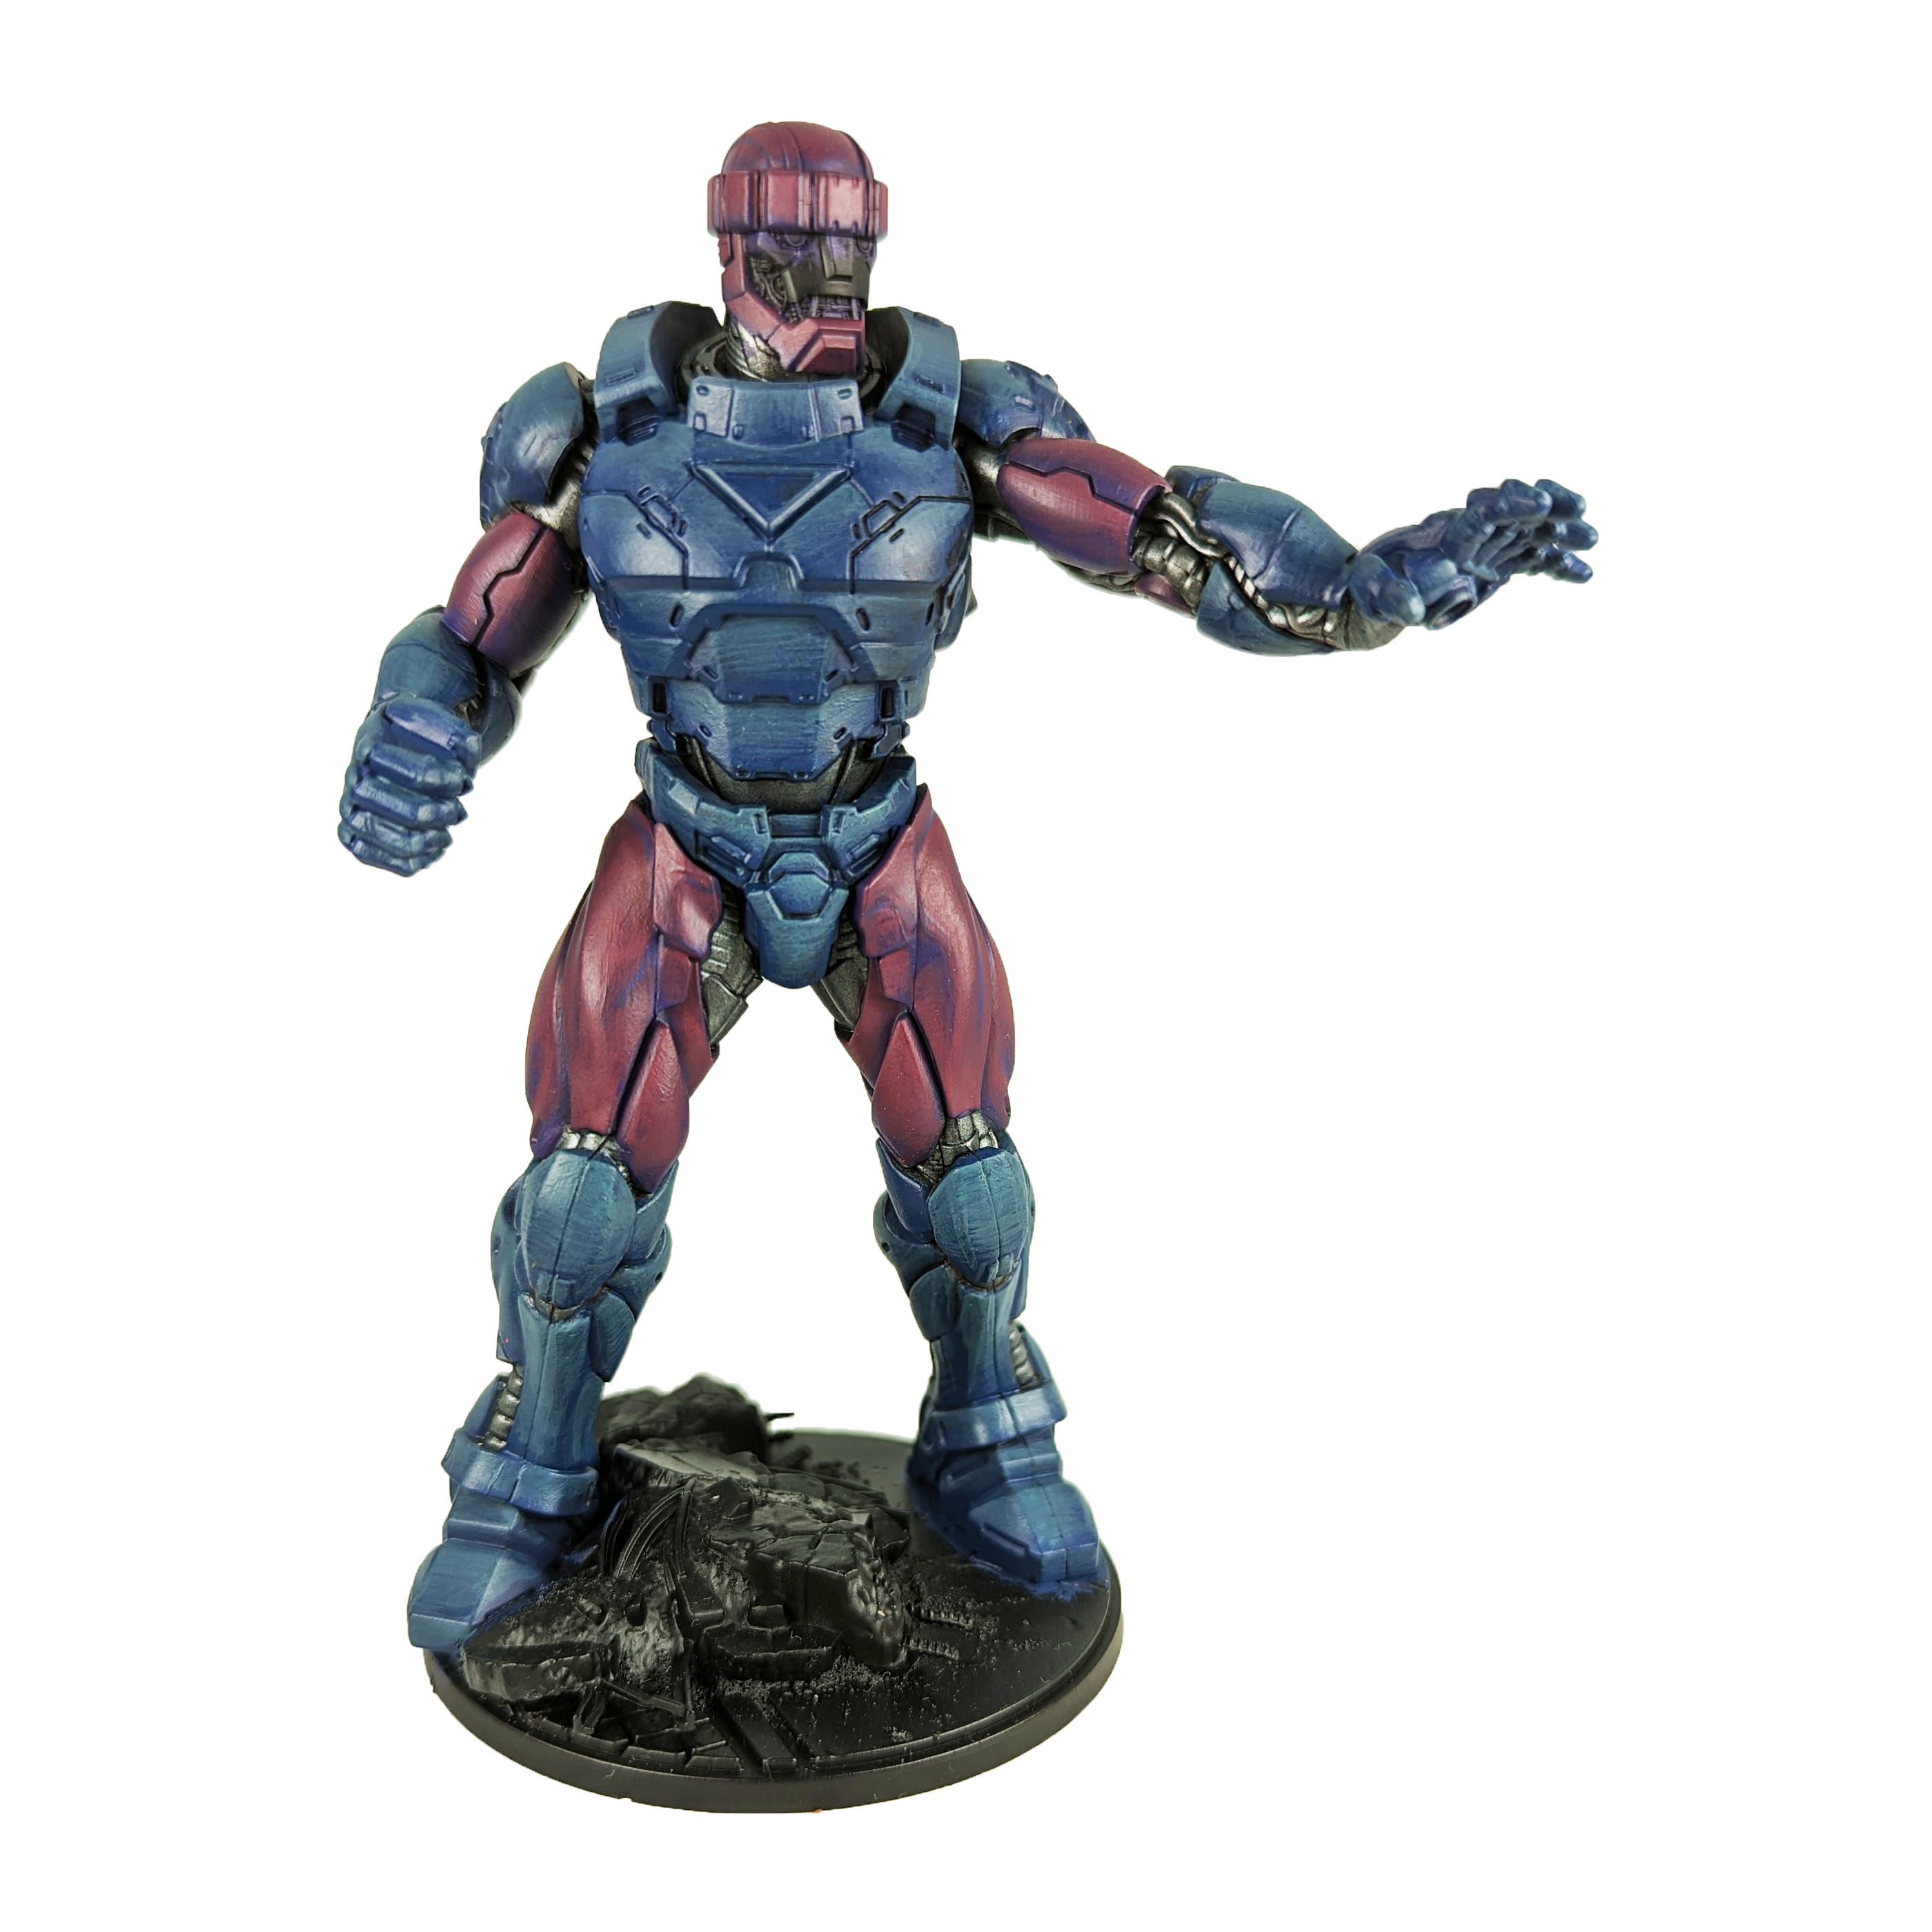
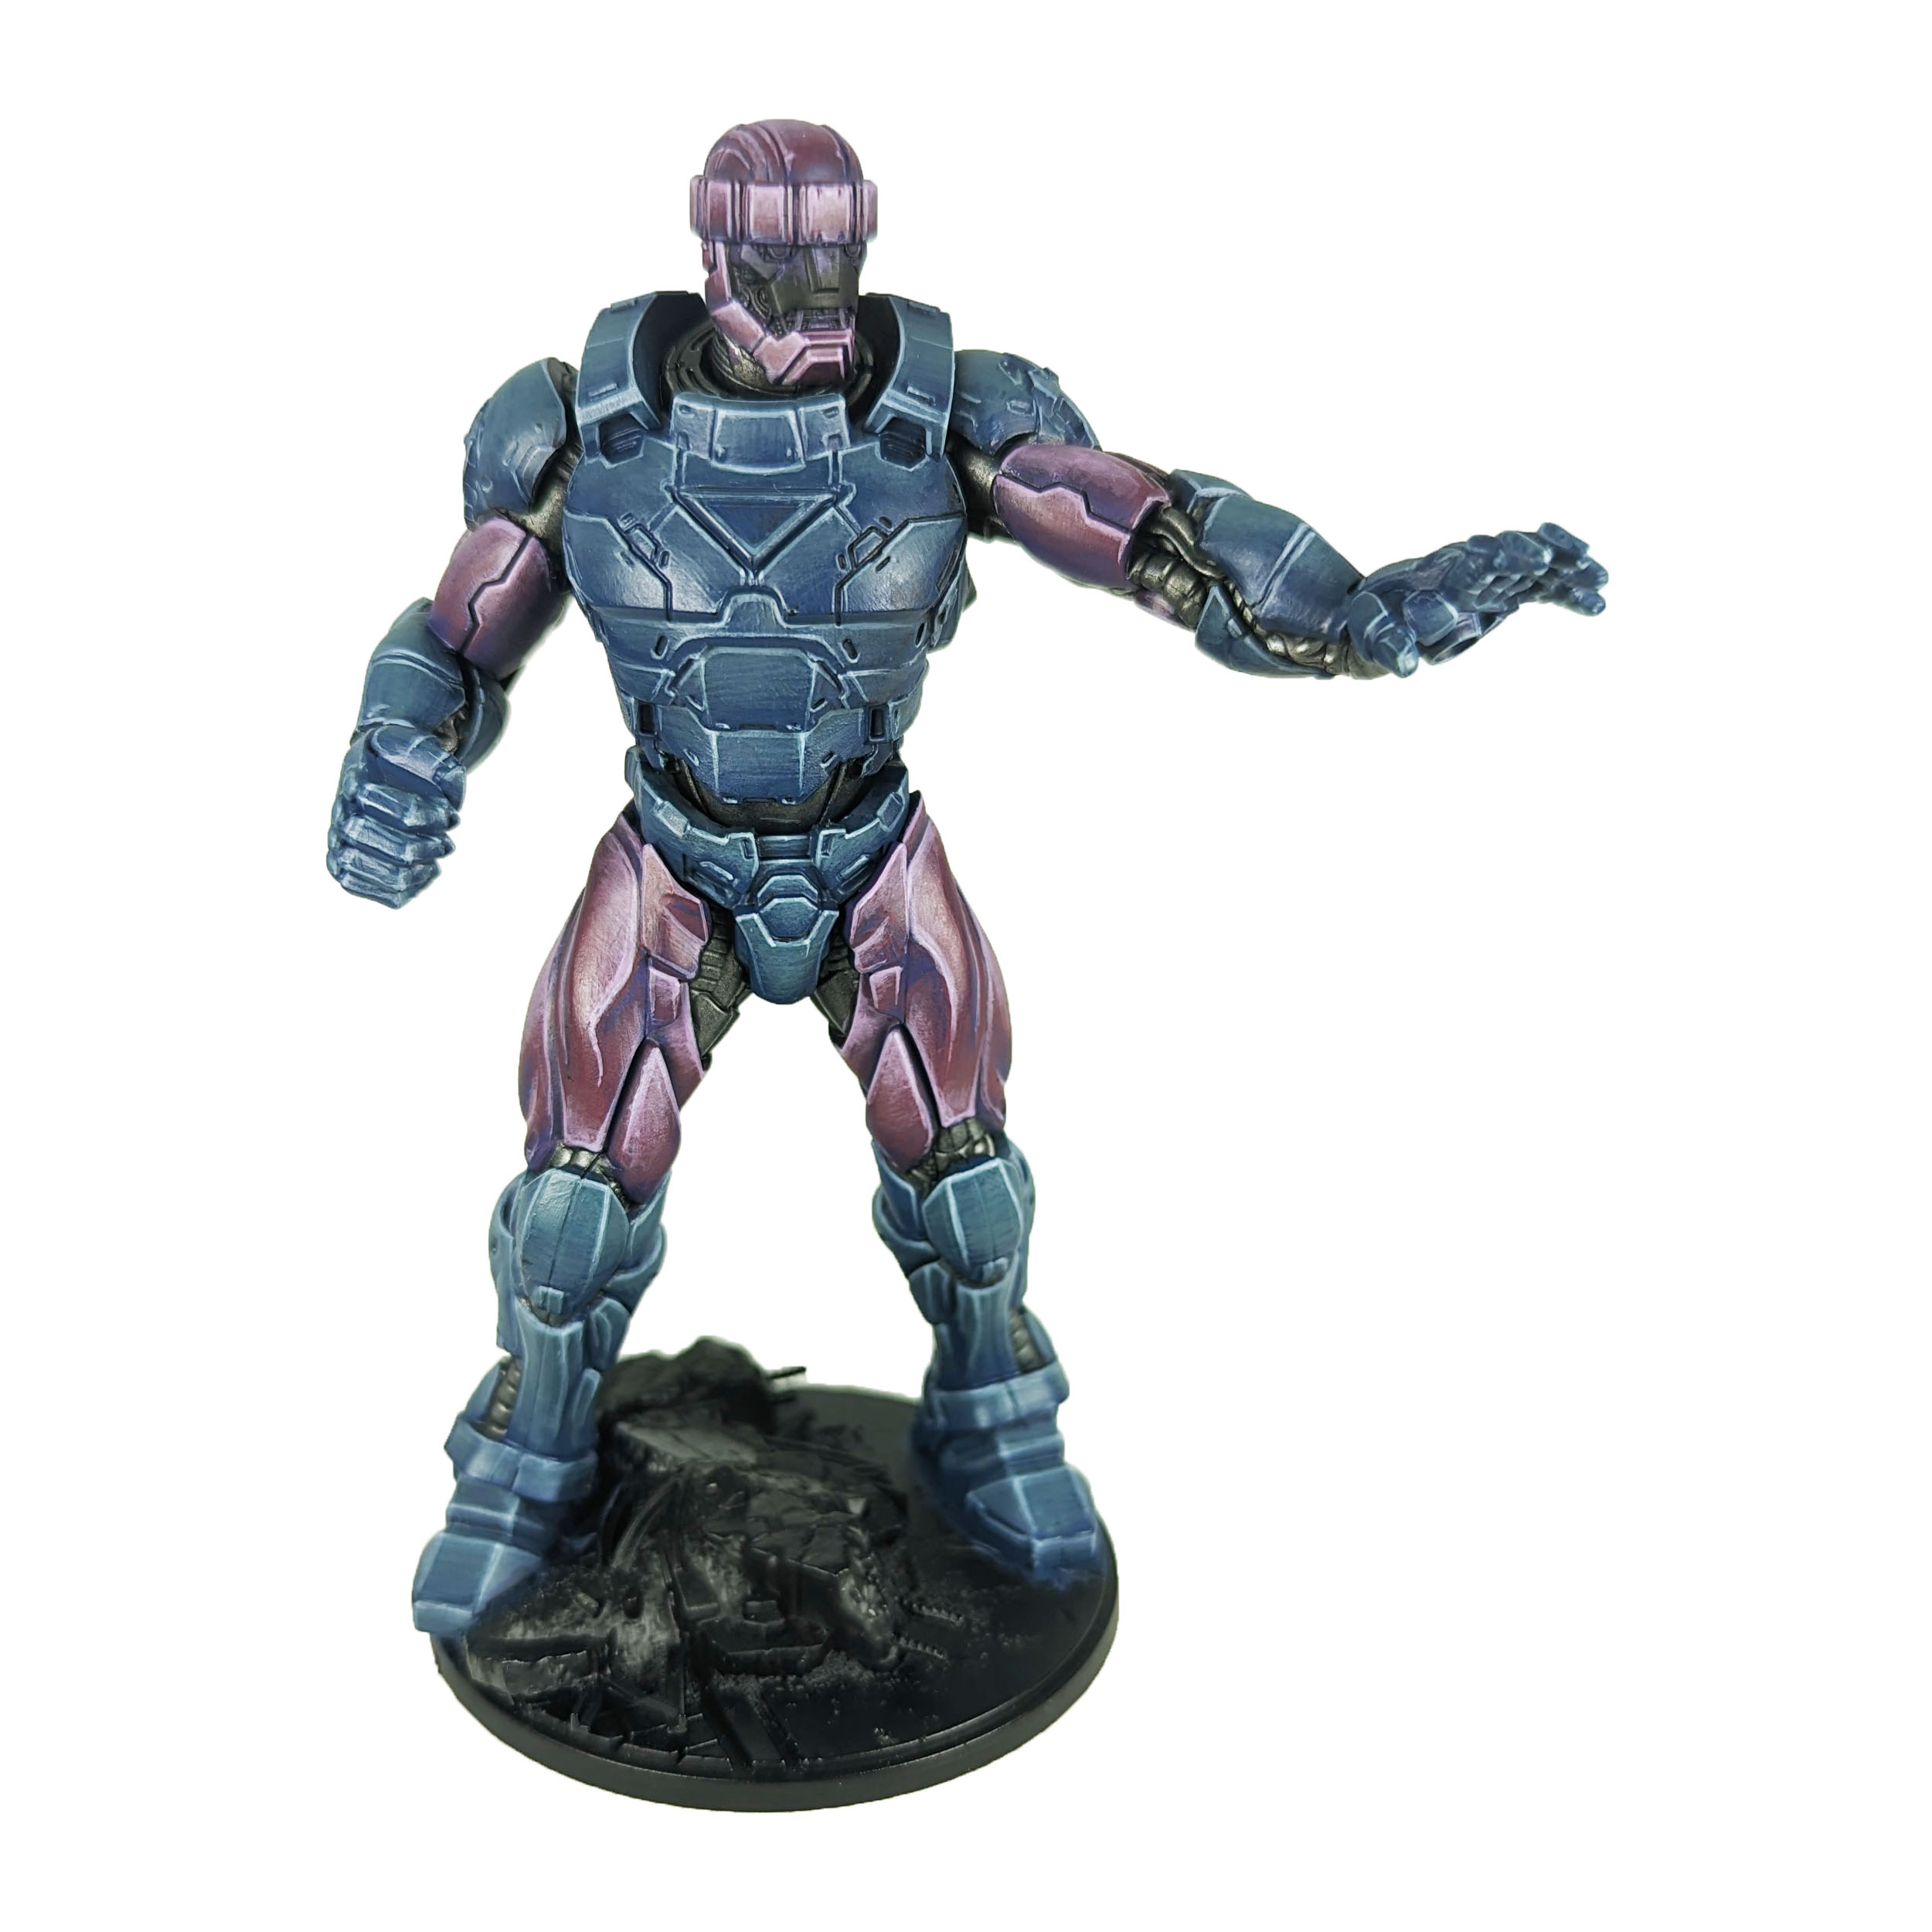
Kantor Blue: Apply a basecoat to the blue sections.

Phoenician Purple: Apply a basecoat to the head, thighs and upper arms.

Leadbelcher: Apply a basecoat to the joints.

Stage 2

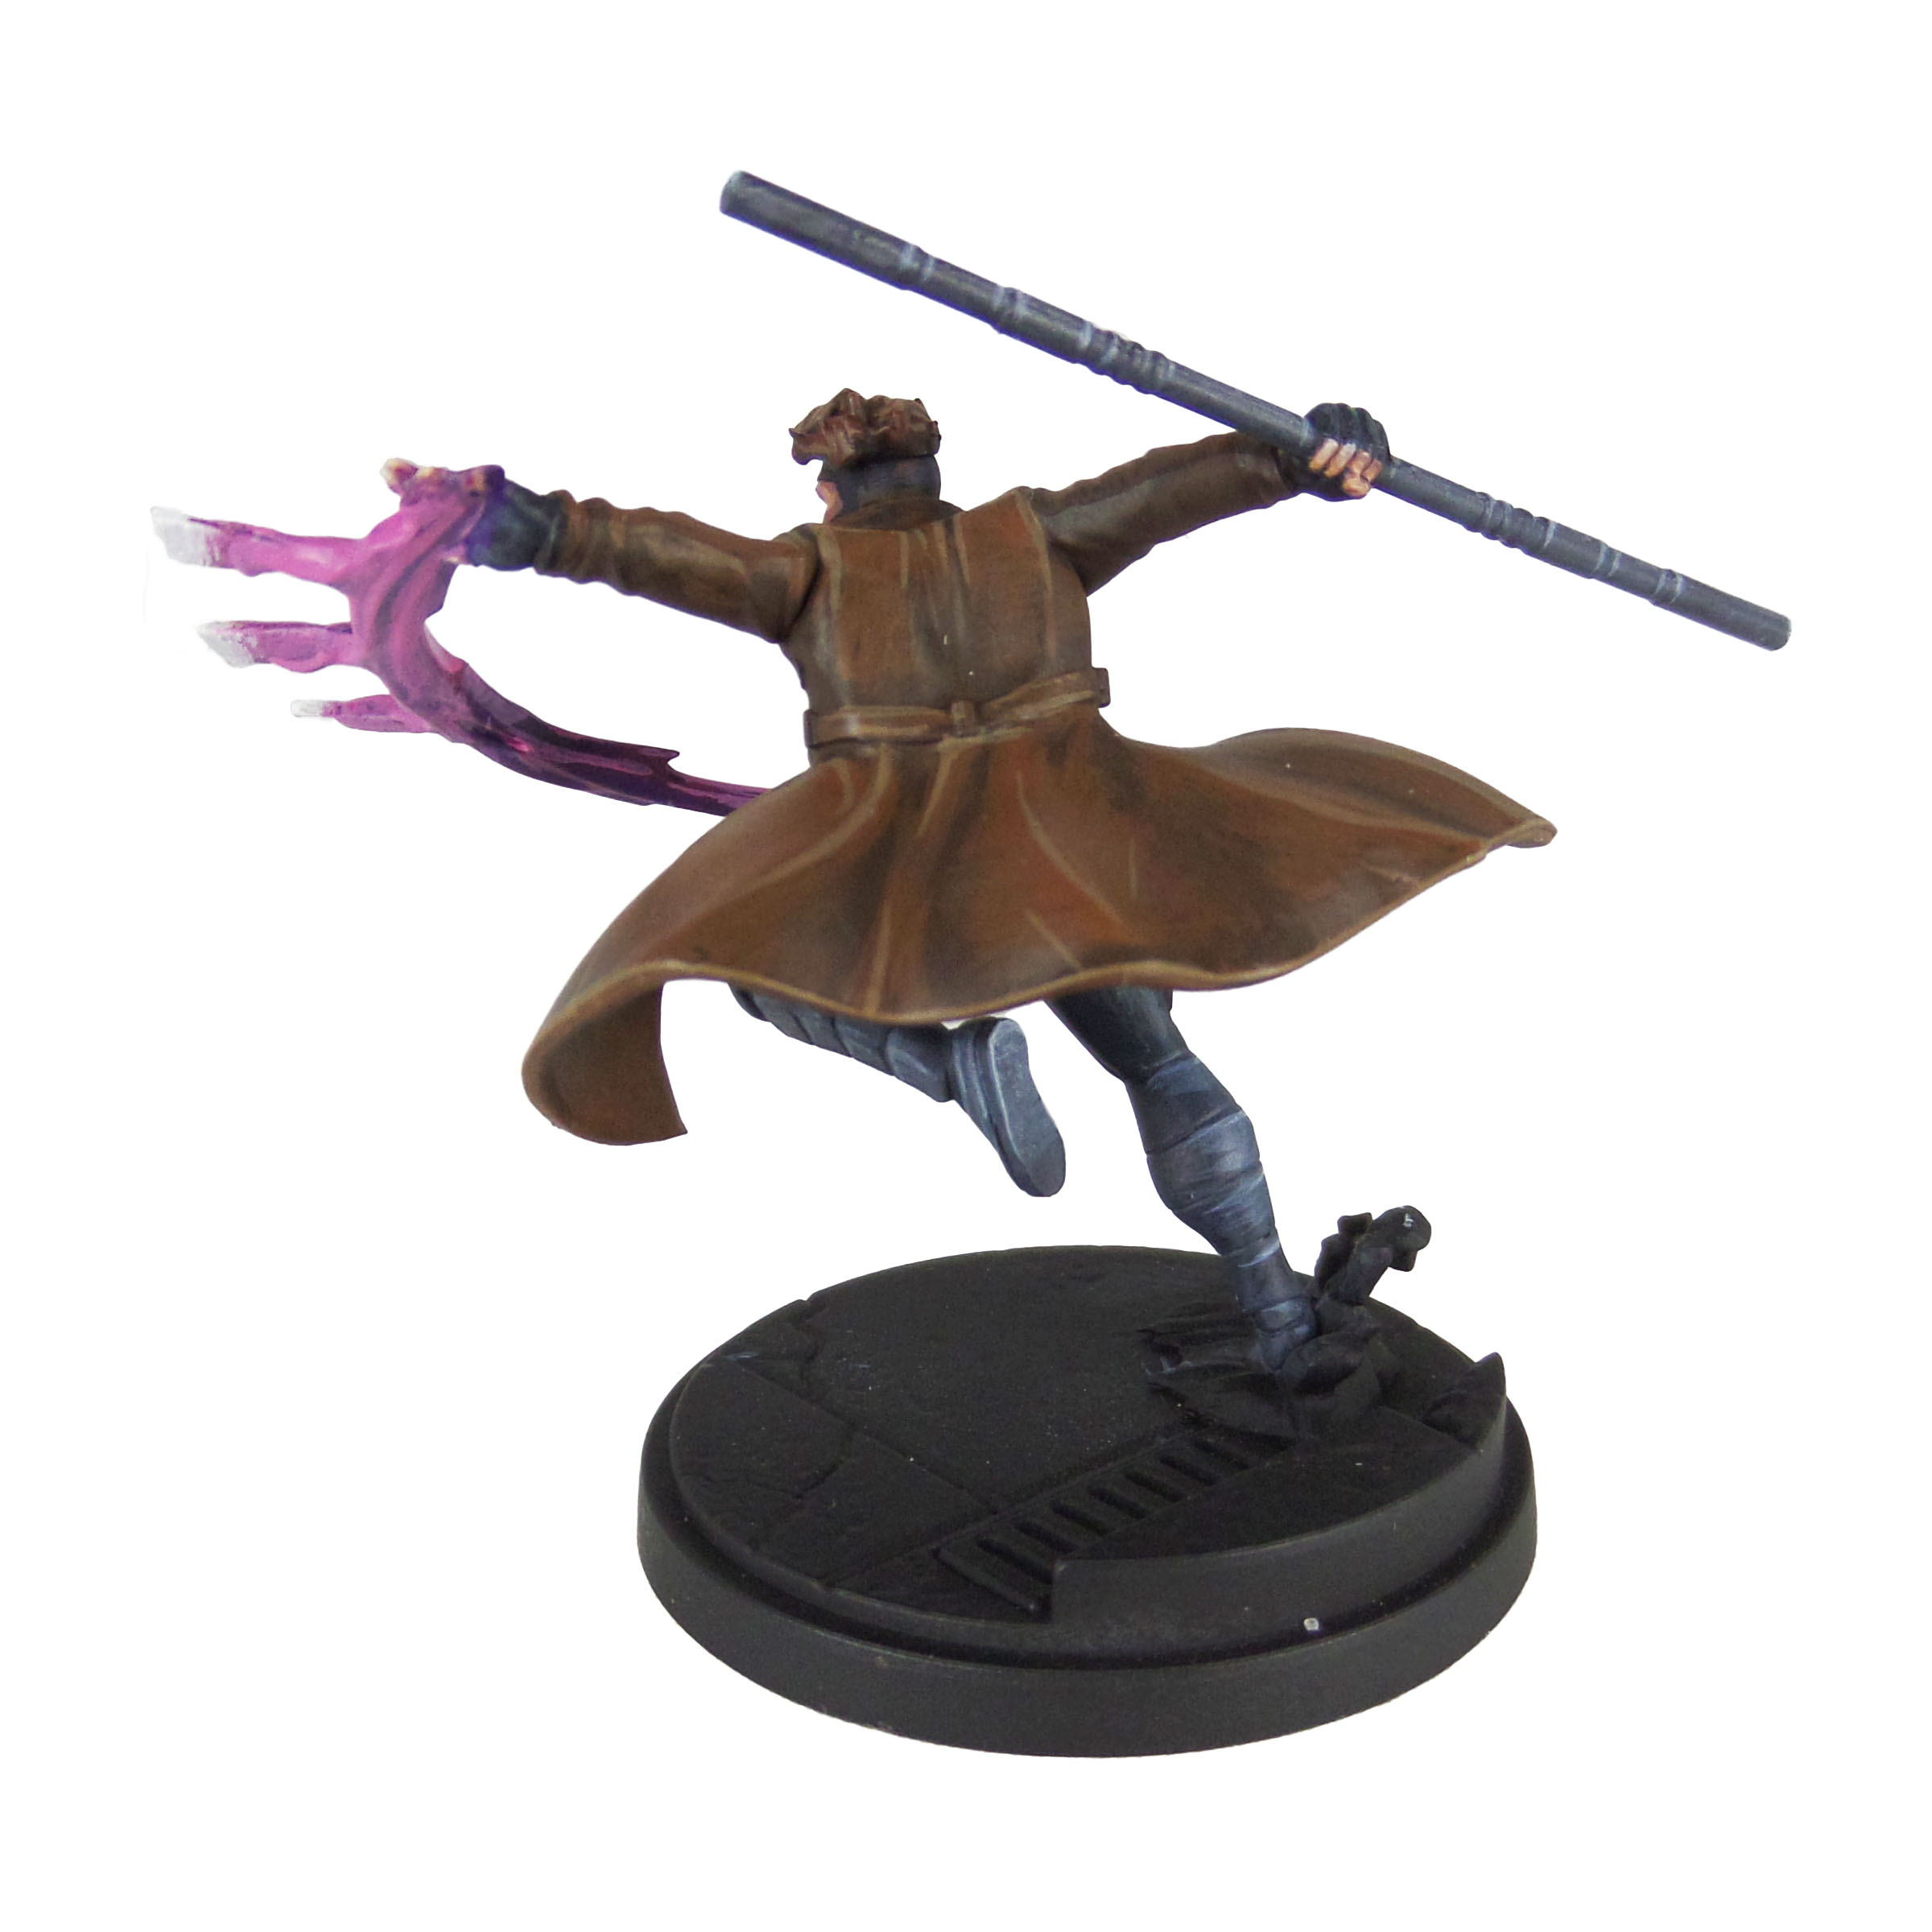
Thunderhawk Blue: Apply a thinned layer to the blue sections.

Screamer Pink: Apply a thinned layer to the head, thighs and upper arms.

Nuln Oil: Apply a shade to the metals.

Stage 3

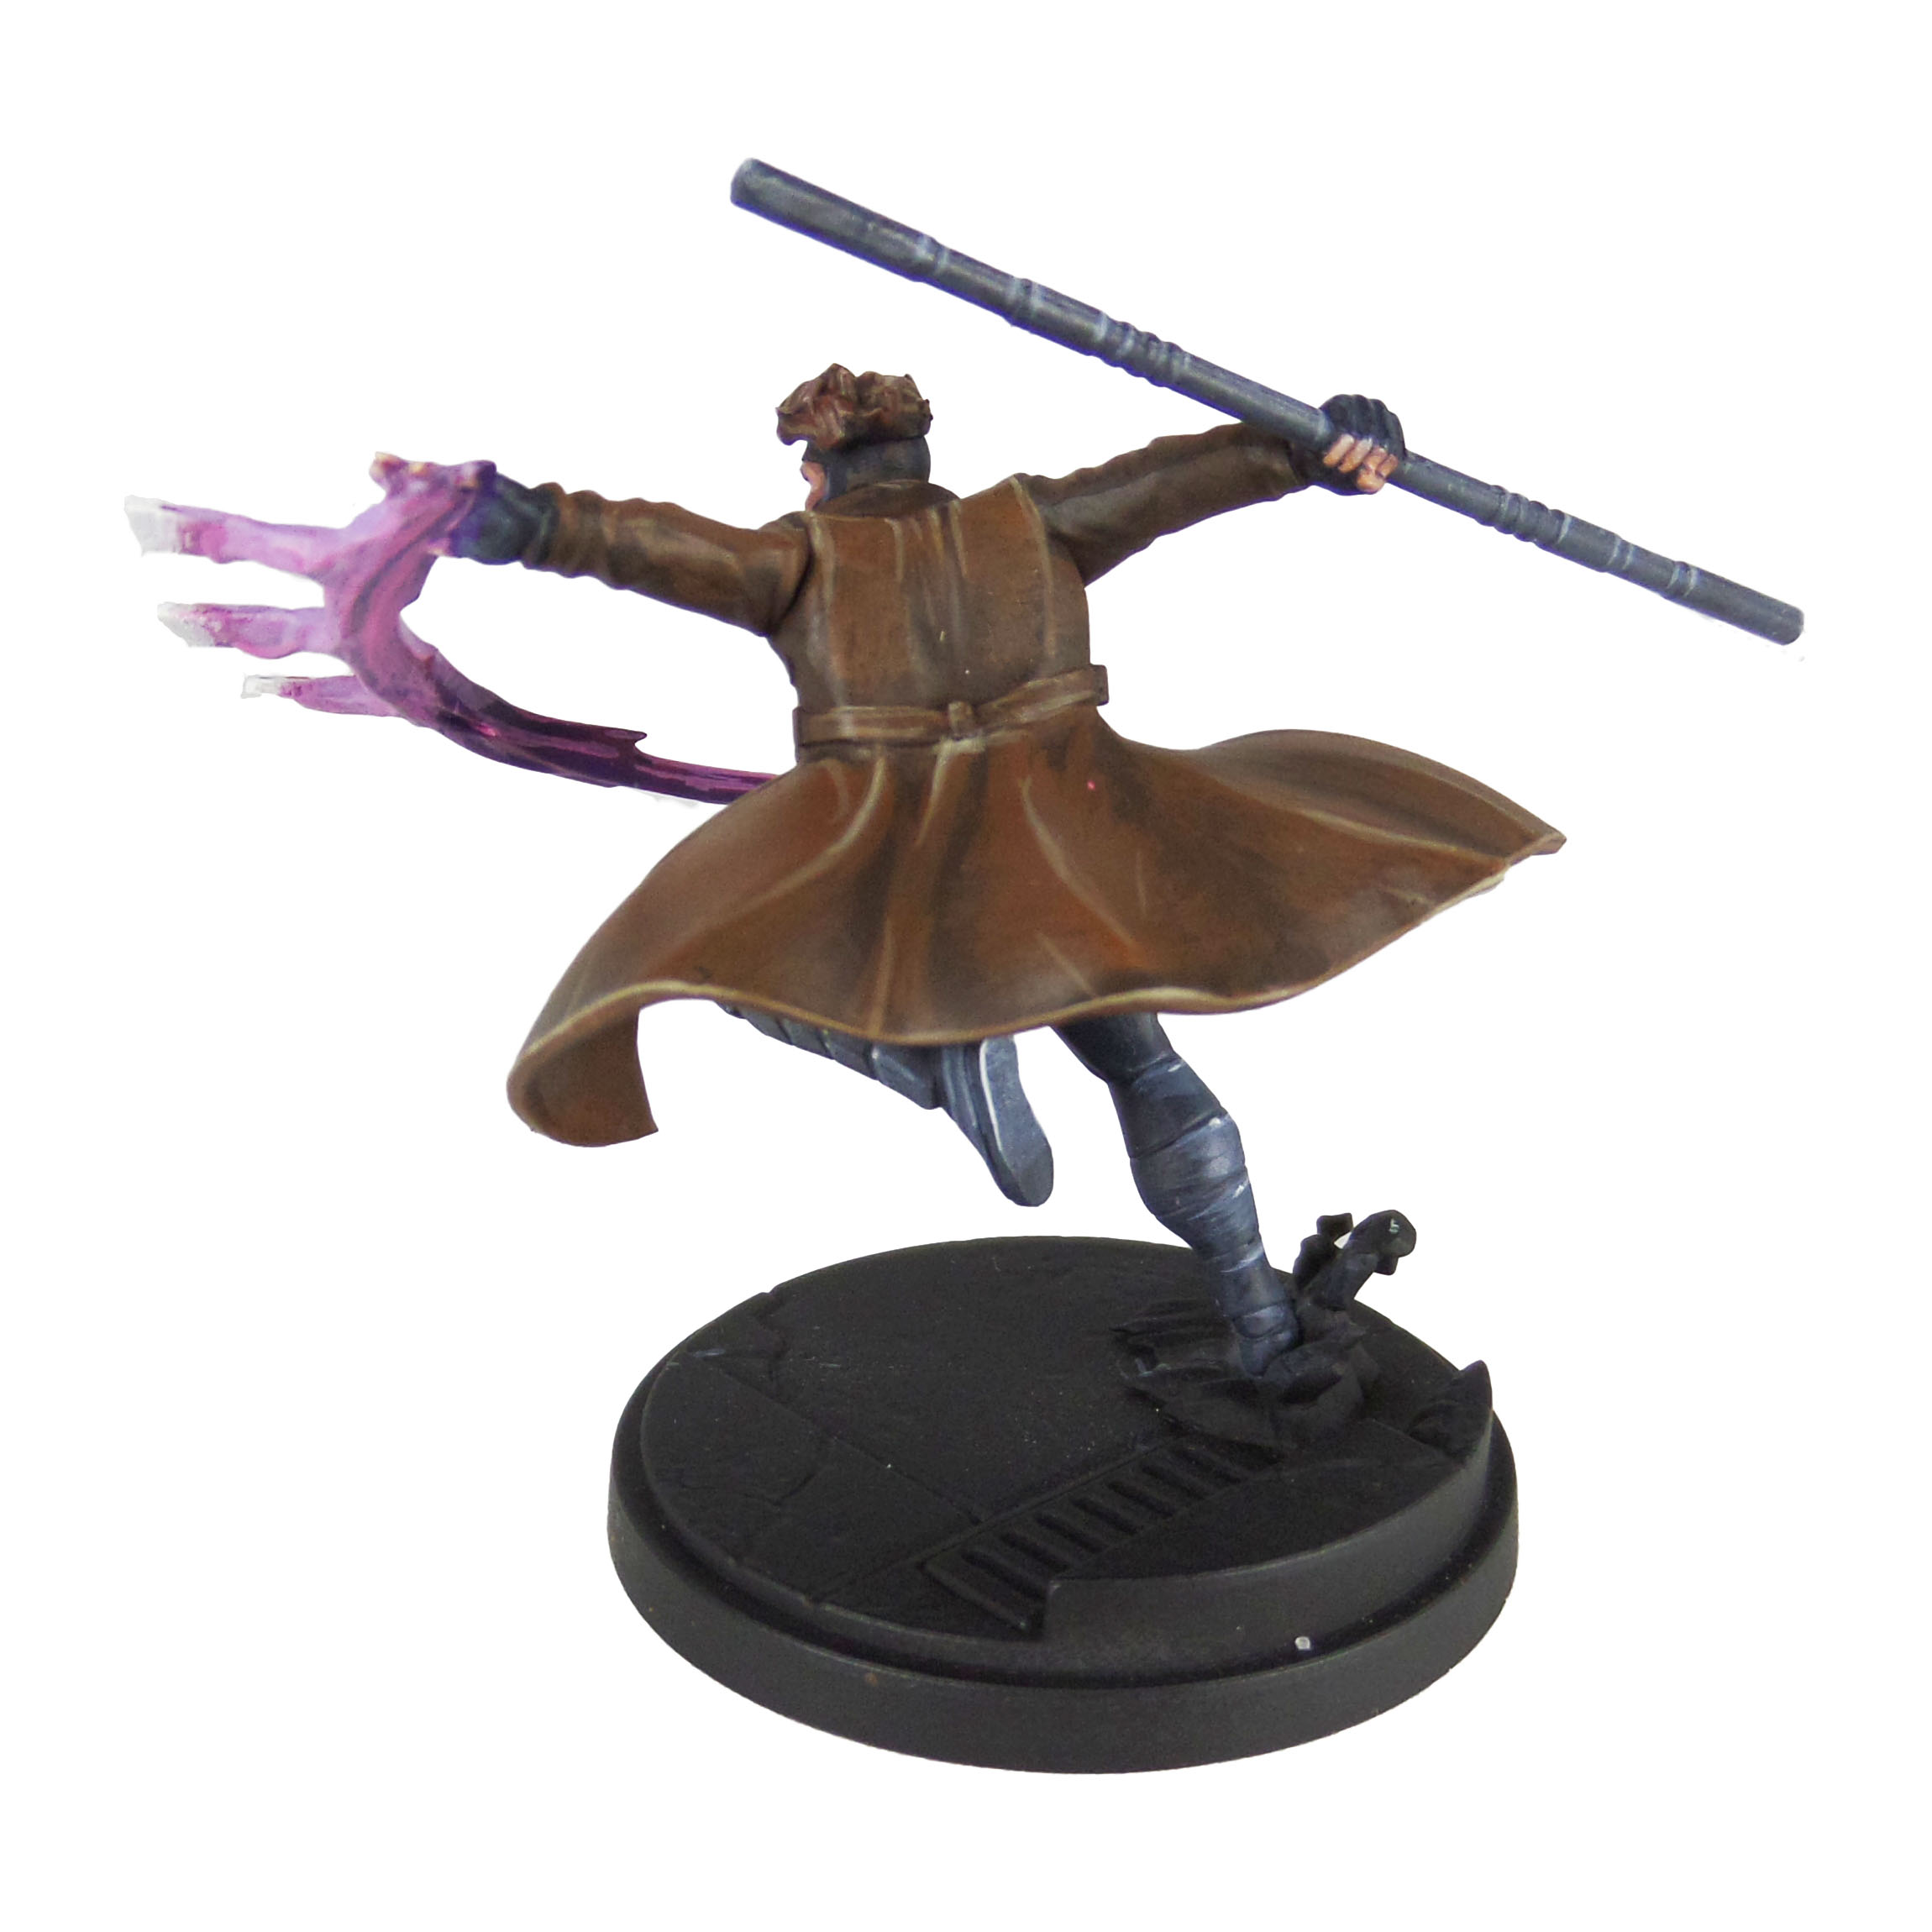
Russ Grey: Apply a line highlight to the blue sections.

Kakophoni Purple: Apply a line highlight to the head, thighs and upper arms.

Drakenhof Nightshade: Apply a shade to the metals.

Stage 4

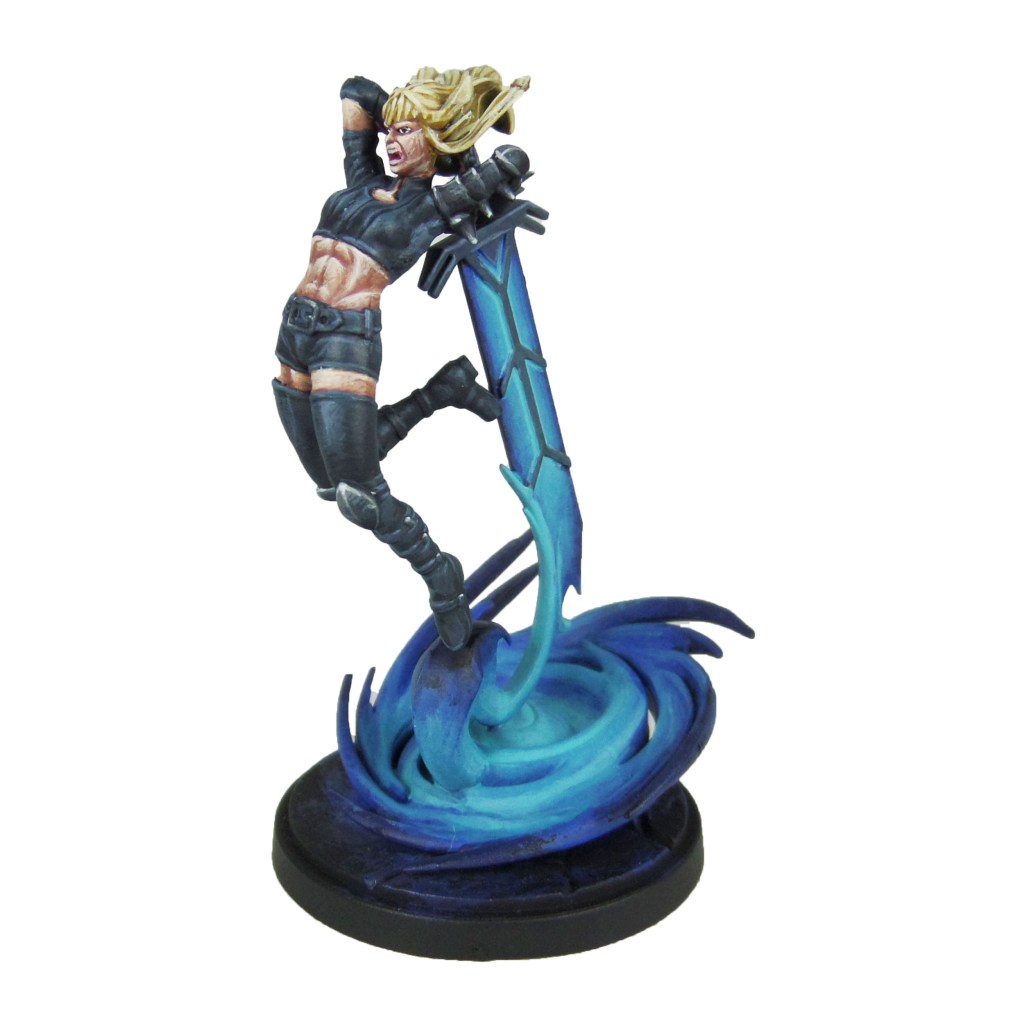
Fenrisian Grey: Apply a spot highlight to the blue sections.

Dechala Lilac: Apply a spot highlight to the head, thighs and upper arms.
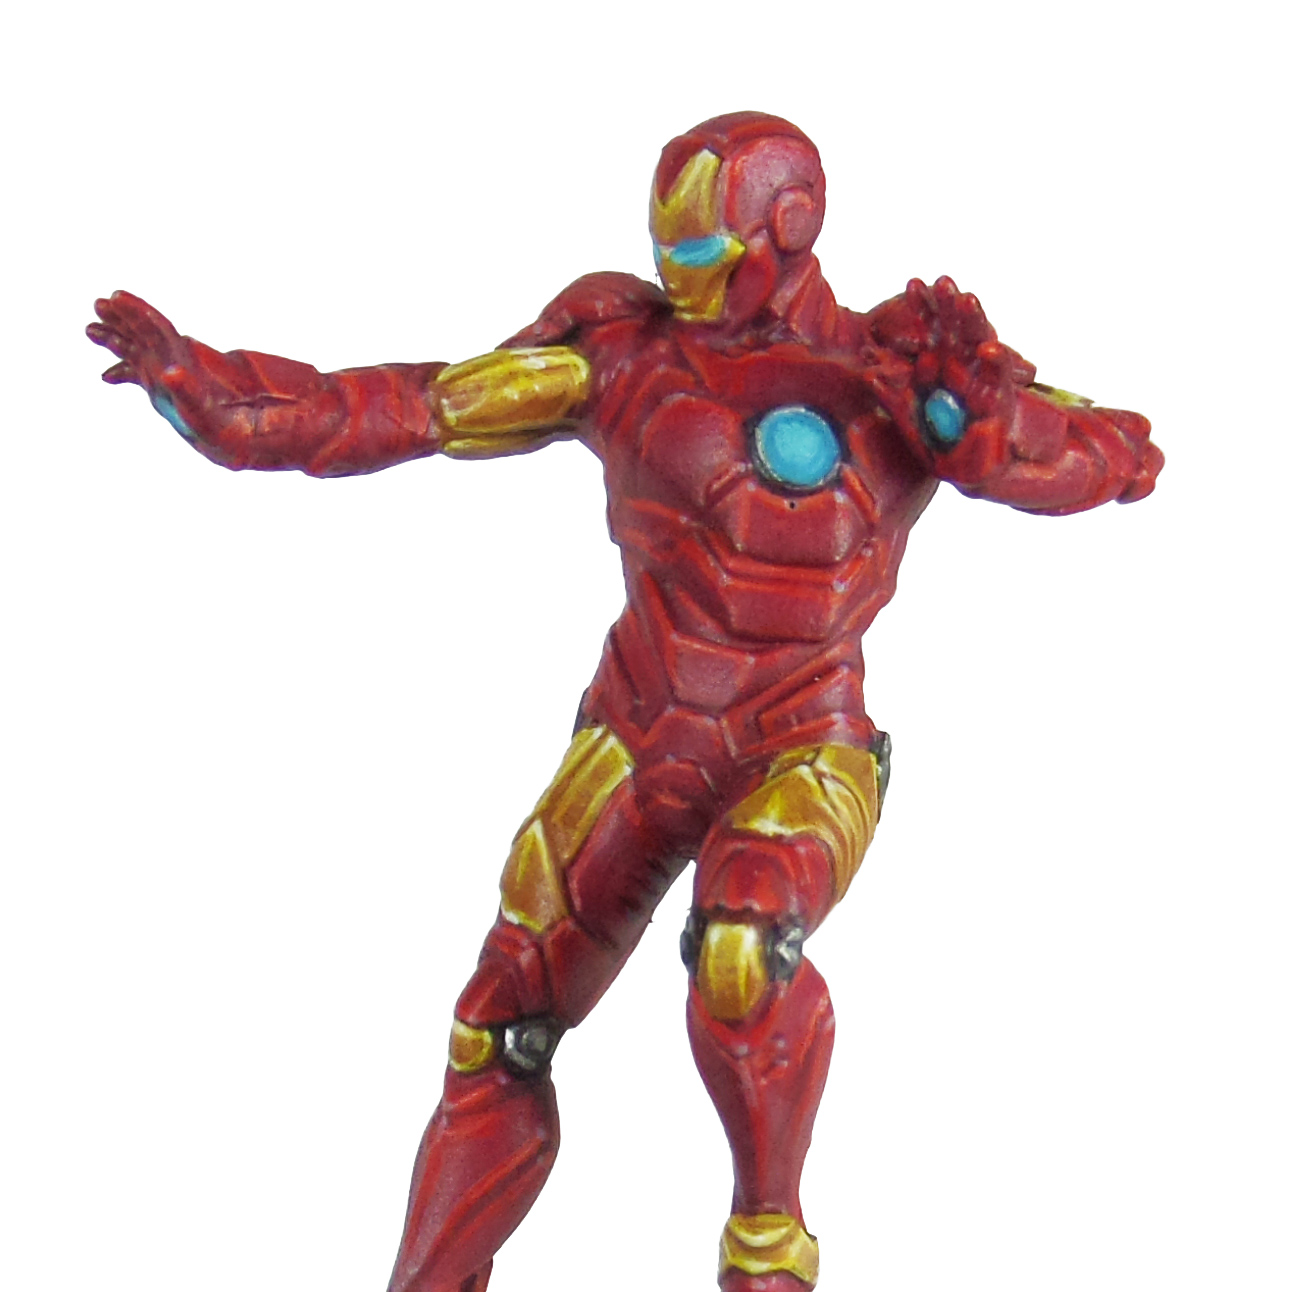
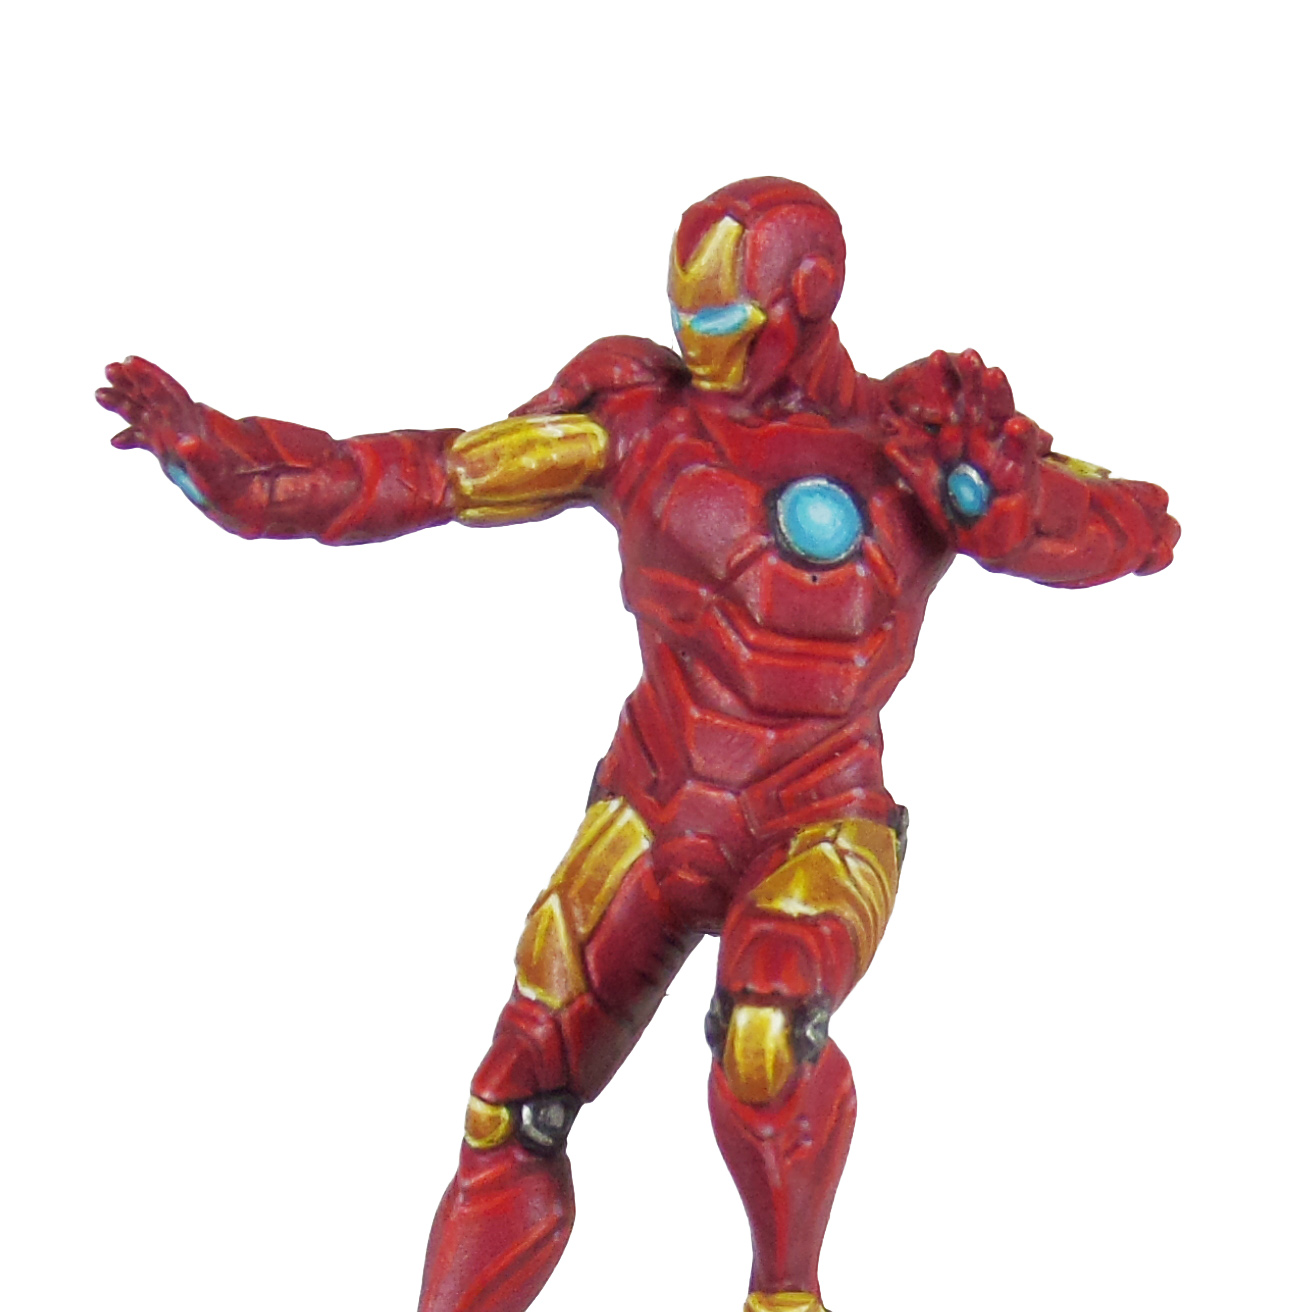
Face & Lights

Stage 1

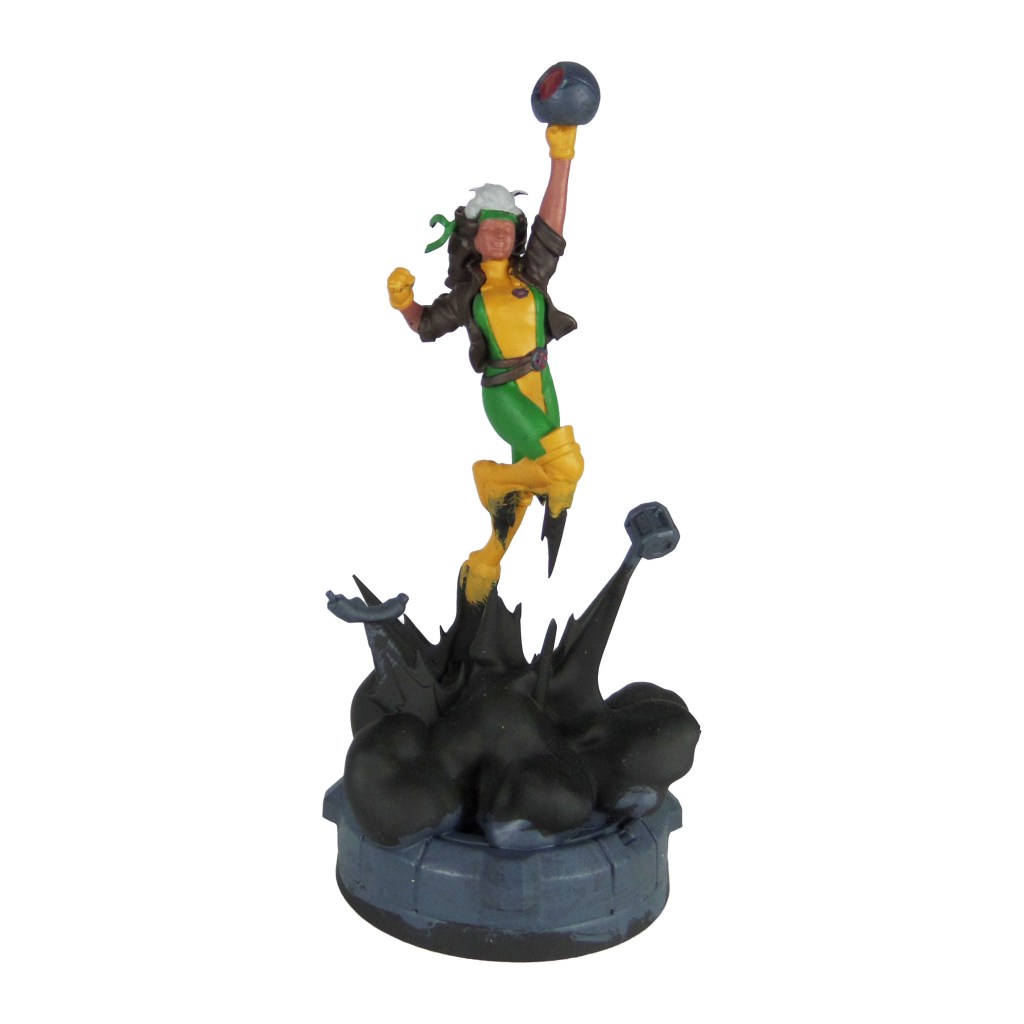
Kislev Flesh: Apply a basecoat to the face.

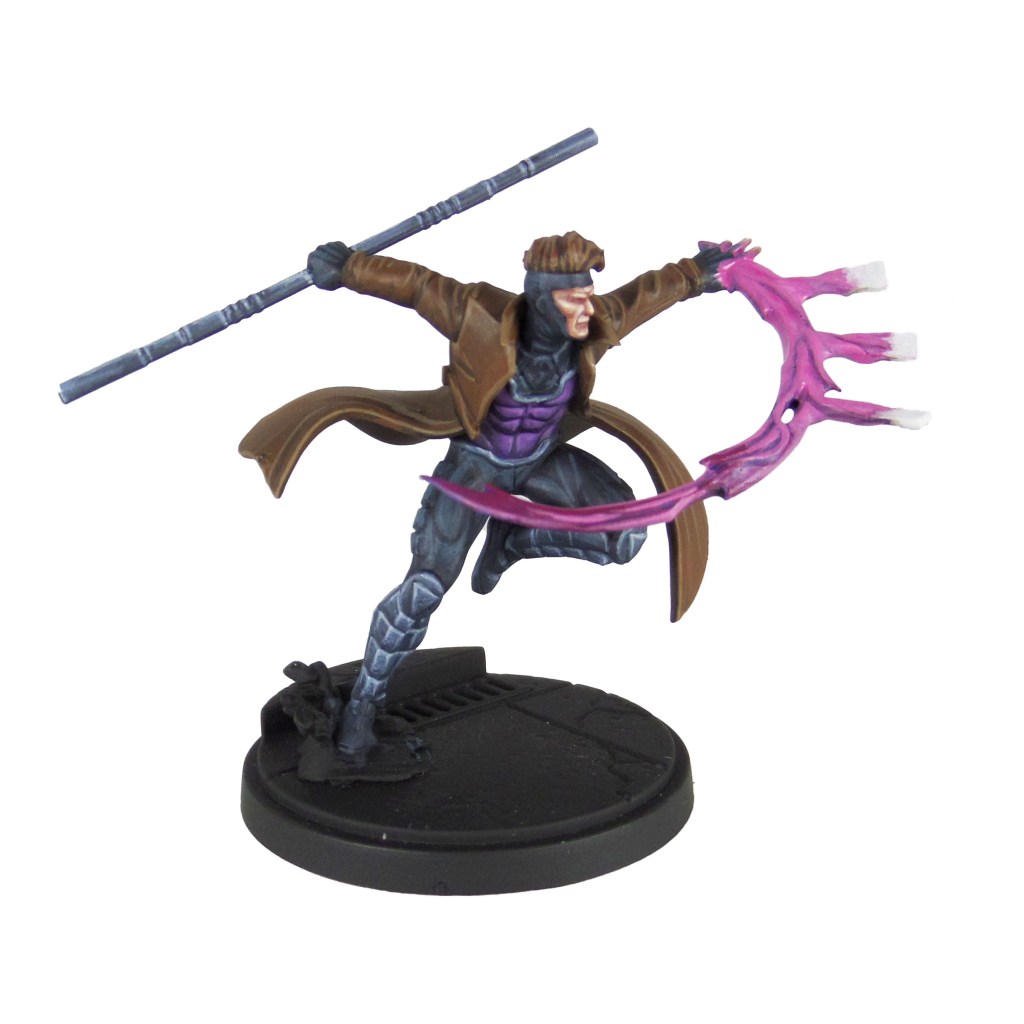
Fire Dragon Bright: Apply a basecoat to the chest and palm lights.

Khorne Red: Apply a basecoat to the eyes.

Stage 2

Flayed One Flesh: Apply a layer to the face.

Mephiston Red: Apply a layer to the eyes.

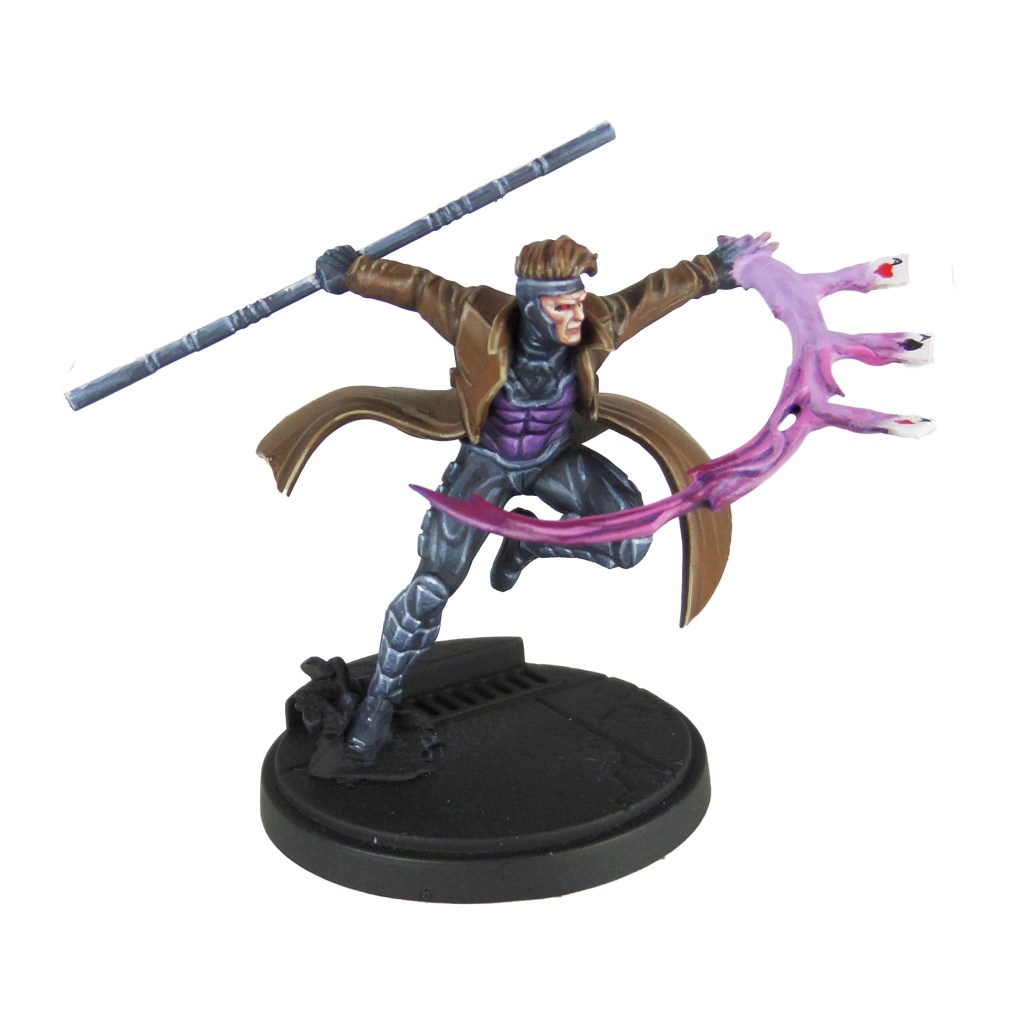
Yriel Yellow: Apply a layer to the middle of the lights.
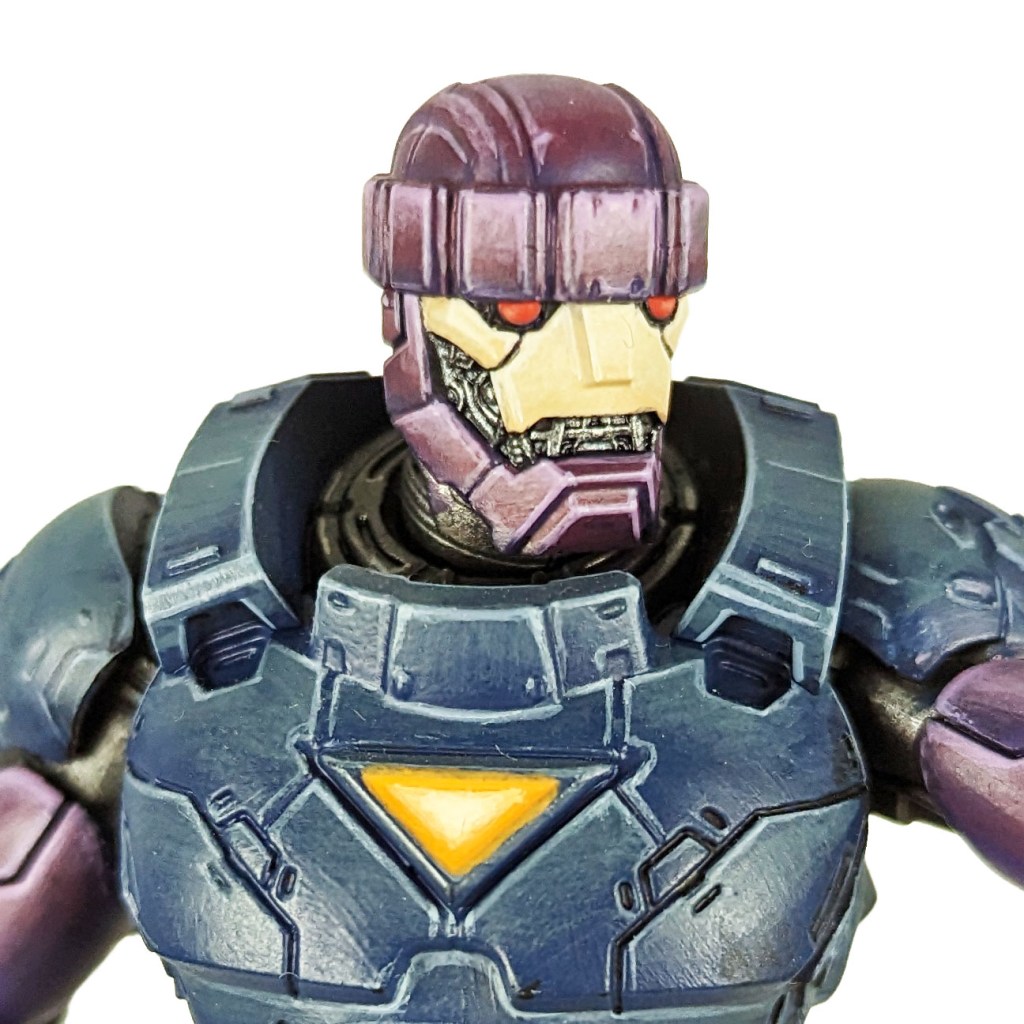
Stage 3

Pallid Wych Flesh: Apply a line highlight to the face.

Evil Sunz Scarlet: Apply a layer to the eyes.

Dorn Yellow: Apply a thinned layer to the centre of the lights.
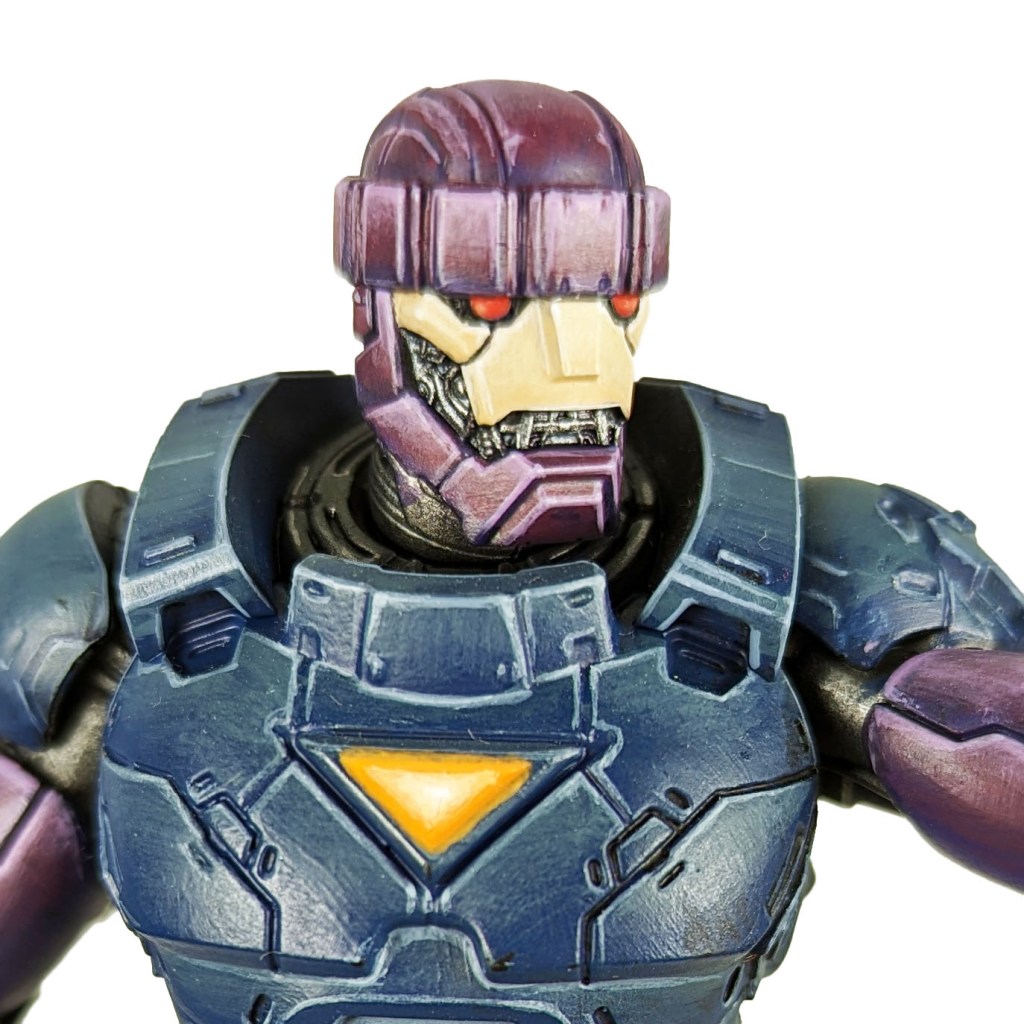
Stage 4

White Scar: Apply a spot highlight to the face and lights.

Wild Rider Red: Apply a spot highlight to the eyes.
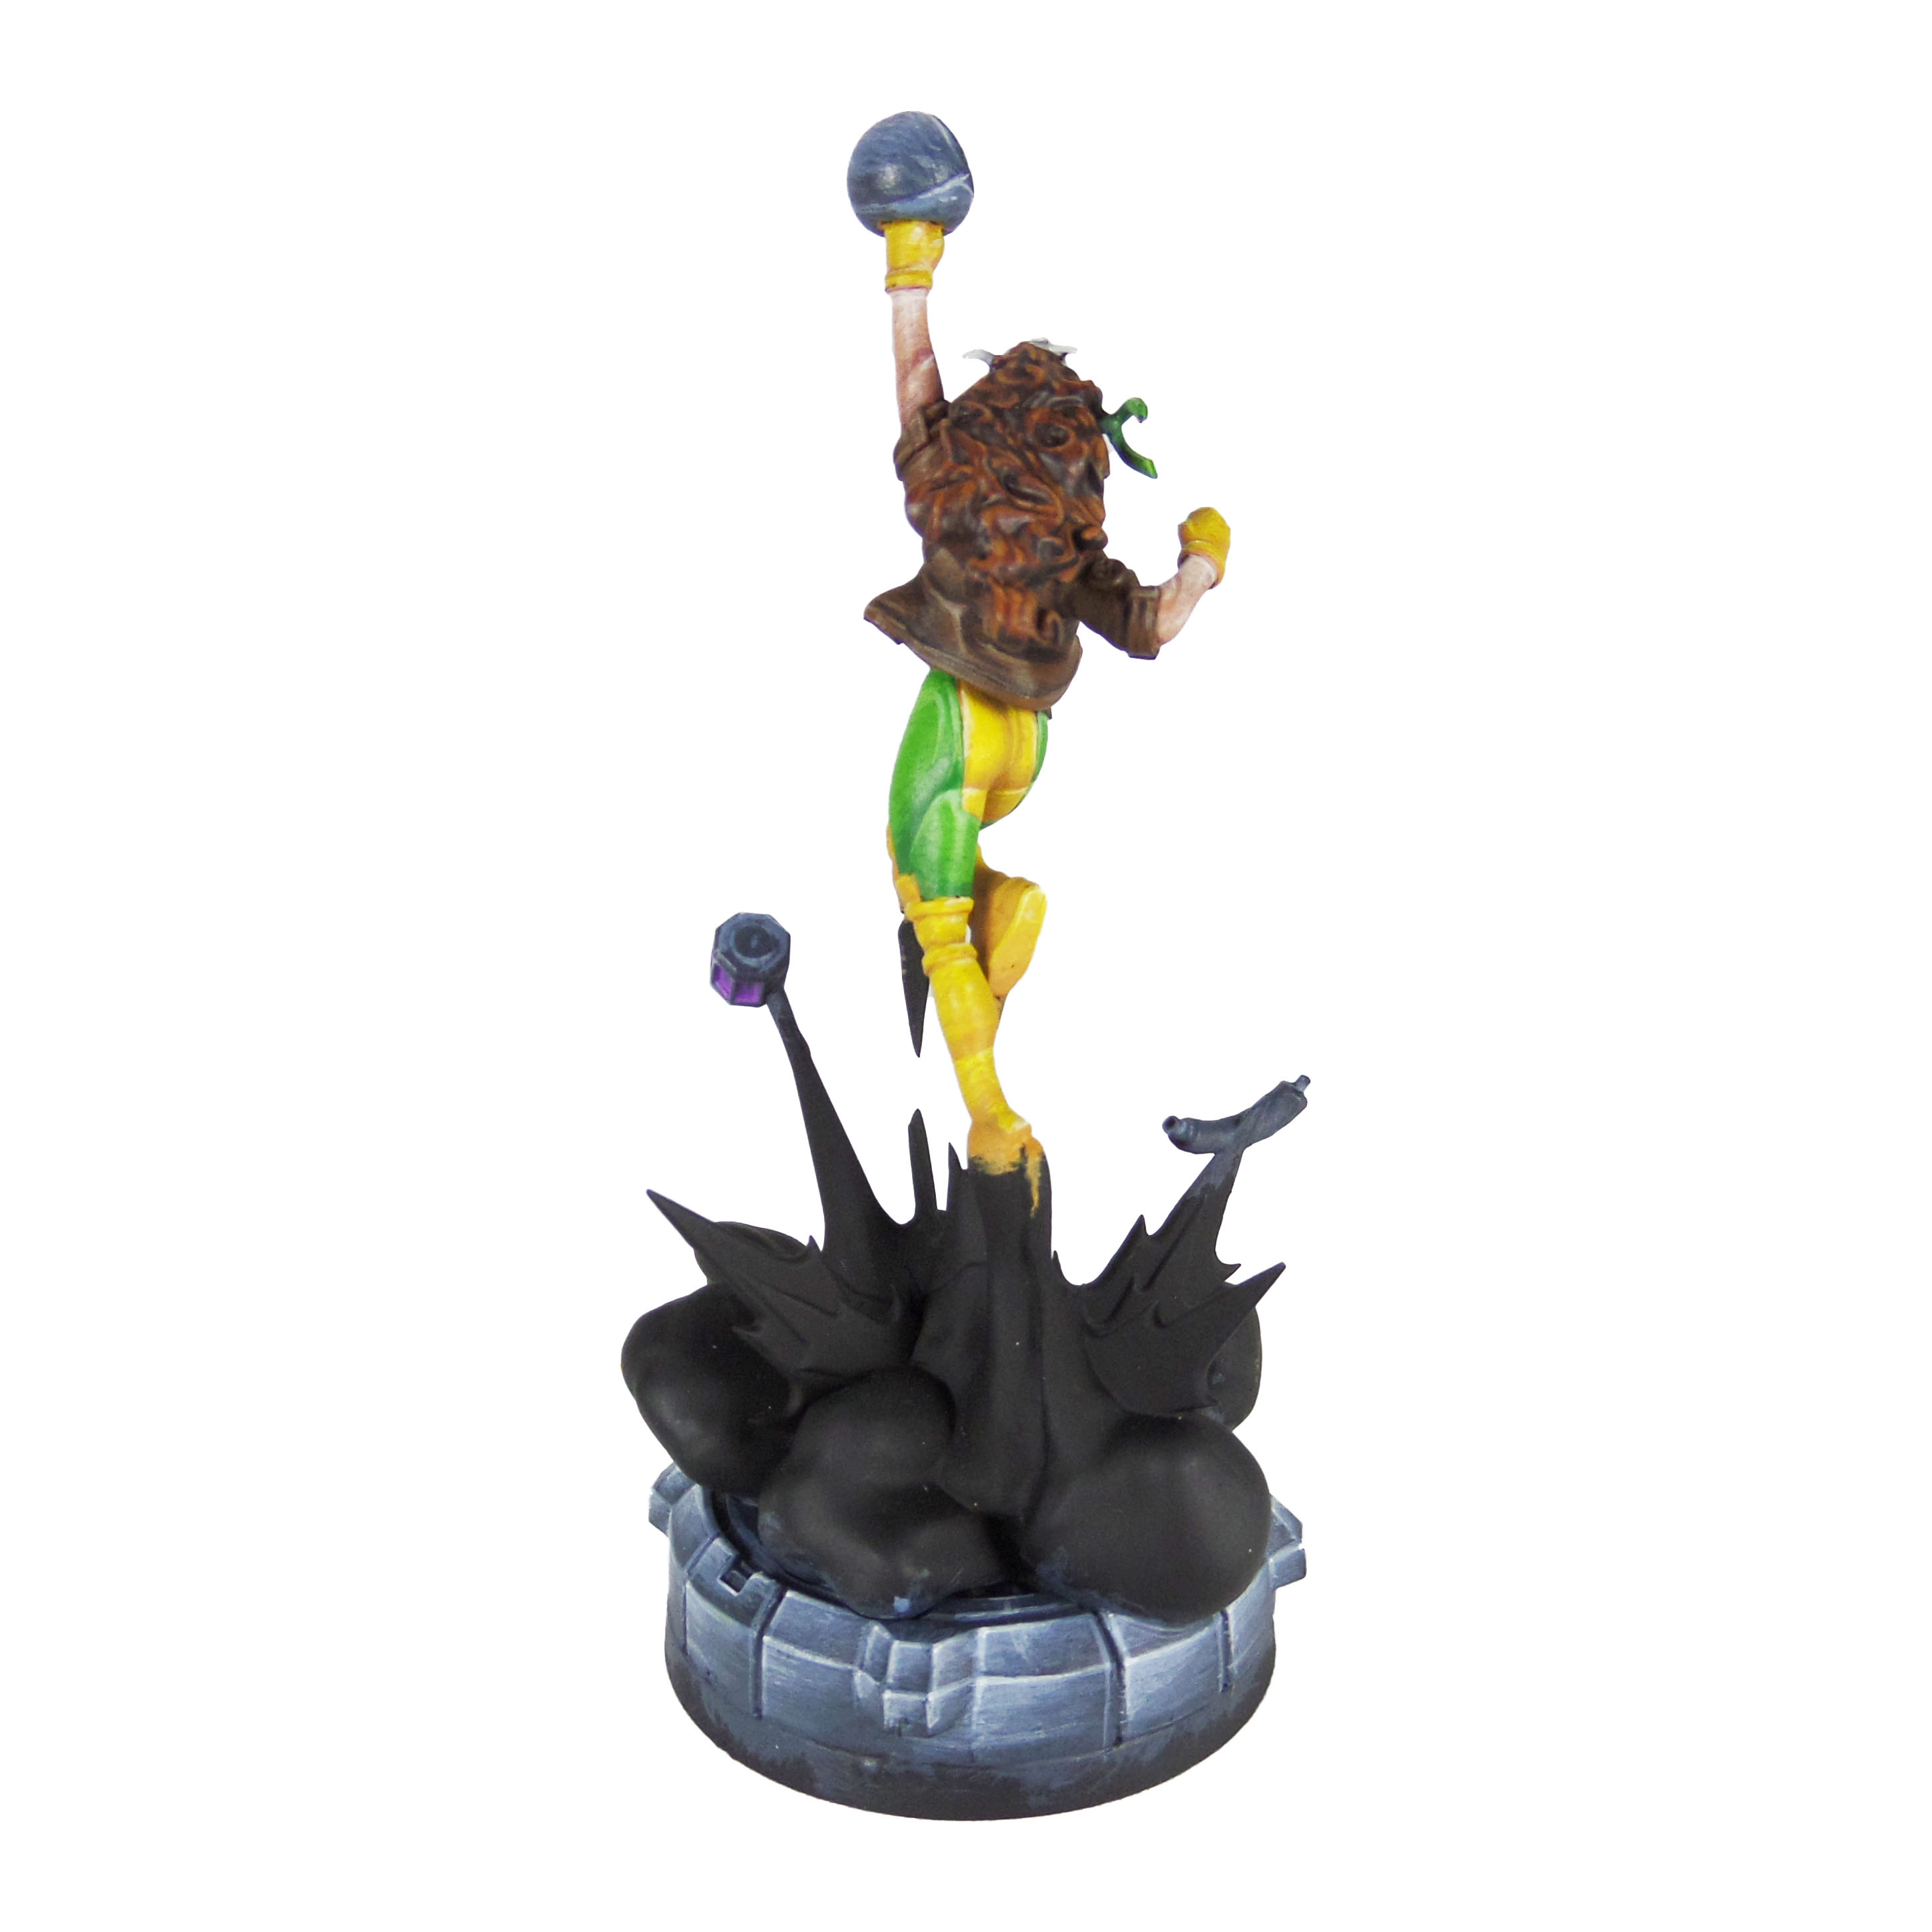
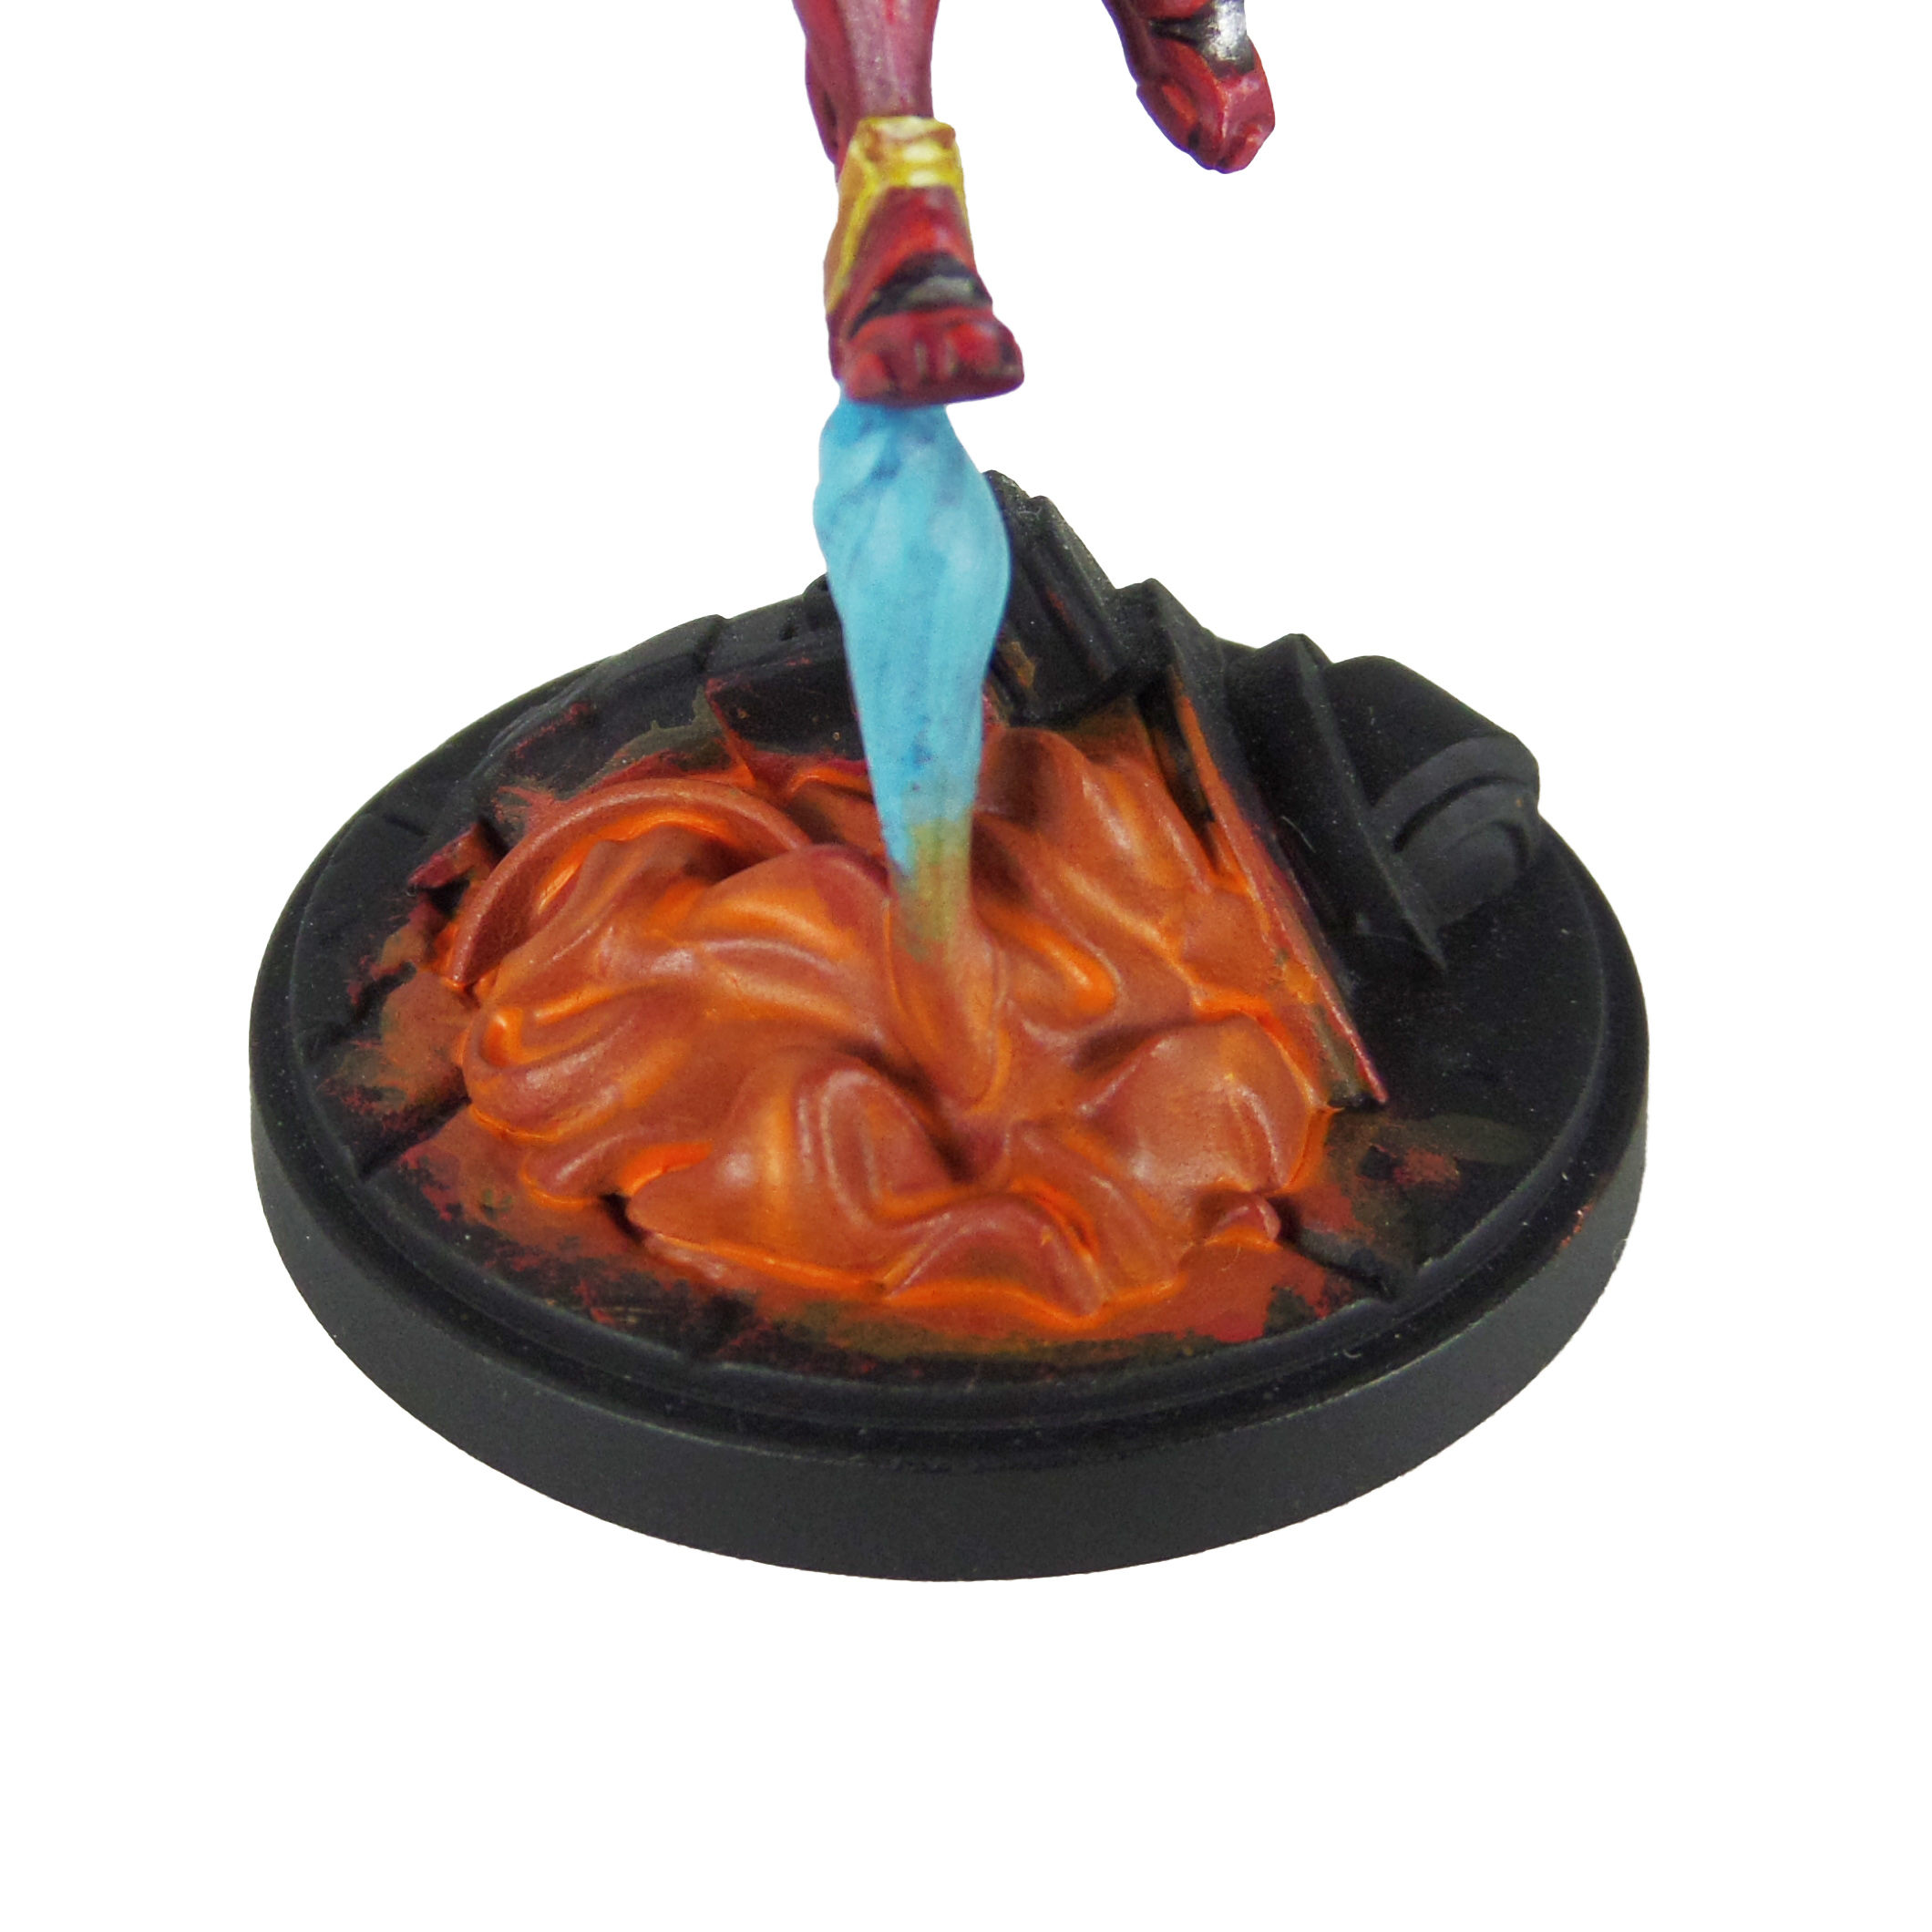
Bases

Stage 1

Dawnstone: Apply a basecoat.

Stage 2

Mournfang Brown: Make a mix with around 5 parts water and apply a glaze over the rubble patches.

Stage 3

Celestra Grey: Apply a drybrush.
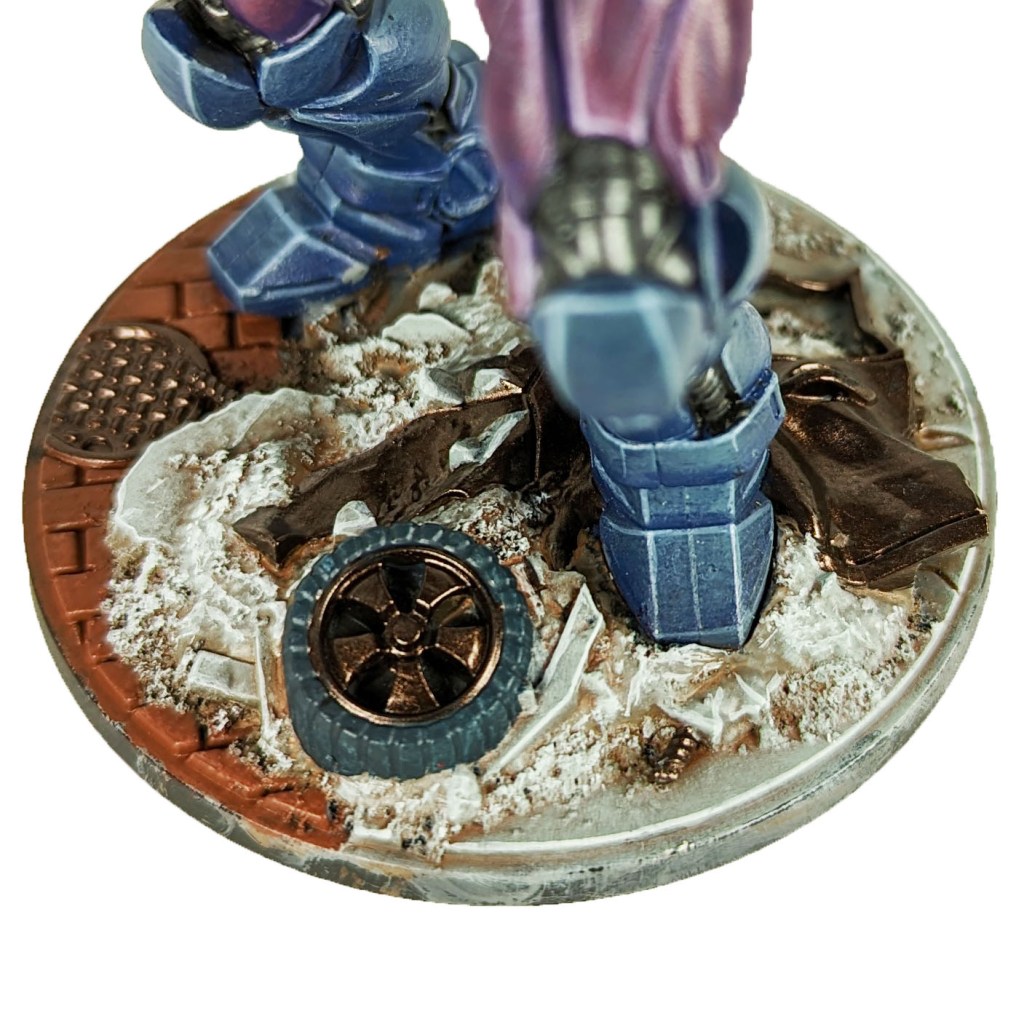
Stage 4

Ulthuan Grey: Apply a line highlight to the rubble and concrete.

Doombull Brown: Apply a basecoat to the bricks.

Warplock Bronze: Apply a basecoat to the car body and hubcap.

Incubi Darkness: Apply a basecoat to the tyre.

Stage 5

Agrax Earthshade: Apply a shade to the bricks.

Leadbelcher: Apply a layer to the car body and hubcap.

Thunderhawk Blue: Apply a layer to the tyre.
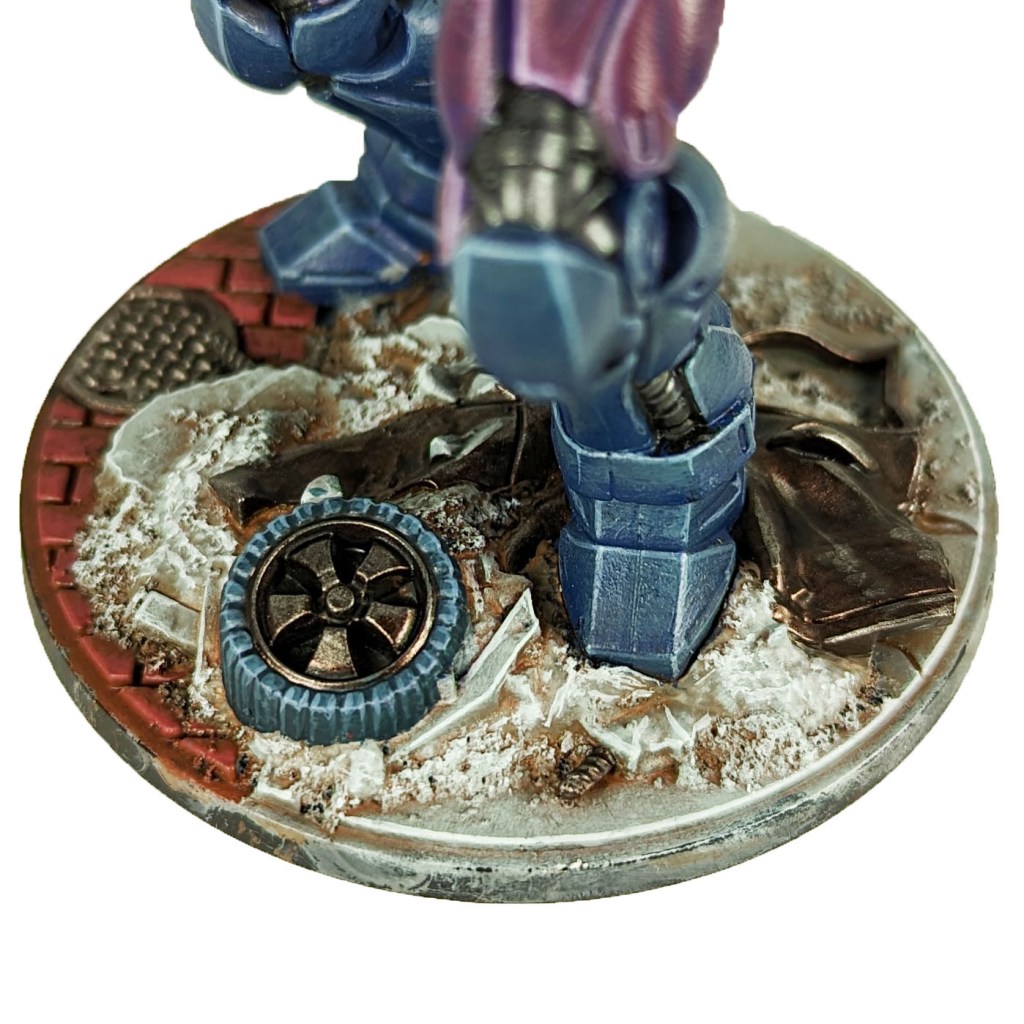
Stage 6

Wazdakka Red: Apply a thinned layer to the bricks.

Agrax Earthshade: Apply a shade to the metals.

Russ Grey: Apply a line highlight to the tyre.
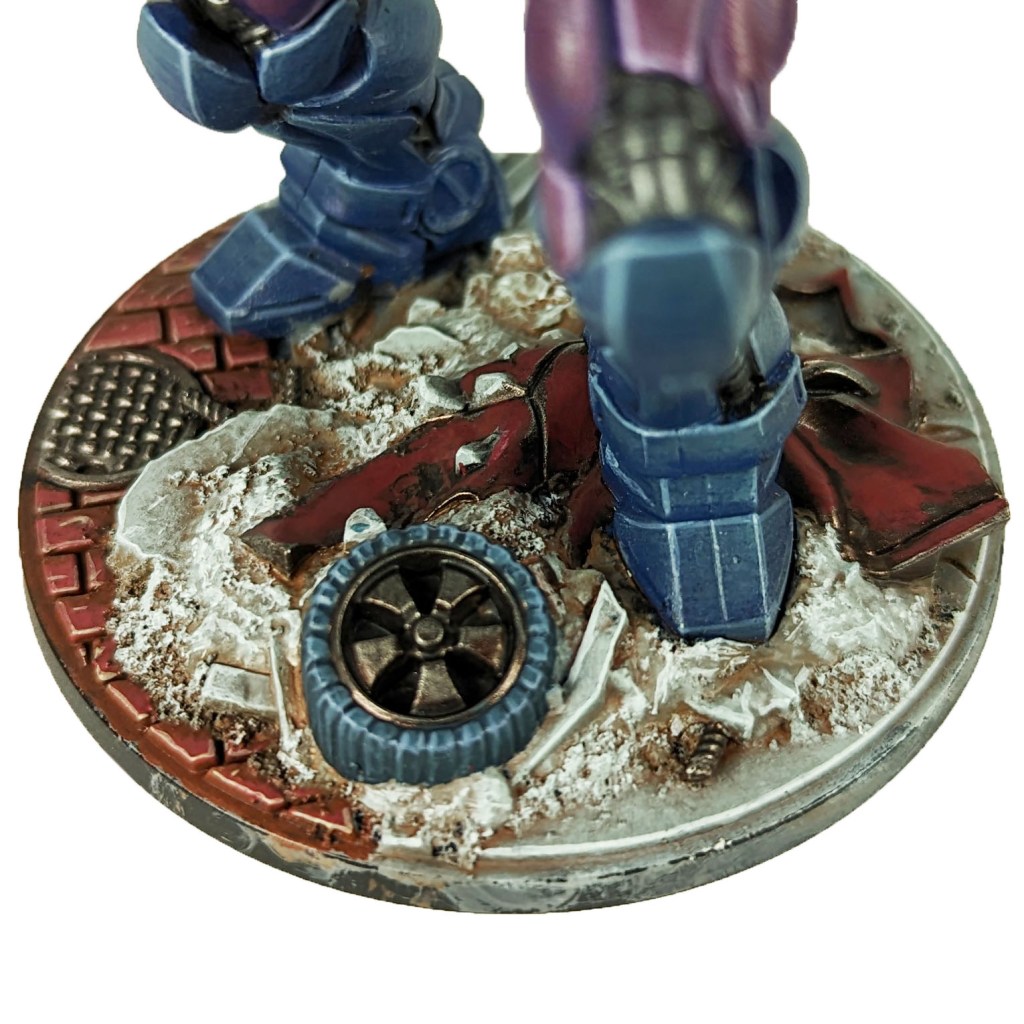
Stage 7

Karak Stone: Apply a line highlight to the bricks.

Fenrisian Grey: Apply a spot highlight to the tyres.

Wazdakka Red: Apply a thinned layer to the car body, missing areas around the edges and crumples.

MCP – Colossus & Magik Painting Guide

Welcome to my latest painting guide! The Rasputin’s hit the painting table and bolster my X-Men. Like the previous guide I’ve tried an NMM approach for these two, particularly Colossus. Whilst I would have liked him to end up a bit lighter, I’m still pleased with the result.


I need your support. Because my guides takes time and supplies to do, any support you can offer would mean the world to me. A supportive message in the comments is enough, but if you have the means why not send me a gift on Ko-Fi or PayPal. Thank you!


Prep: Fully build both models. Undercoat black.

Colossus

Stage 1

Word Bearer’s Red: Apply a basecoat to the bodysuit.

Deathclaw Brown: Apply a basecoat to the centre stripe of the bodysuit and belt lining.

Phoenician Purple: Apply a basecoat to the sentinel head.

Kantor Blue: Apply a basecoat to the sentinel arm.

Incubi Darkness: Apply a basecoat to the hair.

Dark Reaper: Apply a line highlight or all of the hard edges of the metal skin. Also apply a thinned layer down the centre/top of each segment.

Stage 2

Mephiston Red: Apply a thinned layer to the bodysuit.

Tau Light Ochre: Apply a thinned layer to the stripe of the bodysuit and belt lining.

Screamer Pink: Apply a thinned layer to the dentinal head.

Macragge Blue: Apply a thinned layer to the sentinel arm.

Dark Reaper: Apply a thinned layer to the hair.

Dawnstone: Apply a line highlight to the hard edges and a thinned layer down the centre/top of each segment.

Stage 3

Evil Sunz Scarlet: Apply a line highlight to the bodysuit.

Yriel Yellow: Apply a line highlight to the stripe of the bodysuit and belt lining.

Kakophoni Purple: Apply a line highlight of the sentinel head.

Russ Grey: Apply a line highlight and a thinned layer to the sentinel arm.

Dawnstone: Apply a line highlight to the hair.

Celestra Grey: Apply a line highlight to the hard edges and a thinned layer down the centre/top of each segment.

Stage 4

Wild Rider Red: Apply a spot highlight to the bodysuit.

Phalanx Yellow: Apply a spot highlight of he stripe of the bodysuit and belt lining.

Slaanesh Grey: Apply a spot highlight to the sentinel head.

Fenrisin Grey: Apply a line highlight to the sentinel arm.

Celestra Grey: Apply a spot highlight to the hair.

Ulthuan Grey: Apply a spot highlight to the skin.

Finish by painting the base with the Base Painting guide.

Magik

Stage 1

Incubi Darkness: Apply a basecoat to the cloths and sword hilt.

Kantor Blue: Apply a basecoat to the magic and sword blade.

Bugman’s Glow: Apply a basecoat to the skin.

Zandri Dust: Apply a basecoat to the hair.

Dark Reaper: Apply a thinned layer and line highlight to the armour.

Stage 2

Dark Reaper: Apply a layer to the cloths and sword hilt.

Caledor Sky: Use thinned layers to build up the glow off the magic, working out from the centre.

Cadian Fleshtone: Apply a layer to the skin.

Agrax Earthshade: Apply a shade to the hair.

Dawnstone: Apply a thinned layer and a line highlight to the armour.

Stage 3

Thunderhawk Blue: Apply a line highlight to the cloths and sword hilt.

Temple Guard Blue: Apply a thinned layer to the magic, again building from the centre.

Basic Skin Tone 70.815: Apply a thinned layer to the skin.

Blonde Hair 09257: Apply a layer to the hair.

Celestra Grey: Apply a line highlight to the armour.

Stage 4

Russ Grey: Apply a spot highlight to the clothes and hilt.

Baharroth Blue: Apply a spot highlight to the magic.

Light Flesh 70.928: Apply a spot highlight to the skin.

Blonde Highlight 09258: Apply a spot highlight to the hair.

Ulthuan Grey: Apply a spot highlight to the armour.

Finish by painting the base with the Base Painting guide.

MCP – Gambit & Rogue Painting Guide

Welcome to my latest painting guide! Two of my all-time favourite X-Men hit the painting table.


I need your support. Because my guides takes time and supplies to do, any support you can offer would mean the world to me. A supportive message in the comments is enough, but if you have the means why not send me a gift on Ko-Fi or PayPal. Thank you!


Prep: Fully build both models. Undercoat black.

Before you begin…

For this guide I’ve switched over to a non metallic metal(NMM) technique. The paints used are within the guide, but take a look at the thinned layers mini-guide for a better understanding.

Gambit

Stage 1

Incubi Darkness: Apply a basecoat to the bodysuit and gloves.

Thondia Brown: Apply a basecoat to the jacket and hair.

Phoenician Purple: Apply a basecoat to the chest and kinetic charge.

Karak Stone: Apply a basecoat to the cards.

Bugman’s Glow: Apply a basecoat to the skin.

Dark Reaper: Apply a basecoat to the boots, lining and staff.

Stage 2

Thunderhawk Blue: Apply a layer to the bodysuit and gloves.

Mournfang Brown: Apply a layer to the jacket.

Doombull Brown: Apply a layer to the hair.

Genestealer Purple: Apply a thinned layer to the chest.

Screamer Pink: Apply a layer to the kinetic charge.

Pallid Wych Flesh: Apply a layer to the cards.

Russ Grey: Apply a line highlight and a thinned layer to the boots, suit lining and staff.

Cadian Fleshtone: Apply a layer to the skin.

Stage 3

Russ Grey: Apply a line highlight to the bodysuit and gloves.

Steel Legion Drab: Apply a thinned layer to the jacket and hair.

Kakophoni Purple: Apply a line highlight to the chest.

Emperor’s Children: Apply a thinned layer to the kinetic charge.

White Scar: Apply a thinned layer to the cards.

Blue Horror: Apply a line highlight and thinned layer to the boots, suit lining and staff.

Basic Skin Tone 70.815: Apply a thinned layer to the skin.

Stage 4

Fenrisian Grey: Apply a spot highlight to the bodysuit and gloves.

Karak Stone: Apply a spot highlight to the jacket and hair.

Fulgrim Pink: Apply a aspot highlight to the kinetic charge.

Abaddon Black/Mephiston Red: carefully apply the symbols to the cards.

White Scar: Apply a spot highlight to the boots, suit lining and staff.

Light Flesh 70.928: Apply a spot highlight to the skin.

Finish by painting the base with the Base Painting guide.

Rogue

Stage 1

Tau Light Ochre: Apply a basecoat to the centre of the bodysuit, boots and gloves.

Warpstone Glow: Apply a basecoat to the sides and legs of the bodysuit.

Rhinox Hide: Apply a basecoat to the jacket and hair.

Celestra Grey: Apply a basecoat to the front patch of hair.

Dark Reaper: Apply a basecoat to the core, base edge and debris.

Khorne Red: Apply a basecoat to the core lens, and inside the x symbols.

Bugman’s Glow: Apply a basecoat to the skin.

Stage 2

Averland Sunset: Apply a layer to the bodysuit, boots, and gloves.

Moot Green: Apply a layer to the sides and legs of the bodysuit.

Doombull Brown: Apply a layer to the hair.

Mournfang Brown: Apply a layer to the jacket.

Ulthuan Grey: Apply a layer to the front patch of hair.

Russ Grey: Apply a line highlight and a thinned layer to the core, base edge and debris.

Mephiston Red: Apply a layer to the core lens and inside of the x symbols.

Cadian Fleshtone: Apply a layer to the skin.

Stage 3

Flash Gitz Yellow: Apply a line highlight to the bodysuit, boots and gloves.

Skarsnik Green: Apply a line highlight to the sides and legs of the bodysuit.

Skrag Brown: Apply a line highlight to the hair.

Steel Legion Drab: Apply a line highlight to the jacket.

White Scar: Apply a layer to the front patch of hair.

Blue Horror: Apply a line highlight and thinned layer to the core, base edge and debris.

Evil Sunz Scarlet: Apply a spot highlight to the core lens and  inside of the x symbols.

Basic Skin Tone 70.815: Apply a thinned layer to the skin.

Stage 4

Dorn Yellow: Apply a spot highlight to the bodysuit, boots and gloves.

Gauss Blaster Green: Apply a spot highlight to the sides osides and legs of the bodysuit.

Deathclaw Brown: Apply a spot highlight to the hair.

Karak Stone: Apply a spot highlight to the jacket.

White Scar: Apply a spot highlight to the core, base edges and debris.

Light Flesh 70.928: Apply a spot highlight to the skin.

Finish by painting the explosion with the Explosion painting guide.

Update – Getting Back in the Saddle

Hello everyone! It’s good to be back and posting an update…finally. I want to start by saying thank you to everyone for your views, comments and donations. They are a superb and welcome boost. So a thousand thank yous to everybody.

Why the gap?

My mental health has been suffering for a while and the pandemic made things much worse. Painting offers an almost meditative calm for me, so that has continued for the most part, but when I’m at my worst I struggle with communication and unfortunately that includes online too. I’m sorry if I have not replied to your messages or emails. That’s something I will catch up on in the next few days.

I’m working through my issues and I’m still a long way off but I’m going to start posting a couple of times a week again to hopefully jump start things again.

What have I been painting

I’d been feeling a fair amount of burnout with MCP and as a result ended up jumping in the deep end with Star Wars Legion instead. Over the last few months I’ve managed to paint up an Empire army and a wee Shadow Collective force(although that was for an article). I’m a Star Wars nerd so I think I had a lot of pent up energy ready for a project like this.

I’ve also still been working on articles for Tabletop Gaming magazine each month, with more on the way. This always gives me an opportunity to tackle a huge variety of different minis.

Your support has always kept MCP and my painting guides at the back of my mind but I wasn’t really feeling the want to paint what I had. It was the announcement of the Sentinels that brought my attention fully back.

This also means I’ll have a few new guides up in the next couple of days…

What’s Next?

Well aside from the guides mentioned above I have a few MCP figures ready and waiting to be painted. More specifically the following…

Juggernaut

Blade & Moon Knight

X-23 & Honey Badger

Spider-Man Vs. Doc. Ock

I’ve no plans on an order I’ll be doing these as yet, you’ll have to wait and see what takes my fancy.

I’d love to hear from all of you, what guides would you like to see next?

MCP – Cassandra Nova & Jean Gray Painting Guide

Welcome to my latest painting guide! Cassandra Nova and Jean Grey bring their psychic potency to my roster.


I need your support. Because my guides takes time and supplies to do, any support you can offer would mean the world to me. A supportive message in the comments is enough, but if you have the means why not send me a gift on Ko-Fi or PayPal. Thank you!


Prep: Fully build both models. Undercoat black.

Cassandra Nova

Stage 1

Thondia Brown: Apply a basecoat to the jacket, boots and belt.

Incubi Darkness: Apply a basecoat to the shirt.

Steel Legion Drab: Apply a basecoat to the trousers.

Warpstone Glow: Apply a basecoat to the psychic powers.

Skrag Brown: Apply a basecoat to the scarf.

Leadbelcher: Apply a basecoat to the buckle and cane.

Bugman’s Glow: Apply a basecoat to the skin.

Stage 2

Mournfang Brown: Apply a layer to the jacket, boots and belt.

Thunderhawk Blue: Apply a layer to the shirt.

Tallarn Sand: Apply a layer to the trousers 

Moot Green: apply a layer to the psychic powers.

Deathclaw Brown: Apply a layer to the scarf.

Nuln Oil: Apply a shade to the buckles and cane.

Cadian Fleshtone: Apply a layer to the skin.

Stage 3

Steel Legion Drab: Apply a line highlight to the jacket, boots and belt.

Russ Grey: Apply a line highlight to the shirt.

Karak Stone: Apply a line highlight to the trousers.

Orruk Flesh: Apply a line highlight to the psychic powers.

Tau Light Ochre: Apply a line highlight to the scarf.

Drakenhof Nightshade: Apply a shade to the buckles and cane.

Basic Skin Tone 70.815: Apply a thinned layer to the skin.

Stage 4

Karak Stone: Apply a spot highlight to the jacket, boots and belt.

Fenrisian Grey: Apply a spot highlight to the shirt.

Ushabti Bone: Apply a spot highlight to the trousers.

Gauss Blaster Green: Apply a spot highlight to the psychic powers.

Averland Sunset: Apply a spot highlight to the scarf.

Canoptek Alloy: Apply a spot highlight to the buckles and cane.

Light Flesh 70.928: Apply a spot highlight to the skin.

Finish by painting the base with the Base Painting guide.

Jean Gray

Stage 1

Tau Light Ochre: Apply a basecoat to the bodysuit.

Night Lord’s Blue: Apply a basecoat to the centre of the bodysuit, gloves, belt and shoulders.

Pink Horror: Apply a basecoat to the psychic powers.

Doombull Brown: Apply a basecoat to the hair.

Bugman’s Glow: Apply a basecoat to the skin.

Stage 2

Averland Sunset: Apply a layer to the bodysuit.

Macragge Blue: apply a layer to the centre strip of the bodysuit and gloves, belt and shoulders.

Emperor’s Children: Apply a thinned layer to the psychic powers.

Skrag Brown: Apply a layer to the hair.

Cadian Fleshtone: Apply a layer to the skin.

Stage 4

Flash Gitz Yellow: Apply a thinned layer to the bodysuit.

Caledor Sky: Apply a line highlight to the centre bodysuit, gloves, belt and shoulders.

Fulgrim Pink: Apply an edge highlight to the psychic powers.

Jokaero Orange: Apply a line highlight to the hair.

Basic Skin Tone 70.815: Apply a thinned layer to the skin.

Stage 3

Dorn Yellow: Apply a line highlight to the bodysuit.

Temple Guard Blue: Apply a line highlight to the centre bodysuit, gloves, belt and shoulders.

White Scar: Apply a spot highlight to the psychic powers.

Blood letter: Apply a thin layer to the hair.

Light Flesh 70.928: Apply a spot highlight to the skin.

Finish by painting the base with the Base Painting guide.

Tabletop Gaming – Unfathomable Painting Guide

My most recent painting guide in Tabletop Gaming magazine covered the creatures of the deep from the board game Unfathomable. You can find the guide in Issue 65 of Tabletop Gaming magazine.

This one felt very similar to the Nemesis guide in that it had a variety of enemies painted in a very similar style, but without any hero models to go alongside them. I also love big gribblies, so the Mother and Father figure were a delight.

I opted for a purple to green tone to lean into the deep sea angle and keep them very similar to the art style of the game, and a red accent to the eyes to increase the sinister aspect.

MCP – Hulkbuster Painting Guide

Welcome to my latest painting guide! Hulkbuster, the largest miniature that I’ve painted for MCP so far.


I need your support. Because my guides takes time and supplies to do, any support you can offer would mean the world to me. A supportive message in the comments is enough, but if you have the means why not send me a gift on Ko-Fi or PayPal. Thank you!


Prep: Fully build both models. Undercoat black.

Red, Gold & Metal

Stage 1

Word Bearers Red: Apply basecoat to the red panels.

Skrag Brown: Apply a basecoat to the golds.

Leadbelcher: Apply a basecoat to the metals.

Stage 2

Wazdakka Red: Apply a thinned layer to the red panels. Start from the top of the panel working down.

Tau Light Ochre: Apply a thinned layer to the golds. Like the last stage work from the top down.

Drakenhof Nightshade: Apply a shade to the metals.

Nuln Oil: Once the previous shade has dried, apply a shade of Nuln Oil.

Stage 3

Evil Sunz Scarlet: Apply a line highlight to the top edges of the red panel. Apply a very light thinned layer to the tops of the panels.

Flash Gitz Yellow: Apply a line highlight to the gold panels.

Ironbreaker: Apply a line highlight to the metals.

Stage 4

Wild Rider Red: Apply a fine line highlight to the top and side edges of the panels.

Dorn Yellow: Apply a line highlight to the top edges of the gold panels.

Stormhost Silver: Apply a spot highlight to the metals.

Stage 5

Slaanesh Grey: Apply a spot highlight to the red panels, focussing on the top corner and ,meeting points.

White Scar: Apply a spot highlight to the gold panels.

Arc Reactors

Stage 1

Temple Guard Blue: Apply a basecoat.

Stage 2

Baharroth Blue: Apply a thinned layer to the centre.

Stage 3

Blue Horror: Apply a thinned layer to the centre, decreasing the size compared to the last stage.

Stage 4

White Scar: Apply a spot highlight to the centre.

Base Repulsor Blasts

Stage 1

Mephiston Red: Apply a basecoat to the clouds.

Temple Guard Blue: Apply a basecoat to the repulsor blasts.

Stage 2

Troll Slayer Orange: Make a mix with around 5 parts water to 1 part paint and apply over the cloud. once dry repeat 2-3 times to help build the colour.

Baharroth Blue: Apply a thinned layer to the repulsor blast, from the bottom up.

Stage 3

Blue Horror: Apply a line highlight following the twists of the repulsor blasts.

Yriel Yellow: Apply a thinned line highlight to the crevasses featering the highest concentration of orange, and apply lines meeting the repulsor blasts.

Skavenblight Dinge: Apply a thinned layer ot the clouds, avoiding the brightest orange areas.

Stage 4

White Scar: Apply a spot highlight to the twists of the repulsor blasts.

Dorn Yellow: Apply a spot highlight to the brightest parts of the cloud.

Abaddon Black: Apply a thinned layer to the darkest areas of the clouds.

Finish by painting the base with the Base Painting guide.

Tabletop Gaming – Moonstone Painting Guide

My most recent painting guide in Tabletop Gaming magazine covered some goblins from the charming Moonstone. Find the guide in Issue 64 of Tabletop Gaming magazine.

This was a fun wee guide where I tried to push my NMM a little. Mostly the same tone of metal but I am really pleased with the results.

It’s something I’m likely to keep going with in the guides and pushing my own skills forward.

MCP – Guardians of the Galaxy Commission

Another batch of Guardians and my 3rd Rocket and Groot!

It makes life a little bit sweeter when they’re to be painted the same as I’ve done before, as that means I have guides…

I really enjoyed every one, again. MCP models are so crisp, characterful and dynamic, they offer a really enjoyable paint no matter if you’ve painted them before.

Take a look at more pictures of this commission below, and if you would like me to paint some of your models get in touch.

MCP- Painting Guides Update

Hello everyone! I wanted to start by saying thank you to everyone who’s using my guides, and a special thanks to those who’ve left me some comments and helped support me. You’re all legends, thank you!

I am still on a mission to get a guide out for as many models as possible, but trying to keep up with the release schedule can be a little daunting, I’m almost up to 100 models in the collection and still more I need to pick up!

It’s been a lot of fun tackling so many characters and even better to be able to revisit a few. I’ve been painting them now since the core set in 2019 and it’s been amazing to see the progress in the sculpt quality. A good example is Spider-Man; the core set model while cool is also fairly basic, compared to the Amazing Spider-Man, who goes full blown cinematic action pose. It’s clear that AMG are pushing themselves and I love it.

I’m slowly working away on more guides and feel like I’m catching up with the backlog. I’ve added Omega Red today and you can find his guide here…

I have a couple of guides close to completion, with the below coming in the next couple of weeks…

Hulkbuster includes a lot more images than I normally do, because I felt he deserved more detail. I am also going to start including more images for different angles, at least the backs to start.

I also have the following packs and likely will be looking at doing them in the following order..

Gambit & Rogue

Colossus & Magik

Doc Ock & Spider-Man (Rivals Panel)

I’m looking to get the guides out a bit more regularly, with at least 1 every fortnight and 1 a week if I can. Look out on Fridays for future guides.

If there’s anything you’d like to see let me know.